Equipment Finder - Simple Equipment Selection
Using the EquipmentFinder is truly one of the great features of IndySoft.
The EquipmentFinder utility is very useful for finding a particular piece of equipment or a set of Equipment. The dialog is divided vertically into two sections: the Selection Method (top of the screen) and the Selected Equipment (bottom). To select equipment, type in the 1st few letters of the equipment I.D. If you want to list all items, press the button to the right of the I.D. If you want to search by all companies, check the All Companies box. If you want to choose all matching equipment, press the blue double-down arrow. To add the currently highlighted piece of equipment to the selected equipment. Section, press the blue single down arrow. To remove one item from the selected equipment section, highlight it and press the blue button. Press the blue double arrow up button to remove all equipment from the Selected Equip. section.
For this tutorial topic, we will look at the Simple Equipment Selection. For information on the SQL Based Selection, see the IndySoft User Manual.
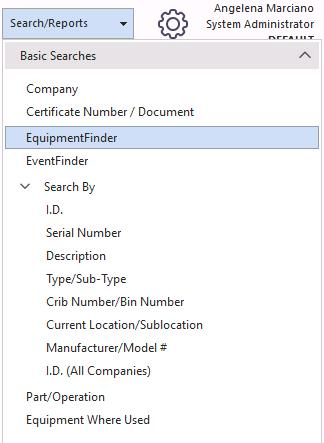
To launch the EquipmentFinder, select "Search-By" on the main screen menu. You will see the EquipmentFinder feature at the bottom of the drop-down menu.
The Simple Equipment Selection allows the user to see all the equipment for a particular Company or Customer. Every gage in the system is available by checking the "All Companies" box.
Select the Company list you wish to view from the Company drop-down. Then click the "List All" icon to display all the equipment for that Company.
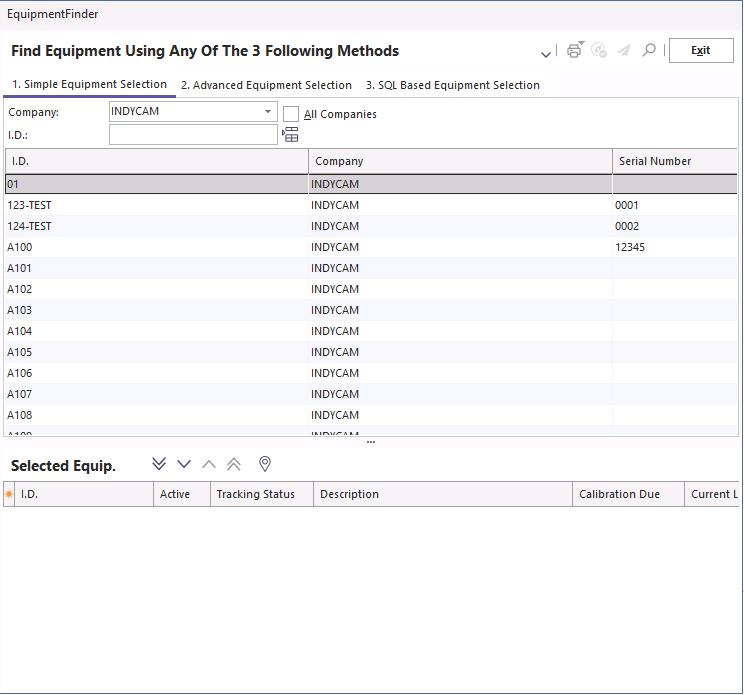
You can scroll through the list, and each time you see a gage you want to add to the list, select it and then double-click it. The gage will be sent to the Selected Equipment grid at the bottom of the screen. See below.
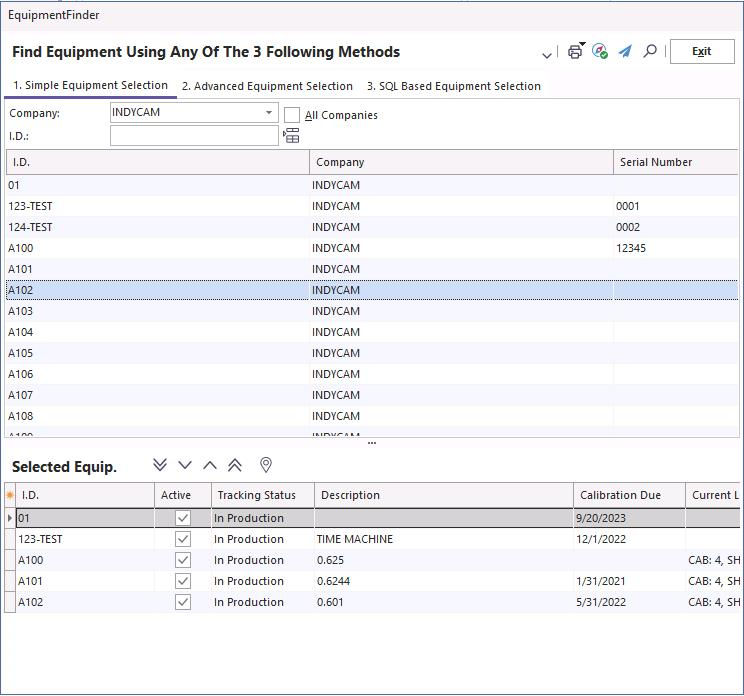
Once you have made your choices, you can use the icons at the top right of the screen to process the information.
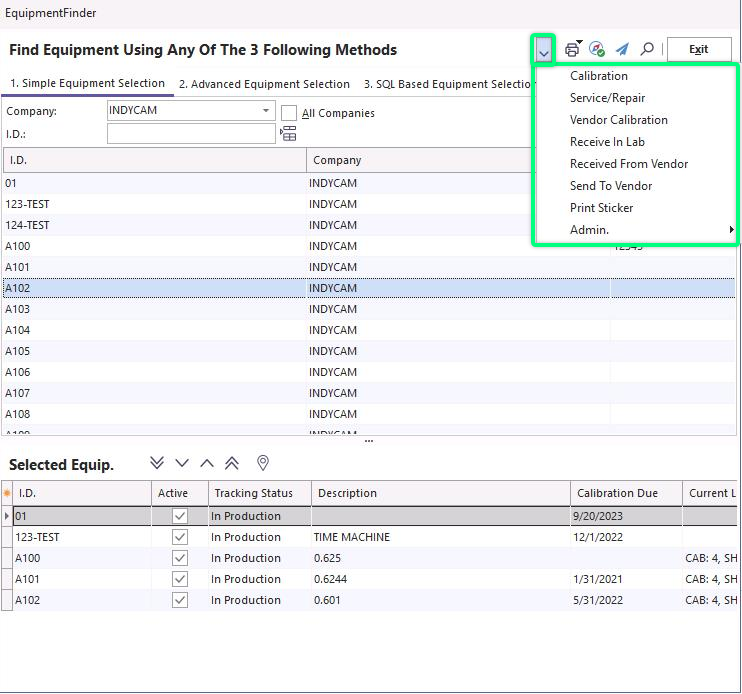
The black arrow icon
![]() opens the events drop-down. You can perform any of these events for one or all equipment from the EquipmentFinder.
opens the events drop-down. You can perform any of these events for one or all equipment from the EquipmentFinder.
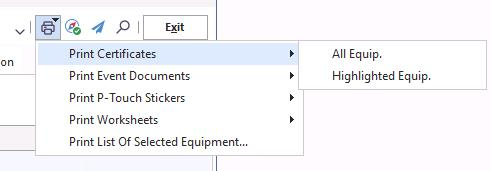
The Print icon
![]() allows the user to select and print documents from the equipment selected in the equipment grid. For example, if you wanted to print all the Worksheets for the equipment, you would have to select the "Print All Equipment" feature or choose one highlighted gage and print that one.
allows the user to select and print documents from the equipment selected in the equipment grid. For example, if you wanted to print all the Worksheets for the equipment, you would have to select the "Print All Equipment" feature or choose one highlighted gage and print that one.
Send selected equipment to the navigator using this icon: ![]()
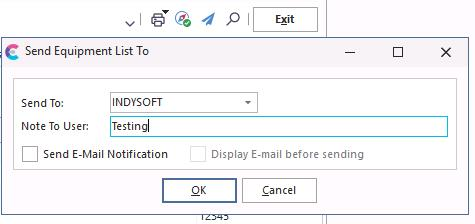
If you wish to send the gage information in the grid to another user, click the "Send to Another User" icon ![]() . When you open the dialog box, you will be prompted to choose a user name to send the gage information to and write a short note if you like. The gage information will be sent to an IndySoft user within your company. You can also send them an e-mail if you wish that will go directly to their inbox. The "Send to User" function is more like an instant message pop-up that will be displayed on the user screen.
. When you open the dialog box, you will be prompted to choose a user name to send the gage information to and write a short note if you like. The gage information will be sent to an IndySoft user within your company. You can also send them an e-mail if you wish that will go directly to their inbox. The "Send to User" function is more like an instant message pop-up that will be displayed on the user screen.
The last icon we will look at is the "View Item" icon ![]() . This selection will display the highlighted gage on the main screen and close the EquipmentFinder. |
. This selection will display the highlighted gage on the main screen and close the EquipmentFinder. |