Event Name and IndyGo Settings
Turning an event into an IndyGo event can be done with a simple check-in step 1. Upon clicking the “Use With IndyGo” checkbox, the workflow configuration screen will update and only show the functionality that IndyGo will use. IndyGo events can only be used in an IndyGo context, and certain event settings may be lost, as the message describes when clicking the checkbox. https://videos.indysoft.com/mXuD9KQE You can expect only to see five steps on the left-hand side
Check your desired visibility option if you plan on having the Event show up in the IndyGo Application in mobile (non-kiosk) or kiosk mode. The event name screen is where you can enable the IndyGo event option. If enabled, the user can specify if the Event should be shown when the app is in Kiosk Mode or Non-Kiosk Mode, both or neither. Kiosk Mode and Non-Kiosk mode options can be set at the IndyGo Mobile App workstation level by a System Administrator in the Settings screen. If enabled, the Use in Main Client option allows the event to be run in the main Windows client.
Event Notes can be used as directions in your IndyGo interface. You can expect these directions to show up on the “Events” or event information screen to help guide the user in the application. If no event fields are exposed, then only the Add Equipment screen will appear, and the Event Notes will show there.
Main Client-Only Options
The Layout type informs the main IndySoft Client on how to display events. Tabs (Multi-Step), Vertical, and Horizontal (Both Single Step) options are available.
Show Event Notes, when enabled, will always show the Event Notes specified by the admin in the event in the IndySoft Client. Regardless of this setting, these notes will appear on the event information screen in the mobile application.
Auto Add Current Equip. will add the equipment on the screen to the IndyGo event.
Close Option Default, when checked, will default to close out of the IndyGo event and not offer another quick IndyGo transaction to be selected.
IndyGo Settings
The First/Top selection dictates whether the equipment selection or the event information screen will be in the first position regardless of the layout.
The Equip. Card Setup allows the Administrator, at a system-wide level, to choose which key fields are exposed in the primary card. This card is used in the following contexts.
-
Client-side equipment information when viewing added equipment to the event.
-
Mobile Application “Equipment Details” and “Locate Equipment” screens. (Note: smaller equipment boxes in the “Search” and “Add Equipment” screens do not have customization options and will show the “I.D.” of the asset, company (if configured locally in the app), description, and the due date specified by the Schedule Type in System-Wide settings.
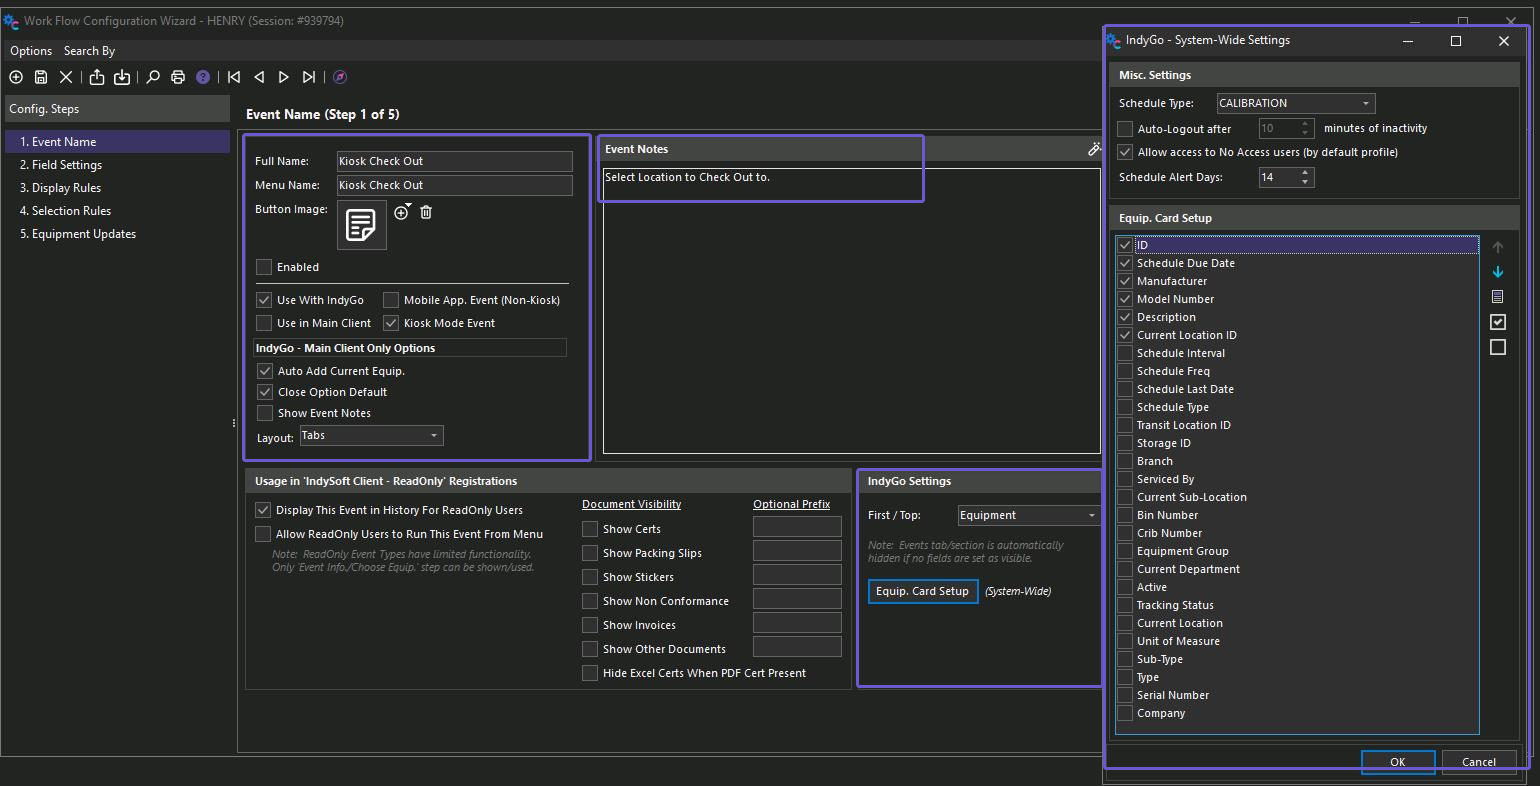
The equipment card fields will be exposed in the order they appear in this interface. The Schedule Type for exposing various schedule fields is specified from the drop-down at the top of the screen. It is recommended to use 4-6 key fields for the Equip. Card Setup.
If users with a base level of “No Access” need to log in to the mobile application, you will need to check the “Allow Access to No Access Users.”By default, if showing a due date in an equipment card, IndyGo will format it if it is due today or past due by making the date red. The additional integer value of Schedule Alert Days allows the user to make the date orange if it is due within that number of days in the future.
The administrator can set the Auto-Logout time in minutes from this screen. The Auto-Logout will only apply to the mobile application when it is not in kiosk mode. (Kiosk mode has a hard-coded shorter time out of 1 Minute.