Building the Taxonomy Tree
Creating Nodes and Structuring Lineage in the IndySoft Taxonomy Manager
Overview
This page guides users through creating and organizing nodes within the Taxonomy Tree using the IndySoft Taxonomy Manager. Building a meaningful and logical hierarchy of nodes ensures assets are accurately classified, and their related fields—such as manufacturer, model number, and capabilities—are correctly populated.
Each node added to the tree represents a distinct classification level and may contain children, depending on its Node Type. Node field behavior and requirements are governed by admin-defined rules, outlined in the Node Type Setupdocumentation.
Creating a New Parent Node
To create a new node:
- Open the Taxonomy Manager
- Use the “Add” button at the top left of the screen
- Enter the required information in the Taxonomy Node dialog, which will open automatically (based on the selected Ndoe Type)
- Click OK to save the node to the tree
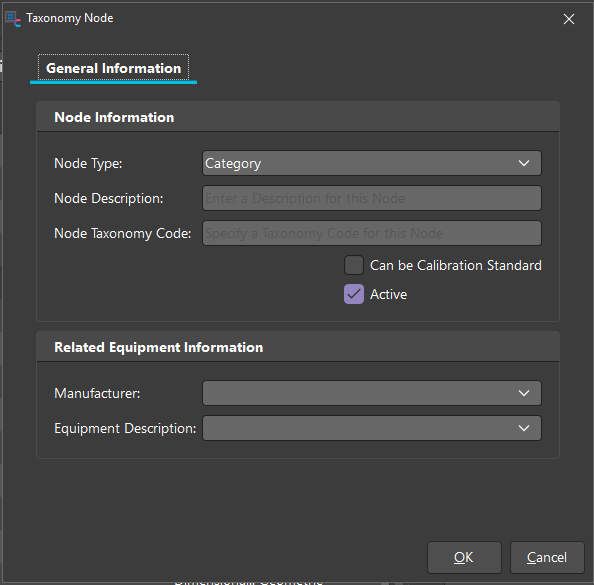
Node Dialog – General Information Tab
Each node includes two key information sections:
1. Node Information
| Field | Description | | Node Type | Controls behavior, required fields, and child compatibility. | | Node Taxonomy Code | Optional identifier (required only if the Node Type demands it). | | Can be Calibration Standard | Flag indicating if this node can represent a calibration standard. | | Active | Indicates whether the node is active and available for use or not. |
2. Related Equipment Information
The fields shown here vary depending on the Node Type selected. These fields are typically asset-related data that will be inherited or populated at the asset level when an asset is associated with this node.
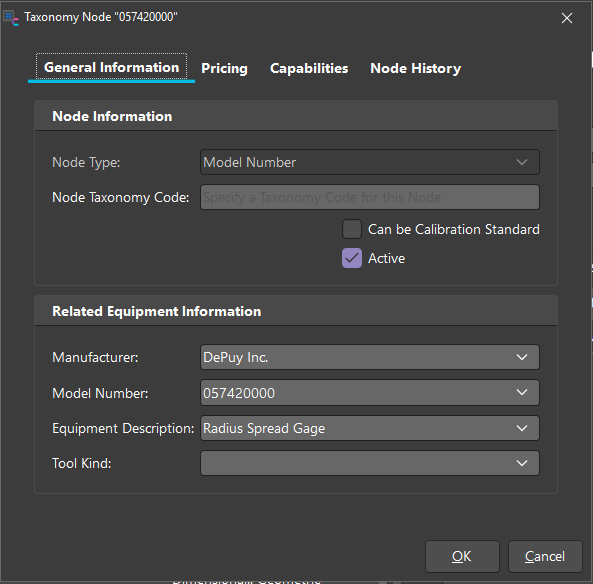
For example:
Node 057420000 Node Type: Model Number
| Field | Value | | Manufacturer | DePuy Inc. | | Model Number | 057420000 | | Equipment Description | Radius Spread Gage | | Tool Kind | GAGE |
Each Node Type defines which of these fields are required and visible. For details on configuring Node Types, see Node Type Setup documentation.
Parent and Child Nodes
The Taxonomy Tree is structured in a parent-child hierarchy, where:
- Parent nodes are broader classifications (e.g., Category, Discipline)
- Child nodes provide increasing specificity (e.g., Sub-Type, Model Number)
⭐ Tip: Use the Taxonomy Group setup to restrict which Node Types are valid parents or children for any given node. Currently, only node types with an Equipment Taxononmy Group can be added to the tre structure (regardless of setup).
Adding a Child Node
- Select a parent node in the tree
- From the top menu, expand the Addsplit button dropdown and select New Child Node (or right-click on the parent in the grid and select "Add New Child Node")
- Complete the required fields in the node creation dialog
- Save the node — your new child will appear under its parent in the hierarchy
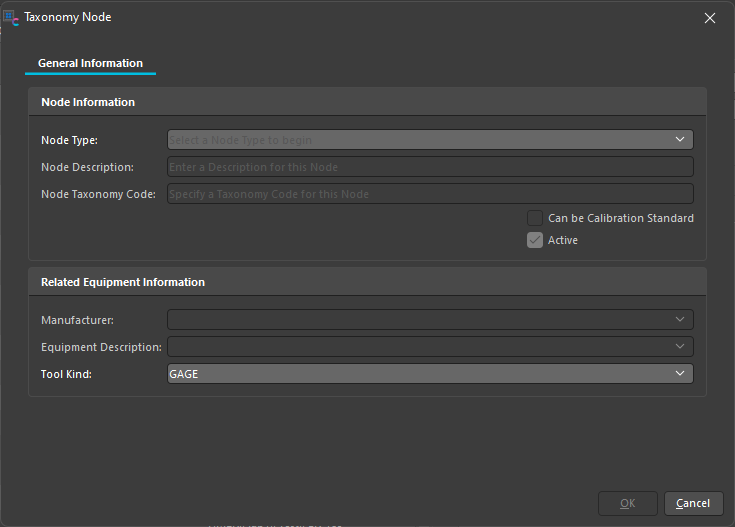
Tooling Enabled - New Field 'Tool Kind' with Auto-Population rules for Equipment Nodes (New Feature - v14.3)
When creating a child node, if all of the following conditions are met:
- The node belongs to the Equipment Taxonomy Group
- The node is flagged with “Can Associate Asset”
- Tooling is enabled in the user's User/Location Settings
Then, the system will require the user to specify a Tool Kind during node creation.
Tool Kind Selection Behavior:
-
The Tool Kind field will auto-default to a valid entry based on the following priority logic:
- A Tool Kind that matches the value
GAGE - If no exact
GAGEmatch exists, then default to the first entry from the Tool Group type ofGAGE - If no Tool Group type of
GAGEexists, then default to the first entry from the Equip Groups list
- A Tool Kind that matches the value
⭐ Tip: If the user does not have tooling enabled or the node does not meet the criteria above, the Tool Kind field should remain hidden
This update ensures better consistency when associating assets that fall under tooling-relevant categories like gages or hand tools. It also reduces setup errors by intelligently defaulting the Tool Kind selection (to GAGE).
Editing and Maintaining Nodes
- To edit a node: Double-click it in the tree or right-click and select "Edit Current Node"
- To disable: Edit the node and uncheck the Active checkbox
- To reassign: Delete and recreate under a new parent (drag-and-drop not currently supported)
Associating Information with a Node
Adding More Information to a Node
Once a node is created, users can specify even further by defining additional details beyond the General tab. To do this:
-
Double-click the node in the tree to open its configuration dialog
-
Navigate through the additional tabs at the top:
- Pricing
- Capabilities
- Node History
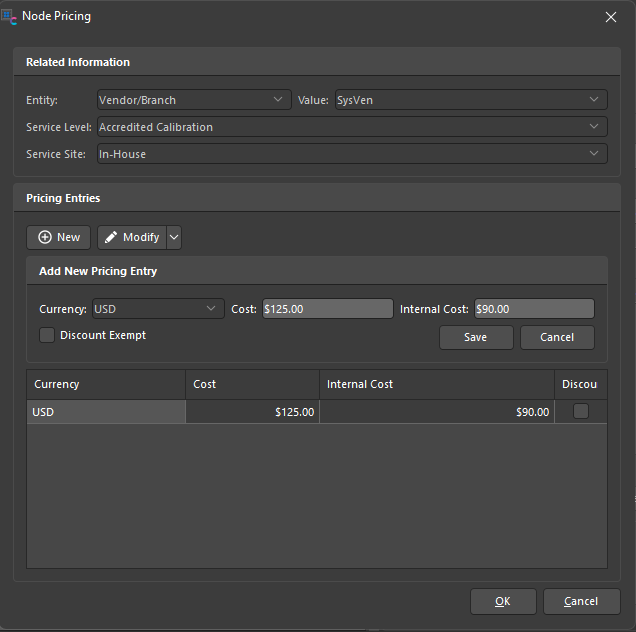
Pricing Tab
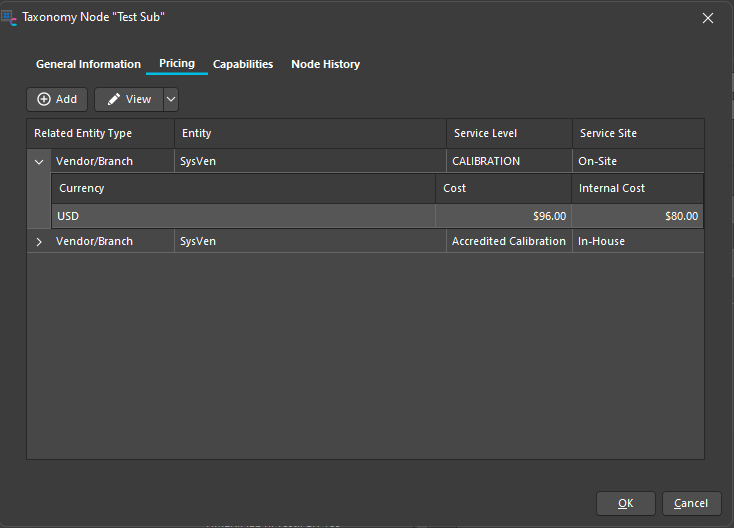
This tab allows you to manage cost and internal cost values related to the node, based on the entity type.
- Entity Types: Vendor/Branch or Corporate
- Currency: The applicable currency (e.g., Dollar)
- Cost: Billable rate for the service/equipment
- Internal Cost: Internal-only reference pricing
Use the “Add” button to include new entity-based pricing information.
Please see the Taxonomy Pricing section for more information on pricing updates using the export/import options.
Capabilities Tab
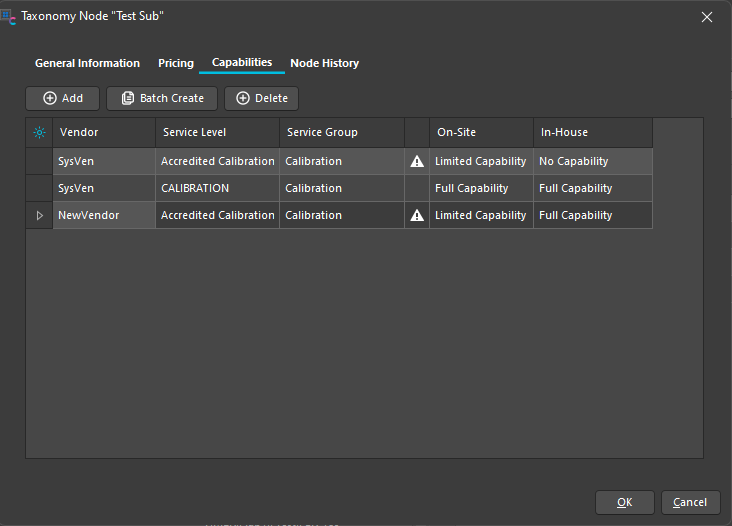
This tab defines the vendor-specific capabilities associated with the node. Capabilities are set based on:
- Vendor
- Service Level (e.g., Accredited Calibration, CALIBRATION)
- Service Group
- Capability Origin (direct vs. inherited)
- On-Site / In-House Capability (e.g., Full Capability, Limited Capability, No Capability, etc.)
This is the same matrix shown in the Details panel of the main Taxonomy screen when a node is selected. However, you can manually configure or edit entries from here.
⭐ Tip: If a node inherits capability settings from a parent, that will be indicated in the Origin column of the Capabilities grid on the details pane.
For more information on capability types and batch creating capabilities, please see the Taxonomy Capability Setup section.
Node History Tab
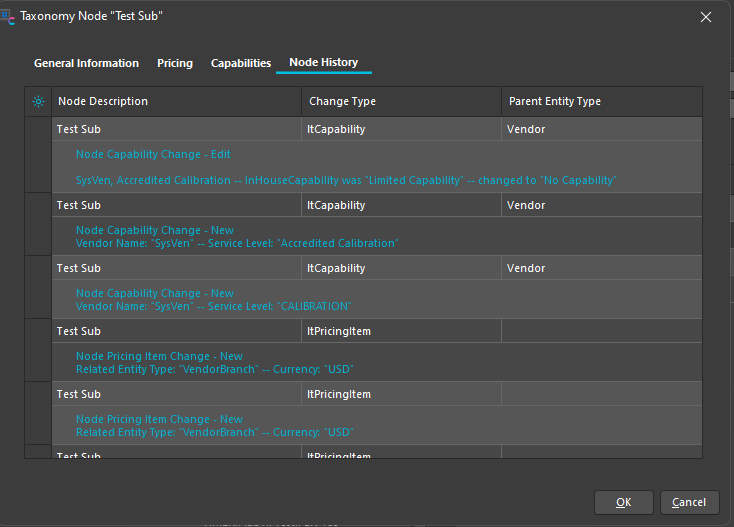
The Node History tab acts as an audit log for all changes made to the node.
-
Tracks and logs changes such as changes to
CapabilityandPricing -
Lists specific actions, such as:
- Capability status changes (e.g., Full → Limited, capability loss)
- New pricing item entries
- Changes to information on the General tab
-
Identifies who made the change and when that change was made
-
Double-clicking on a record in the history log will open a dialog with more detailed info:
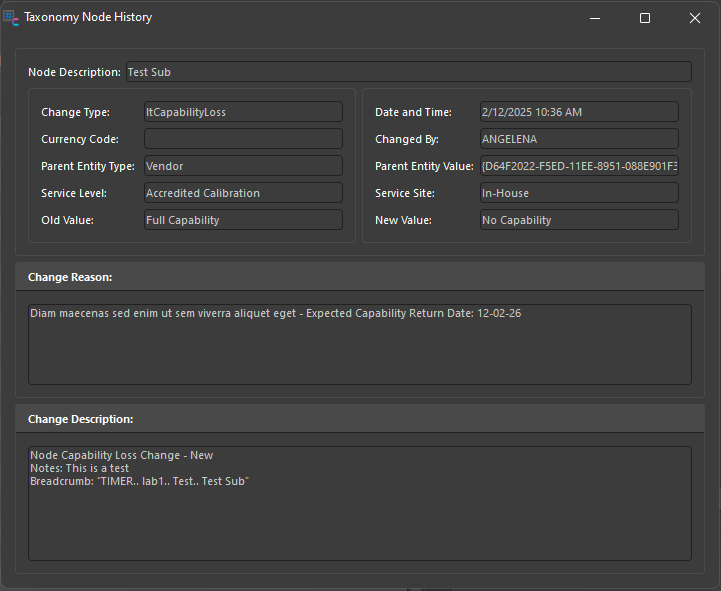
⭐ Tip: This is a valuable tool for understanding how and when a node was modified, especially in multi-admin environments.
Deleting a Node from the Tree
- Select the node you'd like to delete within the tree
- From the top menu, expand the Modify split button dropdown and select Delete Node (or right-click and choose "Delete Node ")
- Select Yes or No to the prompt confirming that you would like to delete the selected node and all its child nodes

See Also
- Setting Up Node Types and Levels – Required fields and asset linkage rules per Node Type
- Intro to the Taxonomy Tree Structure – Navigating the main screen and understanding node behavior in the tree
- Taxonomy Capabilities Setup – How nodes are linked to vendor, and that vendor's capability based on service level and on-site/in-house logic