Estimates - Overview
Estimates - Overview
To access the Estimates function, click the Order System Tab under the IndySoft header, then click the Estimates button in the main menu toolbar.
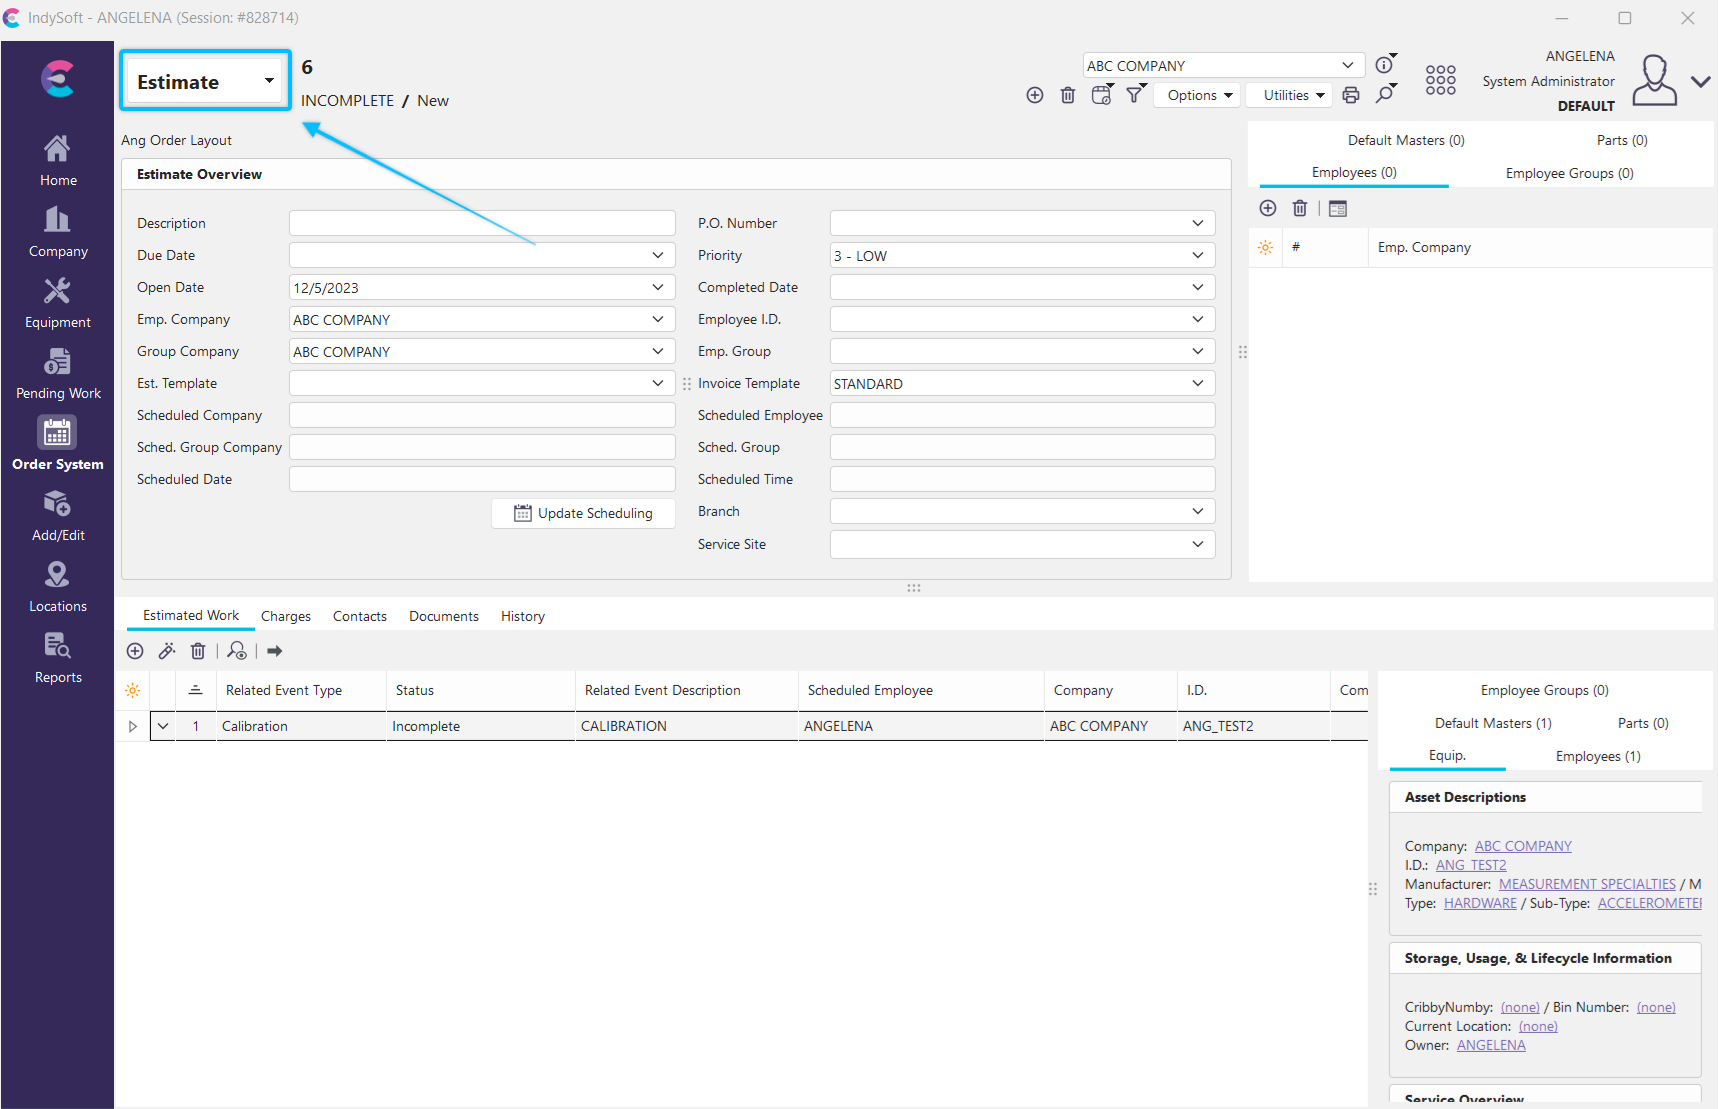
Order System - Estimates View
The Estimate screen is split into three major parts. The top has the menu and toolbar. The middle section has the Company the Estimate is for and basic information about the Estimate. The bottom has five tabs: Estimated Work, Charges, Contacts, Documents, and History
Basic Information
The Estimate toolbar contains essential tools for working with an Estimate.
![]() New Estimate - Begins creating a new Estimate
New Estimate - Begins creating a new Estimate
![]() Delete Estimate - Deletes the currently selected Estimate
Delete Estimate - Deletes the currently selected Estimate
![]() Recent Orders - Recalls a list of recently viewed orders
Recent Orders - Recalls a list of recently viewed orders
![]() Exclude Status Checked Below - Clicking this button will drop down a menu that, by clicking on the Status listed, will exclude it from the Estimate.
Exclude Status Checked Below - Clicking this button will drop down a menu that, by clicking on the Status listed, will exclude it from the Estimate.
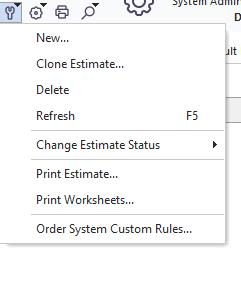
![]() Options Menu - Shows options for Estimates:
Options Menu - Shows options for Estimates:
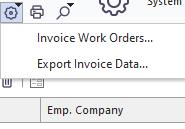
![]() Utilities Menu - Shows utilities associated with the Order System
Utilities Menu - Shows utilities associated with the Order System
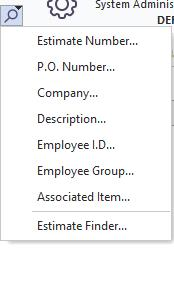
![]() Search By Menu - Allows you to search through all the Estimates in the system
Search By Menu - Allows you to search through all the Estimates in the system
![]() Print - Allows you to print the current Estimate. Each time you Print, a corresponding version of the Estimate will be saved to track changes.
Print - Allows you to print the current Estimate. Each time you Print, a corresponding version of the Estimate will be saved to track changes.
You also have the option to add navigation arrow buttons to the header layout, which will allow you to move forward or back in the list of Estimates. This can be done from the 'Customize' dialog (Admins Only).
Make changes to the estimate by adjusting the fields directly on the estimate screen. Once a change has been made, the 'Save Changes' and 'Cancel Changes' buttons will appear on the screen:
![]() Save Changes - Saves the Estimate you are working on
Save Changes - Saves the Estimate you are working on
![]() Cancel Changes - Cancels any changes to the current Estimate
Cancel Changes - Cancels any changes to the current Estimate
The basic Estimate information is used to assign a company and dates to the project.
·Estimate #: This is automatically generated when you create a new estimate. The Search By Estimate Number screen will launch if you click on the Estimate Number hyperlink.
·P.O. Number: Enter the P.O. number here.
·Due Date: Enter the due date here, if known.
·Priority: This can range from 1 - HIGH to 3 - LOW.
·Open Date: This defaults to the day the Estimate was created.
·Completed Date: This should only be filled in when the Order is finished.
·Company: Select the customer the Order is for here. This will automatically fill in the Bill To and Ship To addresses from the Company.
·Bill To: This is the Company's Bill To address. You can change it by pressing ![]() .
.
·Ship To: This is the Company's Ship To address. You can change it by pressing ![]() .
.
Charges Tab
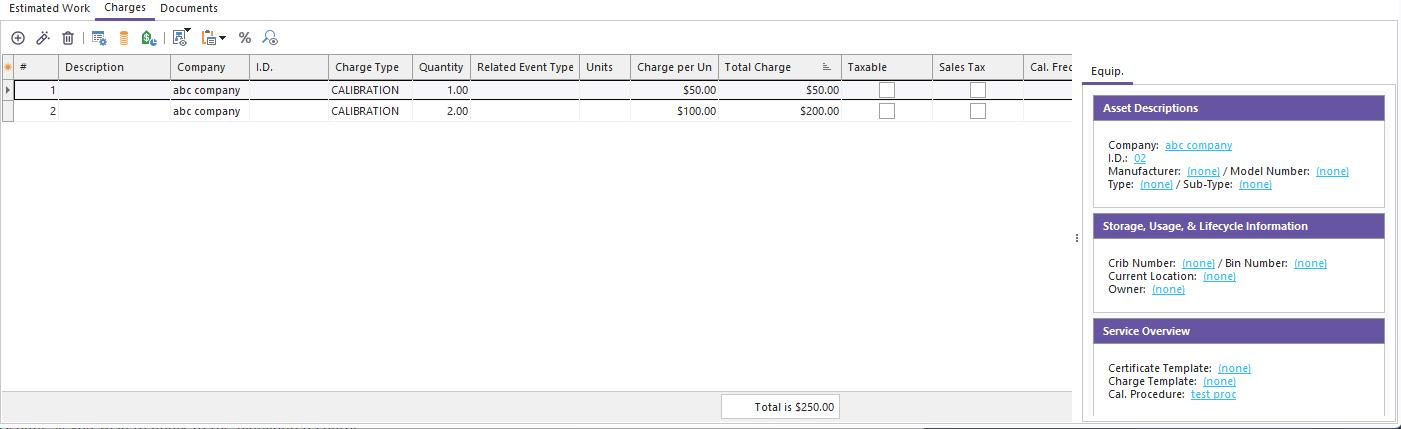
Estimates - Charges Tab
The Charges tab has a toolbar and a grid showing the charges entered.
![]() New Charges - Opens the Add Charges dialog.
New Charges - Opens the Add Charges dialog.
![]() View Charges - Opens the Work To Complete dialog.
View Charges - Opens the Work To Complete dialog.
![]() Delete Charges - Deletes a charge.
Delete Charges - Deletes a charge.
![]() Add Charges for Repair Parts - Allows you to select a repair part from Find Serv/Repair Parts and attach a charge to that part.
Add Charges for Repair Parts - Allows you to select a repair part from Find Serv/Repair Parts and attach a charge to that part.
![]() Add Charges From Templates - If you have stored a charge in an Equipment Template, you can copy all the charges for that template.
Add Charges From Templates - If you have stored a charge in an Equipment Template, you can copy all the charges for that template.
![]() Apply Discount - Clicking will open a dialog to enter a discount % you wish to apply to the highlighted charge.
Apply Discount - Clicking will open a dialog to enter a discount % you wish to apply to the highlighted charge.
![]() Add Charges Using EquipmentFinder - Allows you to select Equipment that has Charges set up in it and copy those charges.
Add Charges Using EquipmentFinder - Allows you to select Equipment that has Charges set up in it and copy those charges.
![]() Paste Charges From Clipboard - This allows you to copy charges from a spreadsheet program and paste them into IndySoft.
Paste Charges From Clipboard - This allows you to copy charges from a spreadsheet program and paste them into IndySoft.
![]() Calculate Sales Tax - Calculates tax for taxable items based on the information entered into the Company.
Calculate Sales Tax - Calculates tax for taxable items based on the information entered into the Company.
![]() Create Work Order from Estimate - Clicking will drop down a menu:
Create Work Order from Estimate - Clicking will drop down a menu:

Create Work Order From Estimate Options
](/it/Storage/indysoft-help-publication/hm_clip3402.png)
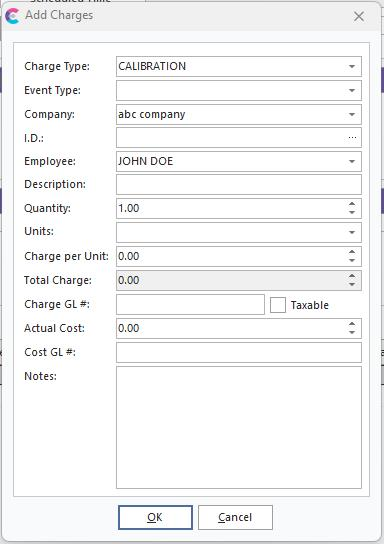
A screen like the one below will open when adding or editing a charge.
 ../Storage/indysoft-help-publication/98038371.png
Add Charges
·Charge Type - The type of work performed.
·Company - The Company to be charged.
·I.D. - The I.D. of the Equipment worked on.
·Description - A description of the charge.
·Quantity - How many times to charge.
·Units - An optional unit of measure for the work.
·Charge per Unit - The cost for this charge.
·Total Charge - This is a calculated field; it equals the Quantity times the Charge per Unit.
·Charge GL # - The General Ledger number for the charge can be noted here.
·Taxable - Whether Sales Tax should be applied.
·Actual Cost - The internal cost can be noted here.
·Cost GL # - The General Ledger number for the cost can be noted here.
·Notes - An optional field for making notes about the charge.
·Description - A general description of the Estimate.
·Emp. Company - The Company the Employee works for.
·Employee I.D. - The Employee assigned to perform the work.
·Group Company - The Company the Employee Group is part of.
·Emp. Group - The Employee Group assigned to perform the work.
·Custom # - These are available for any additional information that may need to be included. See System Wide Prefs. - User Defined Labels for more information about customizing them. (Example noted in red in the screenshot above).
·Est. Template - The template PrintBuilder will use for printing the Estimate.
Documents Tab
The Associated Documents tab stores any relevant documents, such as calibration procedures or equipment documentation, that will be used to perform the work on the Estimate. Estimate Documents can be added/deleted if the estimate status is not COMPLETE.
![]() Add Associated Document - Opens a dialog in which you select the Company, then the Document to be added to the grid or by searching for a file on your hard drive or network. Note that there are three ways to add an associated document:
Add Associated Document - Opens a dialog in which you select the Company, then the Document to be added to the grid or by searching for a file on your hard drive or network. Note that there are three ways to add an associated document:
1. Add Associated Document - use this option to link a document previously input in the Add/Edit...Documentation...Documents wizard.
2. Add Associated Document From File - use this option to add a new document to the Add/Edit quickly...Documentation...Documents wizard, and automatically associate this Document with the current Estimate.
3. Attach Document - use this option to attach a one-time document to this work order. Note that this option does NOT make a copy of the Document and save it to the Add/Edit...Documentation...Documents wizard.
4. Add Signature - use this option to make a one-time signature attachment in .PNG format and add it to this Estimate.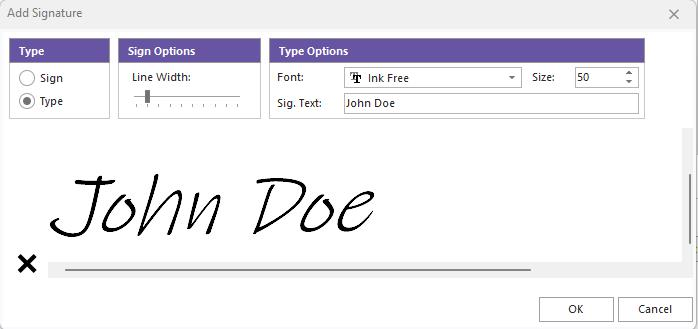
5. Add Signature from Phone App - use this option to make a one-time attachment of a signature from the Mobile App![]() View Document - Displays the Document on the screen.
View Document - Displays the Document on the screen.
![]() Delete Document - Removes the selected Document from the grid.
Delete Document - Removes the selected Document from the grid.
Notes Tab
The Notes tab allows you to enter as much text as necessary to comment on the Estimate.
Associations - see Associations topic for more details. |