IndySoft DataSync Options
PLEASE NOTE
The following topic may include references to the custom scripting aspects of the IndySoft product line. Some aspects of the discussed features may not be accessible to end customers. For reference, the affected features will use the word 'script' or 'custom script.' Refer to the Custom Scripting Overview topic for more information about custom scripting and how it is implemented and supported within the product.This utility has five main purposes:
- Establish the login credentials and other options that will be used by the IndySoftSync utility.
- Set up and test all scripts that will be run by the IndySoftSync utility.
- Install/De-Install the IndySoft REST Server (if purchased) and set other options that the IndySoft REST Server will use.
- Set up and test all scripts the IndySoft REST Server utility will run.
- Display a log of all operations performed by the IndySoftSync utility, Sync Maps, and/or IndySoft REST Scripts, along with any related errors.
In version 13, the IndySoft Sync Options utility can also be launched from the Admin Panel:
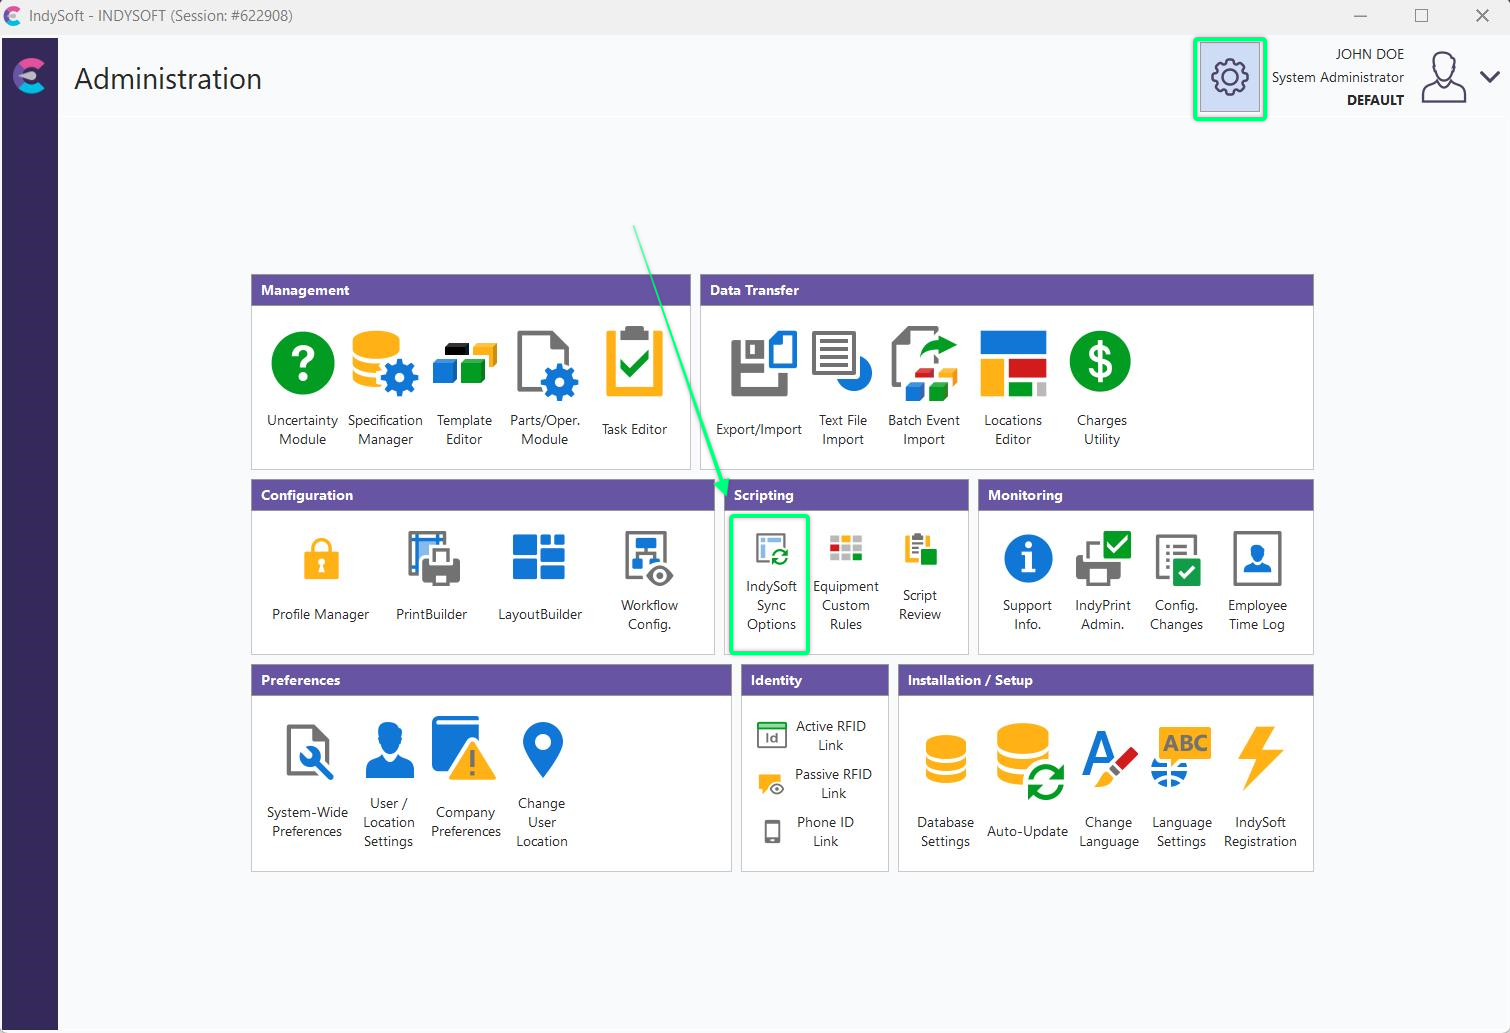
Admin Panel - IndySoft Sync Options
Add Any Scripts Provided By IndySoft
Typically the scripts run by the IndySoftSync service are provided by IndySoft. Press the 'Add Sync' button above the 'Sync - Setup' grid if you have a script ready for input. You will be prompted for a Response Code, which will be provided by an IndySoft tech or entered by the tech in a remote session:
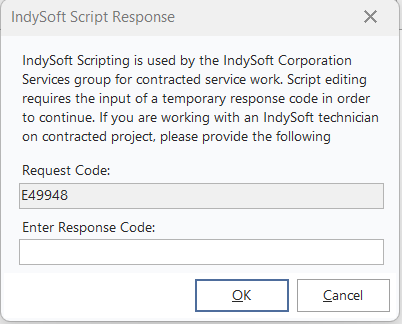
IndySoft Script Response
This code ensures that scripts are not modified without consultation with IndySoft. This is essential since scripts can run UPDATE/INSERT/DELETE SQL on the database or potentially perform large SQL operations once the code has been input, press OK to proceed.
When the script window appears, paste the entire script text into place. Next, note the options in the header section:
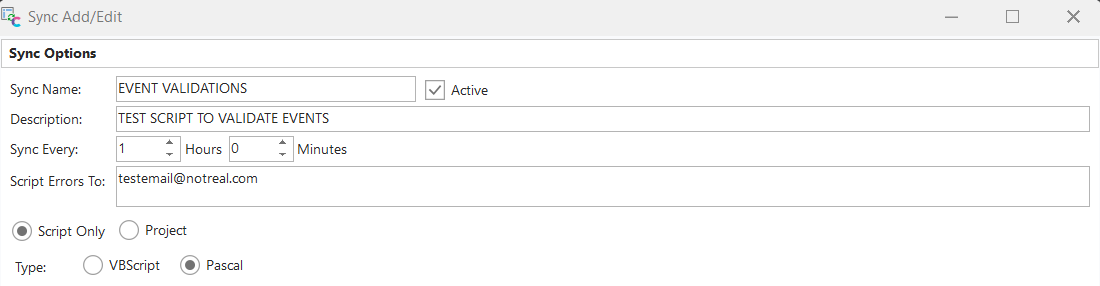
Sync Name: A short name for the script to identify it from others - up to 30 characters.
Active: Whether the script is active. This determines whether the script is loaded/executed by the IndySoftSync service.
Description: A long description of the script - up to 200 characters.
Sync Every: The interval at which this script should be executed. All scripts are executed continually. So, for example, if you would like the script to run once a day, then input 24 hours, etc. Scripts do not execute at an exact time each day (like IndySoft Alarms); rather, they execute immediately upon the start of the service, then at the stated interval after that.
Script Errors To: Scripts can be written to send emails to all addresses noted in this box by calling the SendScriptErrorsTo function within the script. This allows the script logic to remain the same but the distribution of email alerts to be occasionally modified.
Once all information has been input, press OK to save the sync script. Note: If the 'Active' checkbox is true, then the script will be executed by IndySoftSync.
Script Setup
Syncs - Setup Tab
This tab has a grid displaying all sync scripts that have been input. There are six button options:
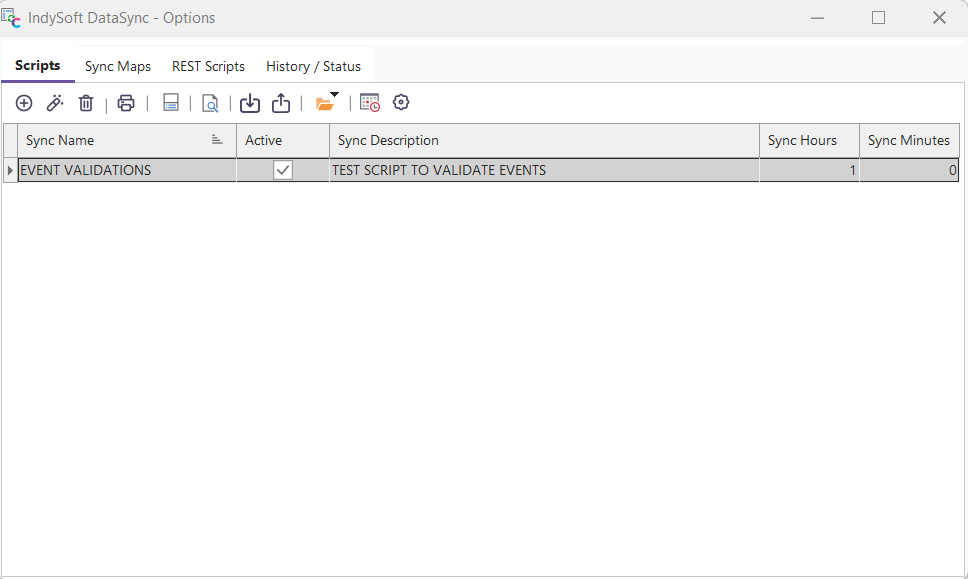
Sync - Setup Tab
![]() Add Sync
Add Sync
This option will allow you to create a new Sync.
![]() Edit Sync
Edit Sync
Editing an existing alarm is accomplished by double-clicking the alarm entry from the grid or pressing this button while the alarm is highlighted. You can edit anything in the alarm settings except for the alarm name. If you need to rename an alarm, create it as a new alarm in the desired name, then delete the original.
![]() Delete Sync
Delete Sync
To delete an existing alarm, select it from the Scheduled Alarms grid, right-mouse, click the item, select Delete from the context menu, or click the Delete icon in the toolbar.
![]() Print Syncs
Print Syncs
To print a list of syncs, press the Print Sync button to display a preview window of the print job.
![]() Update Windows Task Scheduler With All Active Alarms
Update Windows Task Scheduler With All Active Alarms
Press this button to re-add all active syncs to the Windows Task Scheduler. Note that this is only necessary when moving your scheduled syncs to a different workstation or upgrading prior syncs from a pre-9.1.13 IndySoft client.
![]() View Script Only (No Editing)
View Script Only (No Editing)
Clicking this button will launch the currently selected script in view mode (no editing)
![]() Export Selected Sync to File
Export Selected Sync to File
To save an alarm for transfer to another system, highlight the sync, click the Export button, and save it to a file on your workstation.
![]() Import Selected Sync to File
Import Selected Sync to File
A saved sync can be imported into the DataSync options module. Importing a sync will overwrite the currently highlighted one.
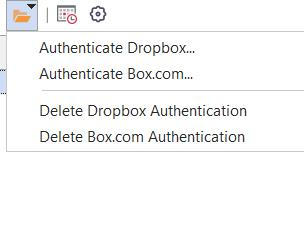
![]() Setup Cloud Service Authentication
Setup Cloud Service Authentication
This button will allow you to authenticate Dropbox or Box.com to the sync options dialog.
![]() Launch Windows Task Scheduler
Launch Windows Task Scheduler
Clicking this button will open the Windows Task Scheduler. This option will not appear on pre-Windows Vista operating systems.
![]() Task Scheduler Options
Task Scheduler Options
Clicking this button in the IndySoft Alarm Management screen will open another window to edit the Task Scheduler Options.
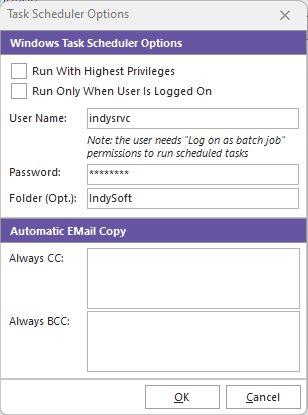
Task Scheduler Options
Windows Task Scheduler Options
Before a Windows Scheduled Task can be added, you must use this dialog to specify a user that will be used to run each alarm by Windows. Be sure to choose a valid Windows user that has all the necessary privileges to run an IndySoft alarm. If a task is registered using the Administrators group for the security context of the task, then you must also ensure the Run with highest privileges check box is checked if you want to run the task. If you want only to have an alarm run when a user is logged into Windows, check the Run Only When User Is Logged On option.
If you need to run the Windows Task Scheduler under the SYSTEM account, enter SYSTEM in the User Name field and leave the password blank.
The optional "Folder" setting will allow you to store your Alarms in its own sub-folder for Windows Versions or Vista or higher. Lower versions of Windows will have this field greyed out.
Automatic Email Copy
While Alarm emails are set up in step 5 Output - Email to an addressee, a copy of every alarm can always be sent to another email address as a 'Carbon Copy' or 'Blind Carbon Copy.' Enter as many email addresses as necessary, separated by semicolons ";"
History / Status Tab
This tab has a grid displaying all operations that occurred through the IndySoft DataSync module (when a log is requested), Sync Maps, and/or IndySoft REST Scripts. Syncs executed from IndySoftSyncOptions during script testing are not logged. There are several controls above the grid:
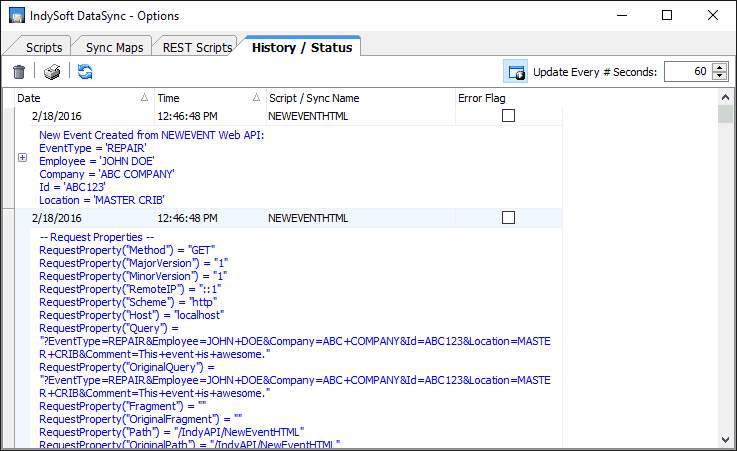
History / Status Tab
·Delete Log Entry - permanently deletes the select Log entry(s). Confirmation precedes.
·Print Log History - prints a preview of the Log History grid.
·Refresh - reloads the grid contents (even if Auto-Refresh Grid is OFF)
·Auto-Refresh Grid - updates the grid automatically every xx seconds (as specified in the next option)
·Update Every # Seconds - the grid is automatically refreshed every xx seconds.
Sync Scripts
Sync scripts use many of the same functions as other custom scripting elements in IndySoft (event custom scripts, etc.) In general, these sync scripts will be either writing files to a directory populated with IndySoft data, reading files from a directory and importing this data into IndySoft, or possibly reporting on IndySoft data and emailing/logging alerts.
·Sync Name - the unique name of the sync script. This is the name that will appear in the Log history and any emails sent from within the script or in response to script errors.
·Active - whether the script is loaded/run by the IndySoftSync service. The script can only be tested from the IndySoftSyncOptions screen if this is unchecked.
·Description - a longer description of the sync
·Sync Every - input the appropriate Hours, Minutes, and Seconds for the sync frequency. Note that a small amount of time might be required to execute the script (and any other scripts that meet their trigger) before the sync stopwatch starts again. So this is the # of seconds that need to elapse between other syncs.
·Script Errors To - this can contain one or more email addresses. These persons will be automatically emailed if the script throws an error upon execution. Note that these errors are related to the compilation of the script, not necessarily errors from within the script that could be trapped there. For instance, if you have bad syntax in the script, these email addresses will be notified (because the script cannot be compiled). But if your script loads an XML file, as an example, and this XML file has a bad format that returns an error code, then your script logic may or may not respond to that error code - that is up to the script's writer. So if your script reads the error code, you might call the SendEMail function from within the script to respond to this error. If you would like to return these 'Send Errors To' addresses from within the script, use the SendScriptErrorsTo function.
A 'Procedures/Functions' tab is available to the right of the script that reminds users of the available procedures and functions. Users can drag/drop these functions/procedures into the script area. The 'Debugging Log' tab logs any syntax errors upon script testing. Also, this 'Debugging Log' text can be populated with debug notes from within the script by calling the DebugLog function. These same notes (as seen in the 'Debugging Log' tab) can be viewing the IndySoft DataSync utility running in Windowed Mode (when launched directly from Windows Explorer rather than Service Manager as a service). |