Branch Manager Tab
Document Sign-Offs
This tab displays pending document sign-offs for past IndySoft events. The sign-off can be completed from this tab, and email reminders can be sent to appropriate parties.
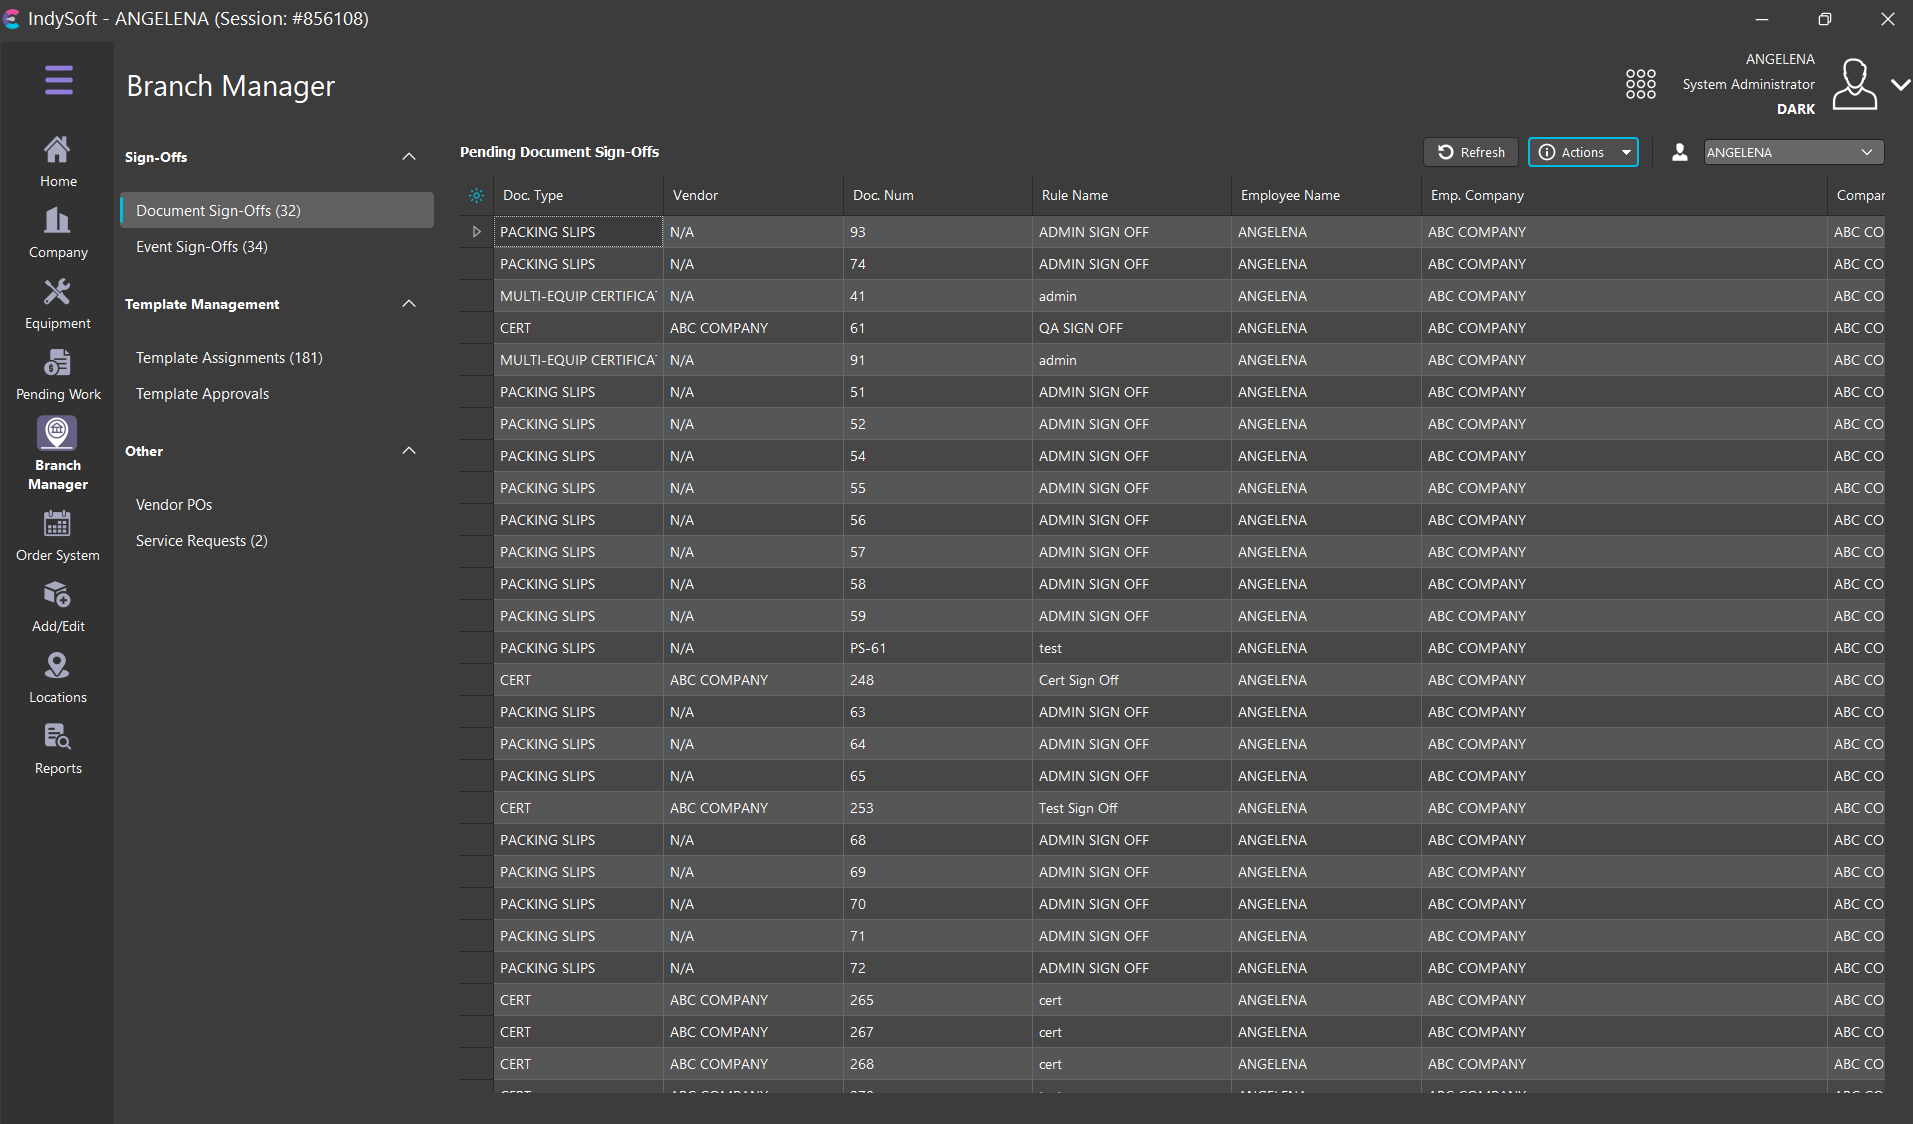
Branch Manager Tab - Document Sign-Offs
To perform a sign-off, double-click on the item in the grid or press the small arrow in the leftmost column

The related document will be shown onscreen along with the sign-off option, as in the example below
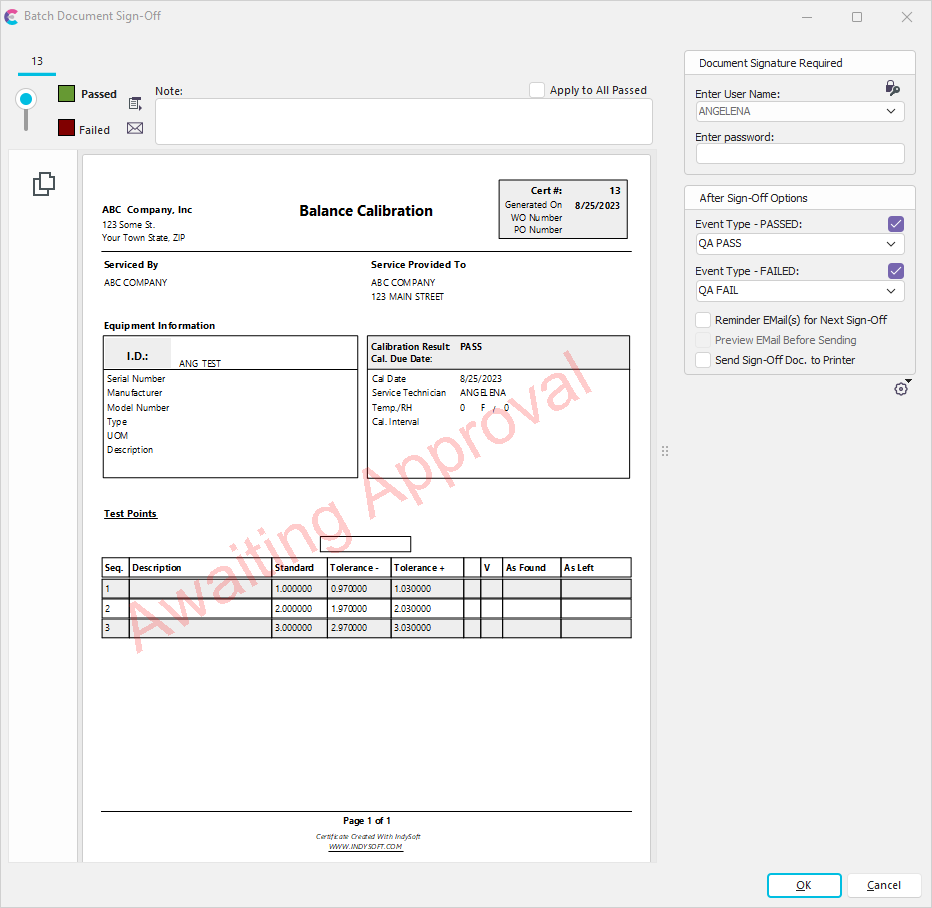
Document Sign-Off
To complete the sign-off, select either Passed or Failed from the slider options on the right and input the password for the username. Note that the sign-offs listed in the grid already include each possible username that can complete the related sign-off, so the username is not editable. If you would like to regenerate the listing of users who can complete the sign-offs for an event, re-enter the event dialog and select 'Finish.' Upon each event finish of an incomplete event, IndySoft checks the current available users and saves to the 'pending signs offs' table all users that can complete the sign-off. Sign-off notes are optional. When a document sign-off is completed, it is removed from the pending sign-off list. All other user names related to this document's sign-off are also removed. For example, say the sign-off rule (as set up in Workflow Configuration...Report Rules) requires that any 'Standard User' signs off on the document. Upon finishing the event, IndySoft checks for all users with a 'Standard User' profile and populates three users to the Pending Sign-Offs table (just an example). If you sign off as the first of these users, approving the document, all 3 document sign-off records are removed from the grid. If you want to see only pending sign-offs for one user, then utilize the grid filtering options in the grid column headers.
![]() Version 13.0.16 || New checkboxes in Systemwide Preferences to 'Auto-prompt for sign off note' and 'Require sign off note' -- will prompt and/or require note on all document sign-offs
Version 13.0.16 || New checkboxes in Systemwide Preferences to 'Auto-prompt for sign off note' and 'Require sign off note' -- will prompt and/or require note on all document sign-offs
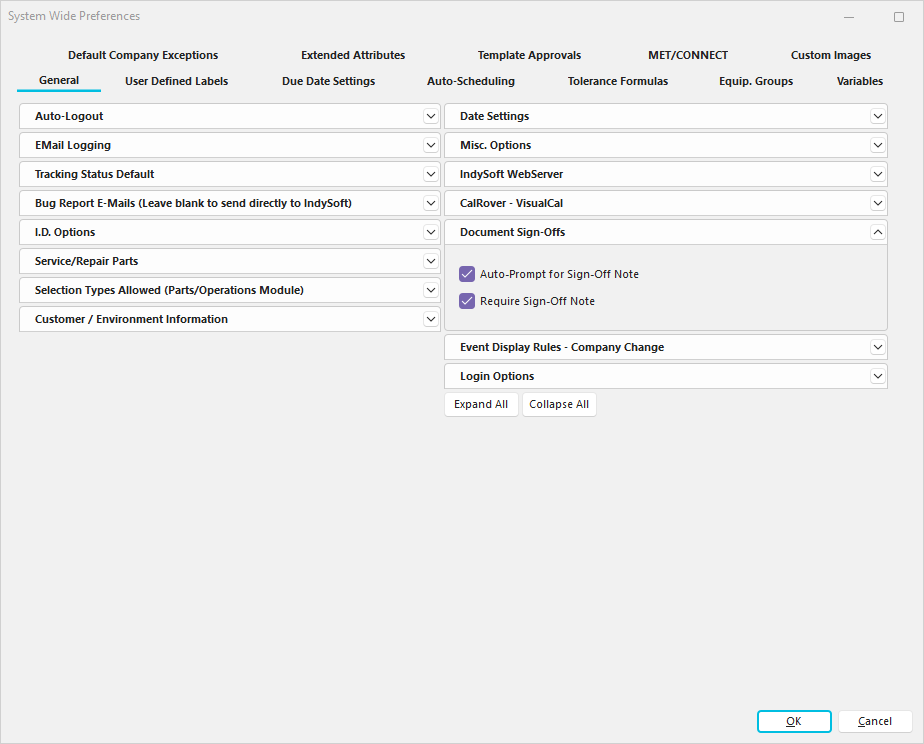
System Preferences...General - Document Sign-Offs
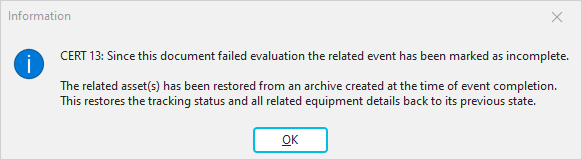
If a document fails a sign-off, then the entire event is forced incomplete. The related asset(s) will be restored to their archived state at the time of the event completion. This includes its current tracking status and all related equipment details.
![]() Version 13.0.16 || After failed document sign-off, the 'Awaiting Approval' watermark is replaced with 'Rejected' on the failed PDF -- note of the employee/user and date/time is added below the watermark
Version 13.0.16 || After failed document sign-off, the 'Awaiting Approval' watermark is replaced with 'Rejected' on the failed PDF -- note of the employee/user and date/time is added below the watermark
Pending sign-offs for this document are also removed since the event must now be completed - at which time, new document sign-offs will be created. A reminder message is shown:
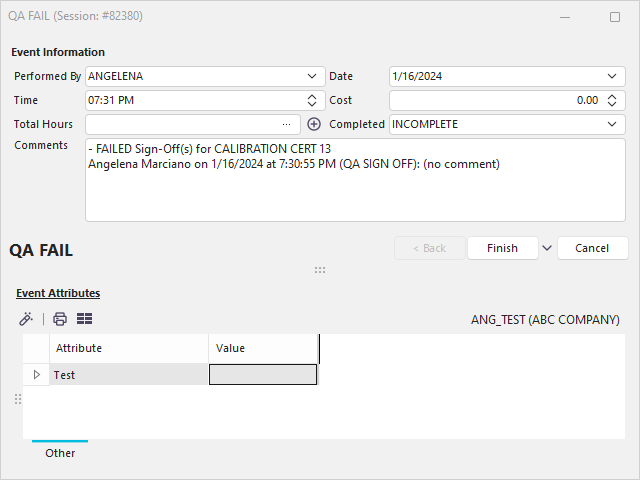
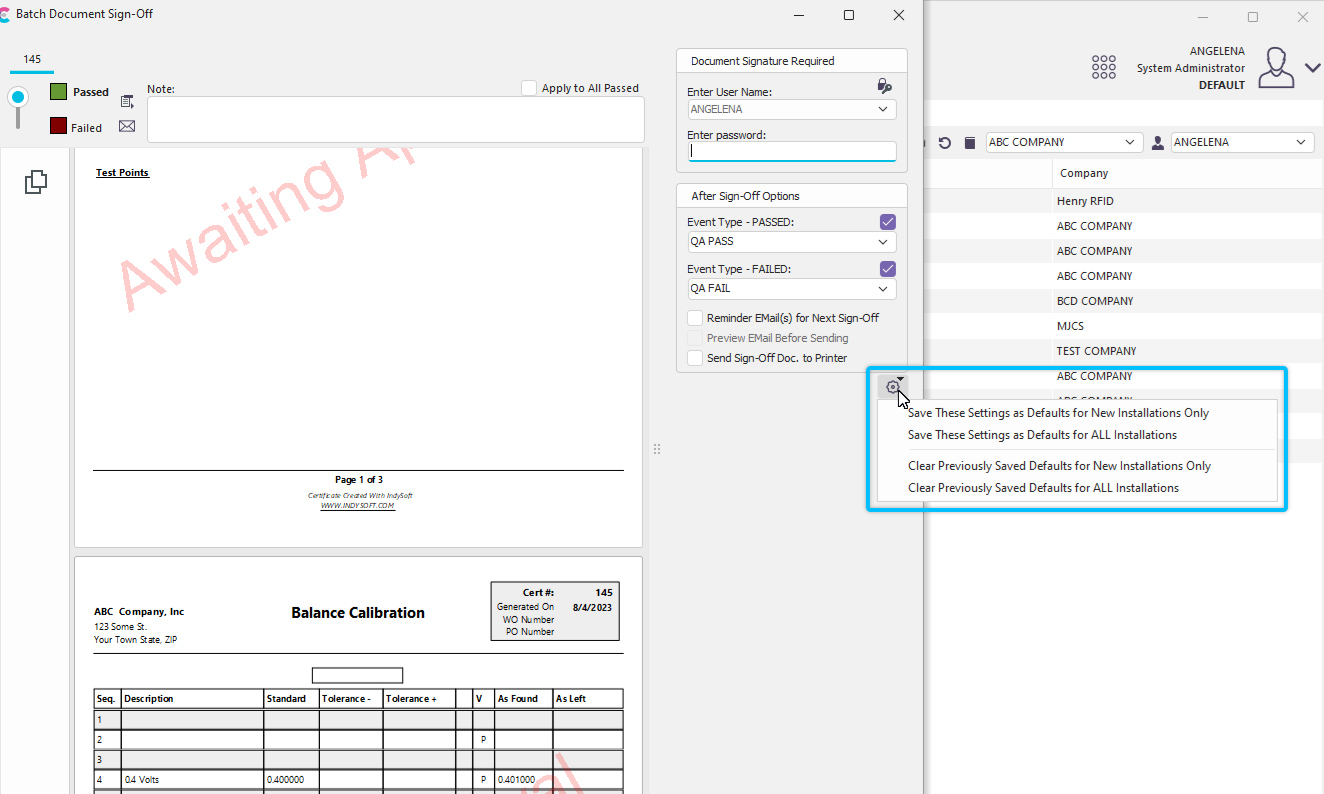
Note that upon completion of the document sign-off, an event can be automatically launched based on the pass/fail status of the sign-off. This auto-launched event creates a log of the sign-off in event history and can be used to set the next appropriate tracking status, etc. Select the appropriate event status from the options on the 'After Sign-Off Options' section on the right:

The launched event's note field (if visible) will be automatically populated with a summary of the event sign-off, reason, and optional note. If multiple documents from multiple assets are signed off at once, all will be noted in the same event (so be sure to select an event type that includes a 'Choose Equipment' grid - so all assets will be auto-added into the event.). If the event type has the Results field visible, it will also be automatically set to the appropriate PASS or FAIL state:
Note: if you have appropriate security rights in Profile Manager, you can save the 'After Sign Off Options' so that they are standardized for all workstations or new installations:
IMPORTANT: Upon each document sign-off, the current asset on the Equipment View will be changed to the asset appropriate for the event/document being reviewed. This is helpful if your evaluation of the document (pass or fail) requires correspondence about the asset. Remember that you can right-mouse-click in the Equipment Layout and send a quick email about the asset, including the current layout in the email.
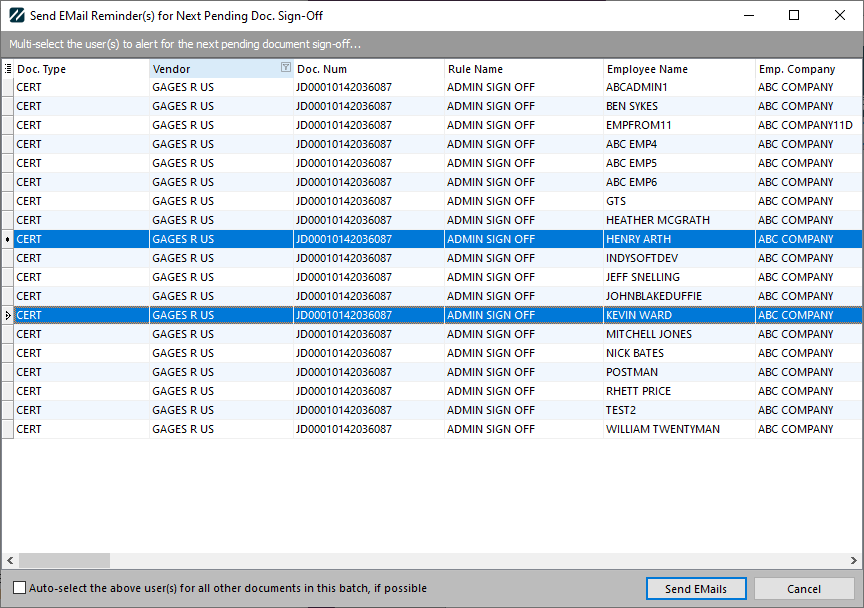
If the 'Reminder EMail(s) for Next Sign-Off' option is turned on, then upon completion of the sign-off, the next set of sign-offs are assembled, with all users that can fulfill the sign-off. Then these users are displayed on a review screen, where the appropriate user(s) can be selected to receive a reminder email:
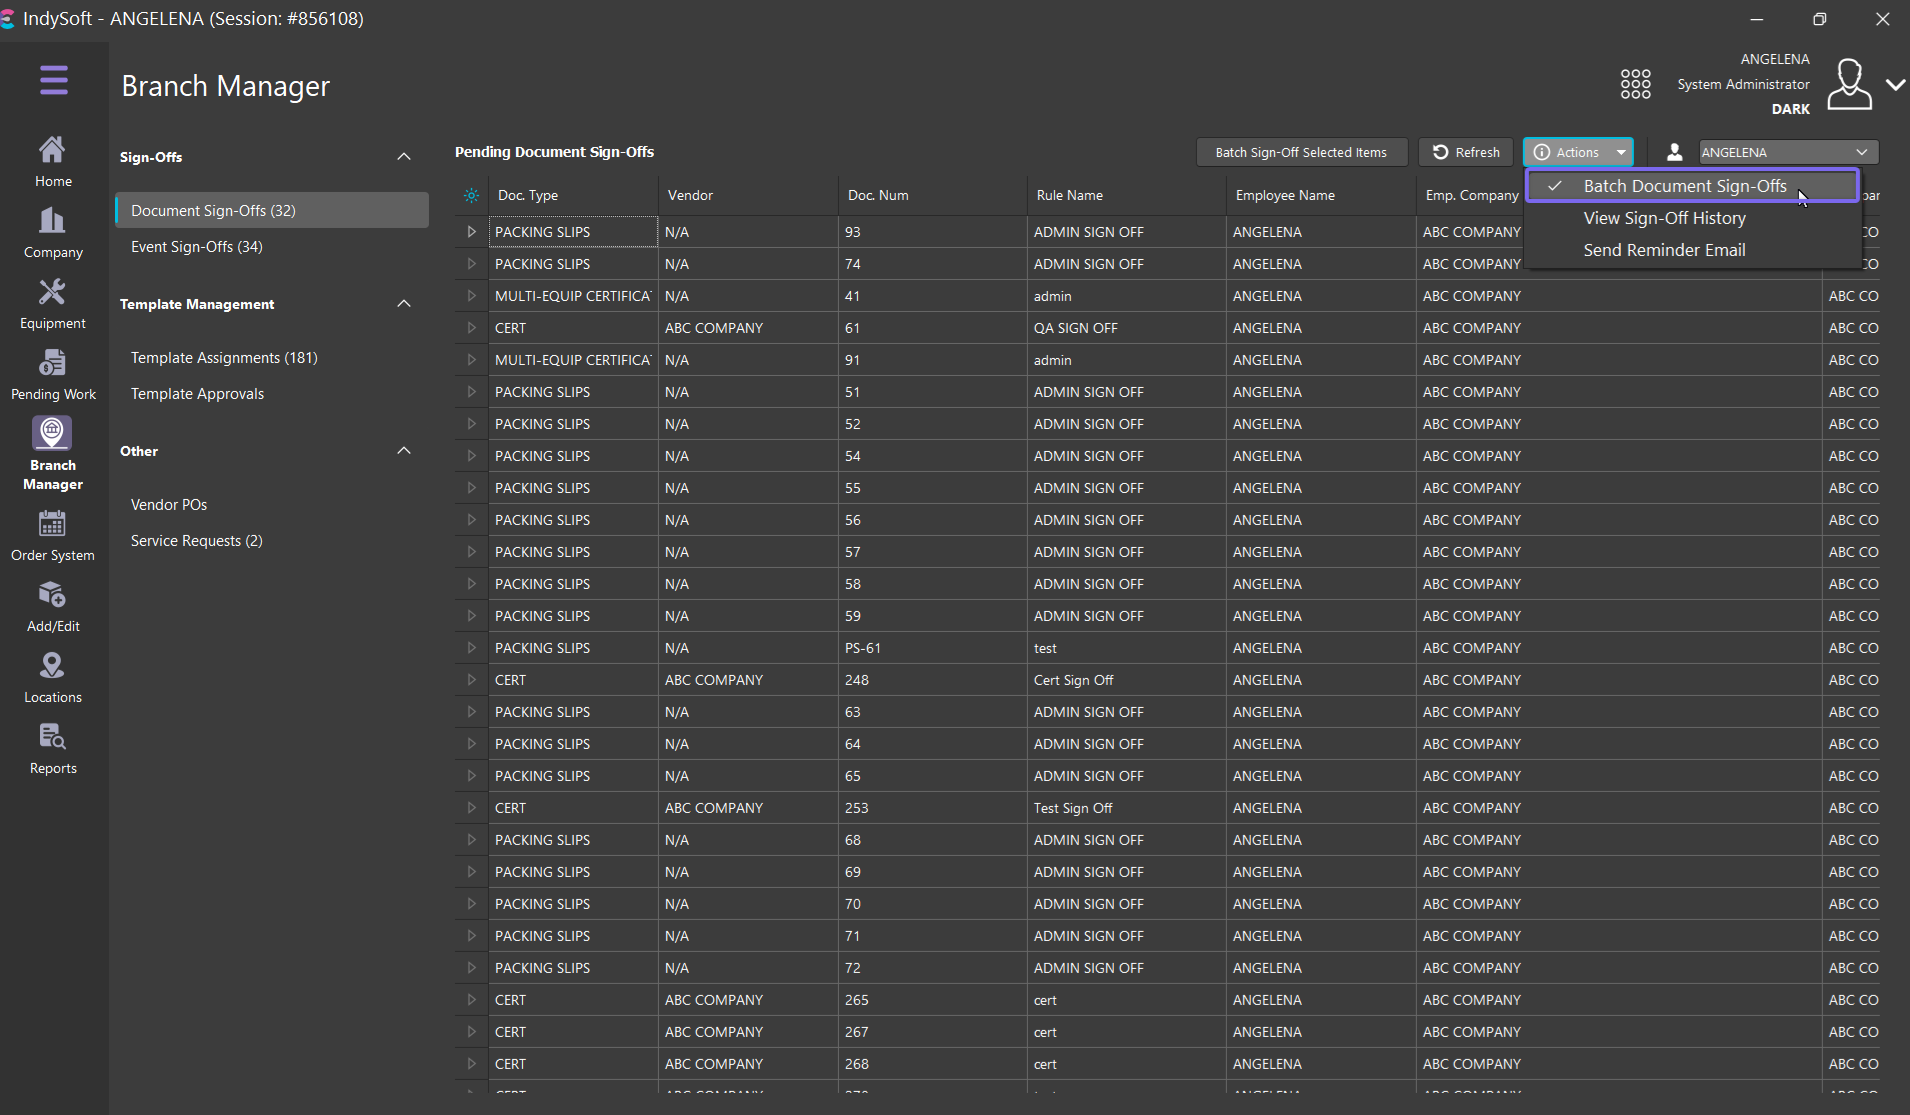
Four additional options are available as buttons above the 'Pending Document Sign-Offs' grid or from right-mouse click options in the grid:
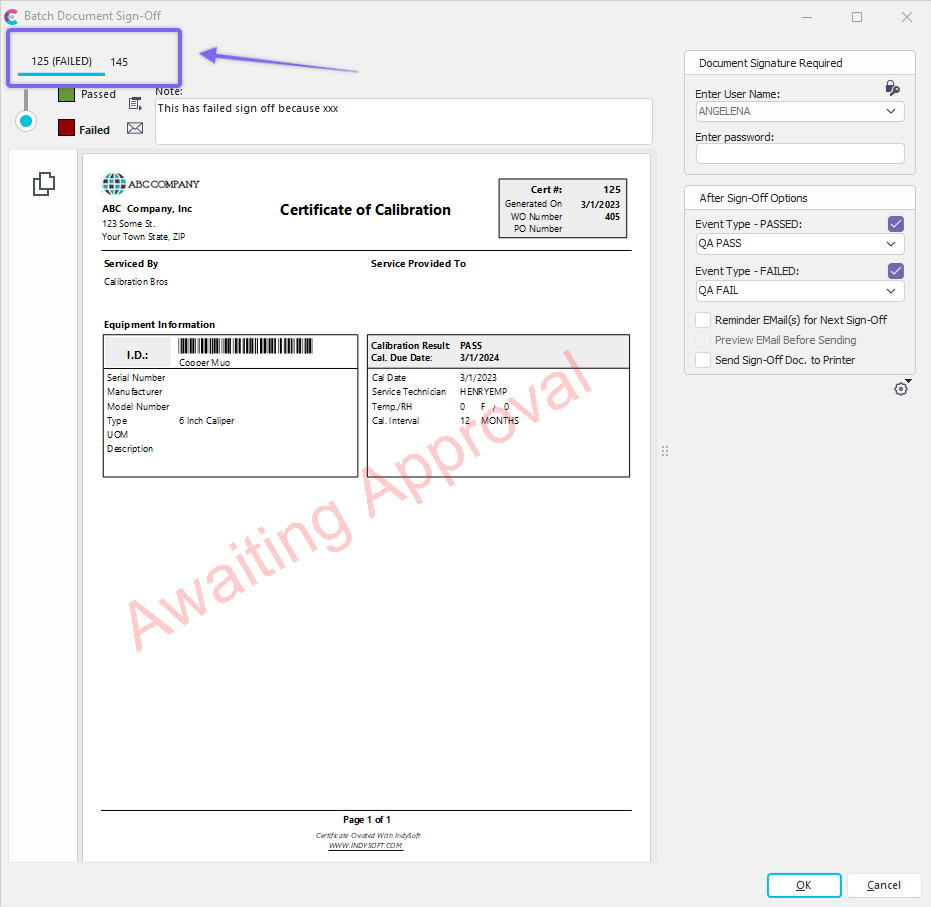
![]() Batch Document Sign-Off - this option will put the sign-off grid into multi-select mode and automatically select all sign-offs. Note that this option is only available if an individual employee is selected for the sign-off filter, not 'All.' You can then unselect any items that you do not wish to include in the batch sign-off, then press the 'Batch Sign-Off Selected Items' button:
Batch Document Sign-Off - this option will put the sign-off grid into multi-select mode and automatically select all sign-offs. Note that this option is only available if an individual employee is selected for the sign-off filter, not 'All.' You can then unselect any items that you do not wish to include in the batch sign-off, then press the 'Batch Sign-Off Selected Items' button:
In this mode, each document for sign-off will be listed as a separate tab on the sign-off screen. So, input one set of credentials to sign off on all documents simultaneously. Keep in mind that each document can have its own PASS or FAIL status and accompanying note:
![]() Send Reminder EMail - sends a reminder to the user associated with the current record. The shell of an email will be created and then shown onscreen for review before being sent.
Send Reminder EMail - sends a reminder to the user associated with the current record. The shell of an email will be created and then shown onscreen for review before being sent.
![]() Refresh Pending Sign-Offs - reloads all pending sign-offs. These are automatically reloaded every 5 minutes, but this can kick-start the reload.
Refresh Pending Sign-Offs - reloads all pending sign-offs. These are automatically reloaded every 5 minutes, but this can kick-start the reload.
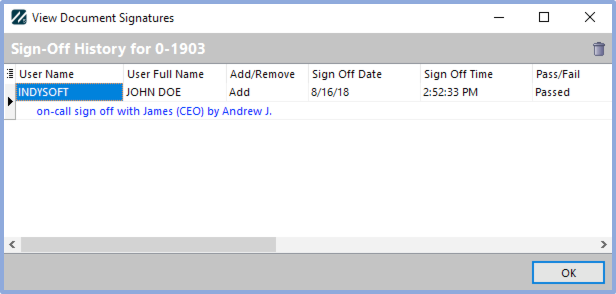
![]() View Sign-Off History For Document - this option will show a dialog reviewing the sign-off history for this document. The history will be blank if no other users have signed off on the document.
View Sign-Off History For Document - this option will show a dialog reviewing the sign-off history for this document. The history will be blank if no other users have signed off on the document.
View Document Signatures
Note that there is an option to delete a sign-off history record from above the grid. When a sign-off is removed, it is re-added to the listing of pending sign-offs, and an audit trail of the delete action is saved into the history. The original sign-off is noted as having been removed. This sign-off history dialog can also be launched from a right-mouse click option on the document icon on the History tab/dialog.
Event Sign-Offs
This tab displays pending event sign-offs for IndySoft events. The sign-off can be completed from this tab, and email reminders can be sent to appropriate parties.
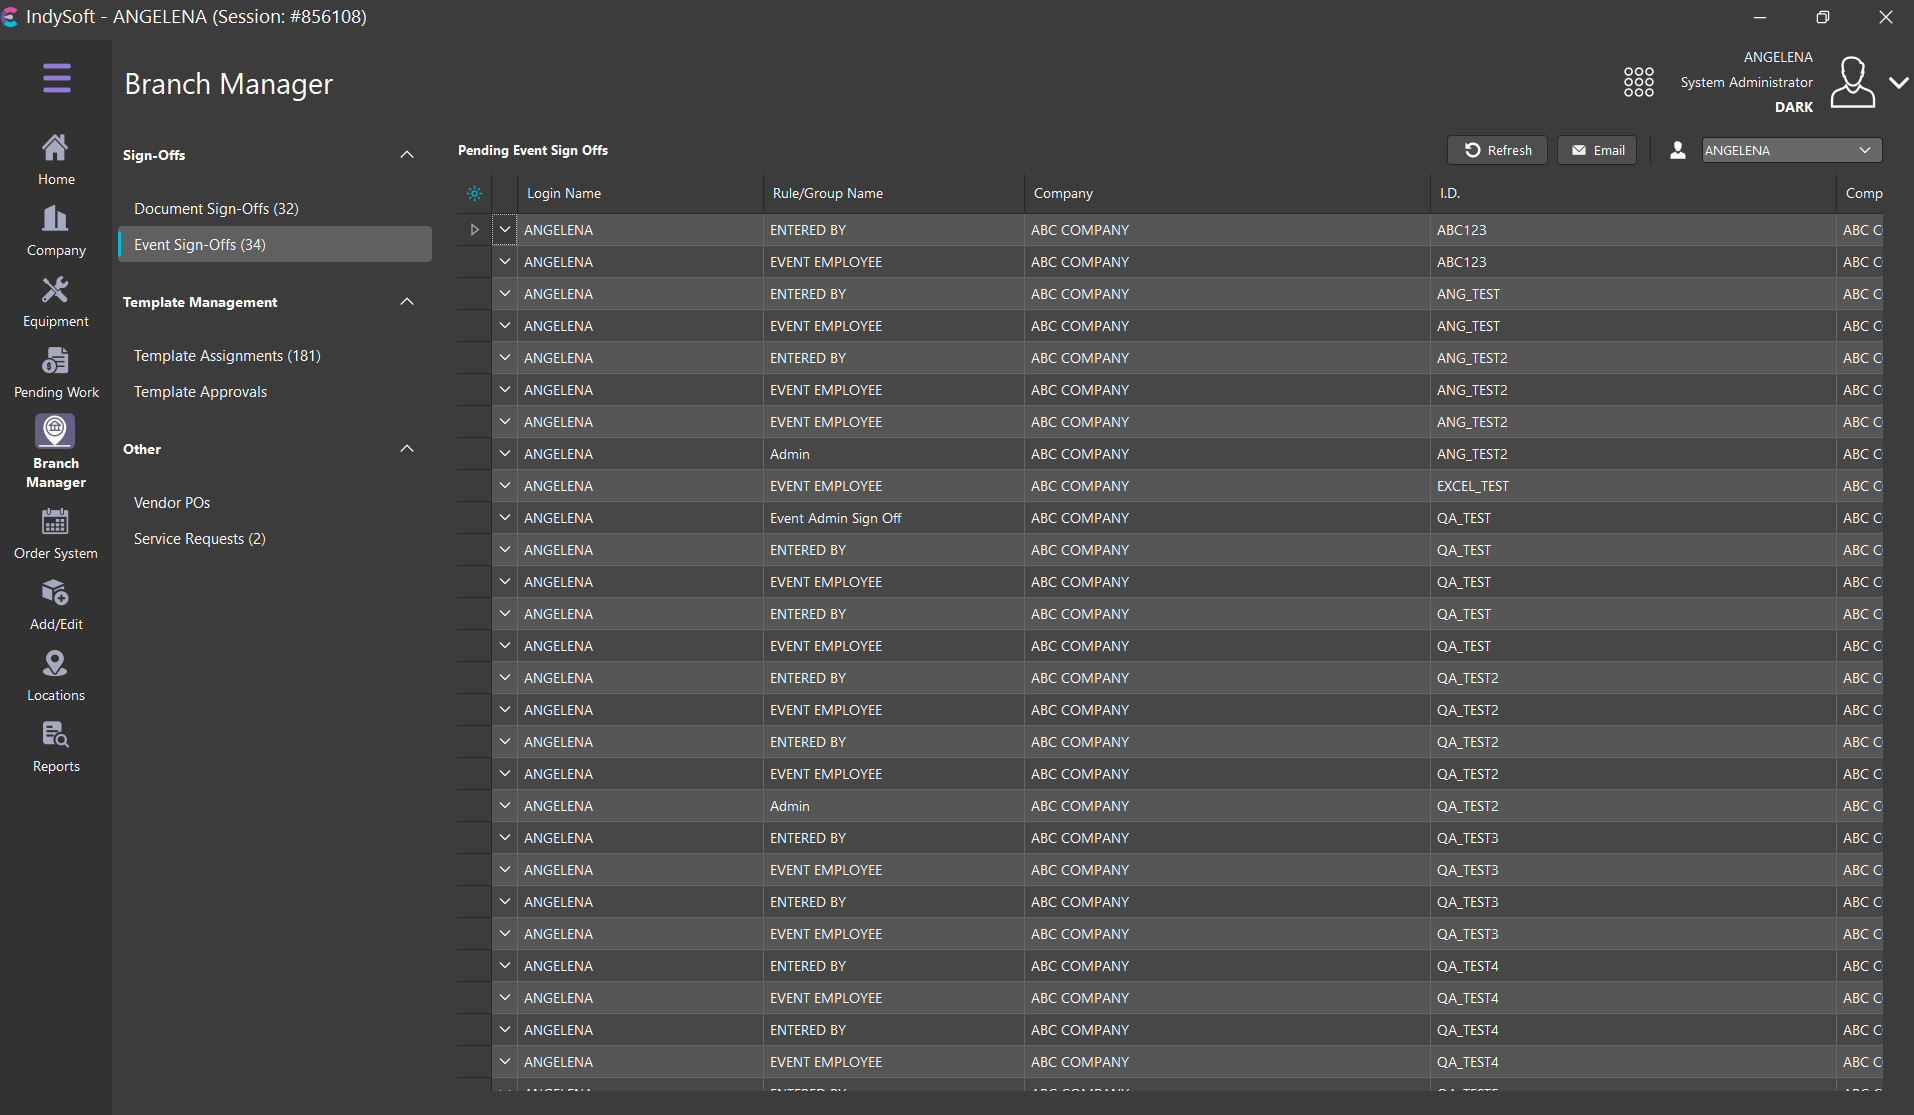
Branch Manager Tab - Event Sign-Offs
To perform a sign-off, double-click on the item in the grid or press the small arrow in the leftmost column. The related asset will be located on the Equipment View (without the tab changing from Pending Work), and the corresponding event will be shown onscreen. Complete the event as usual, adding your sign-off from the Sign-Offs step if desired. Completing the sign-off will remove the pending item from the grid. Two additional options are available as buttons above the grid or as right-mouse click options:
![]() Send Reminder EMail - sends a reminder to the user associated with the current record. The shell of an email will be created and then shown onscreen for review before being sent.
Send Reminder EMail - sends a reminder to the user associated with the current record. The shell of an email will be created and then shown onscreen for review before being sent.
![]() Refresh Pending Sign-Offs - reloads all pending sign-offs. These are automatically reloaded every 5 minutes, but this can kick-start the reload.
Refresh Pending Sign-Offs - reloads all pending sign-offs. These are automatically reloaded every 5 minutes, but this can kick-start the reload.
![]() Version 13.0.15 || Event Sign Offs grid now allows for right mouse click option for Show Group Panel (if Allow Sorting/Grouping turned on)
Version 13.0.15 || Event Sign Offs grid now allows for right mouse click option for Show Group Panel (if Allow Sorting/Grouping turned on)

Event Sign-Off - Show Group panel
![]() Version 13.0.16 || SSO Only: event sign-offs in pending work can now only be performed by the assigned sign-off user from within the grid
Version 13.0.16 || SSO Only: event sign-offs in pending work can now only be performed by the assigned sign-off user from within the grid
Template Assignments
This section of the Branch Manager Tab is used to review all equipment not yet associated with a Template quickly. For instance, if you have a policy that all equipment must be linked to a template, this tab helps review any pending assignment work. The grid lists all equipment not yet assigned. The grid is divided into two panes - by default, the I.D. and Company fields are in a fixed left-hand pane, and other equipment fields are shown to the right:
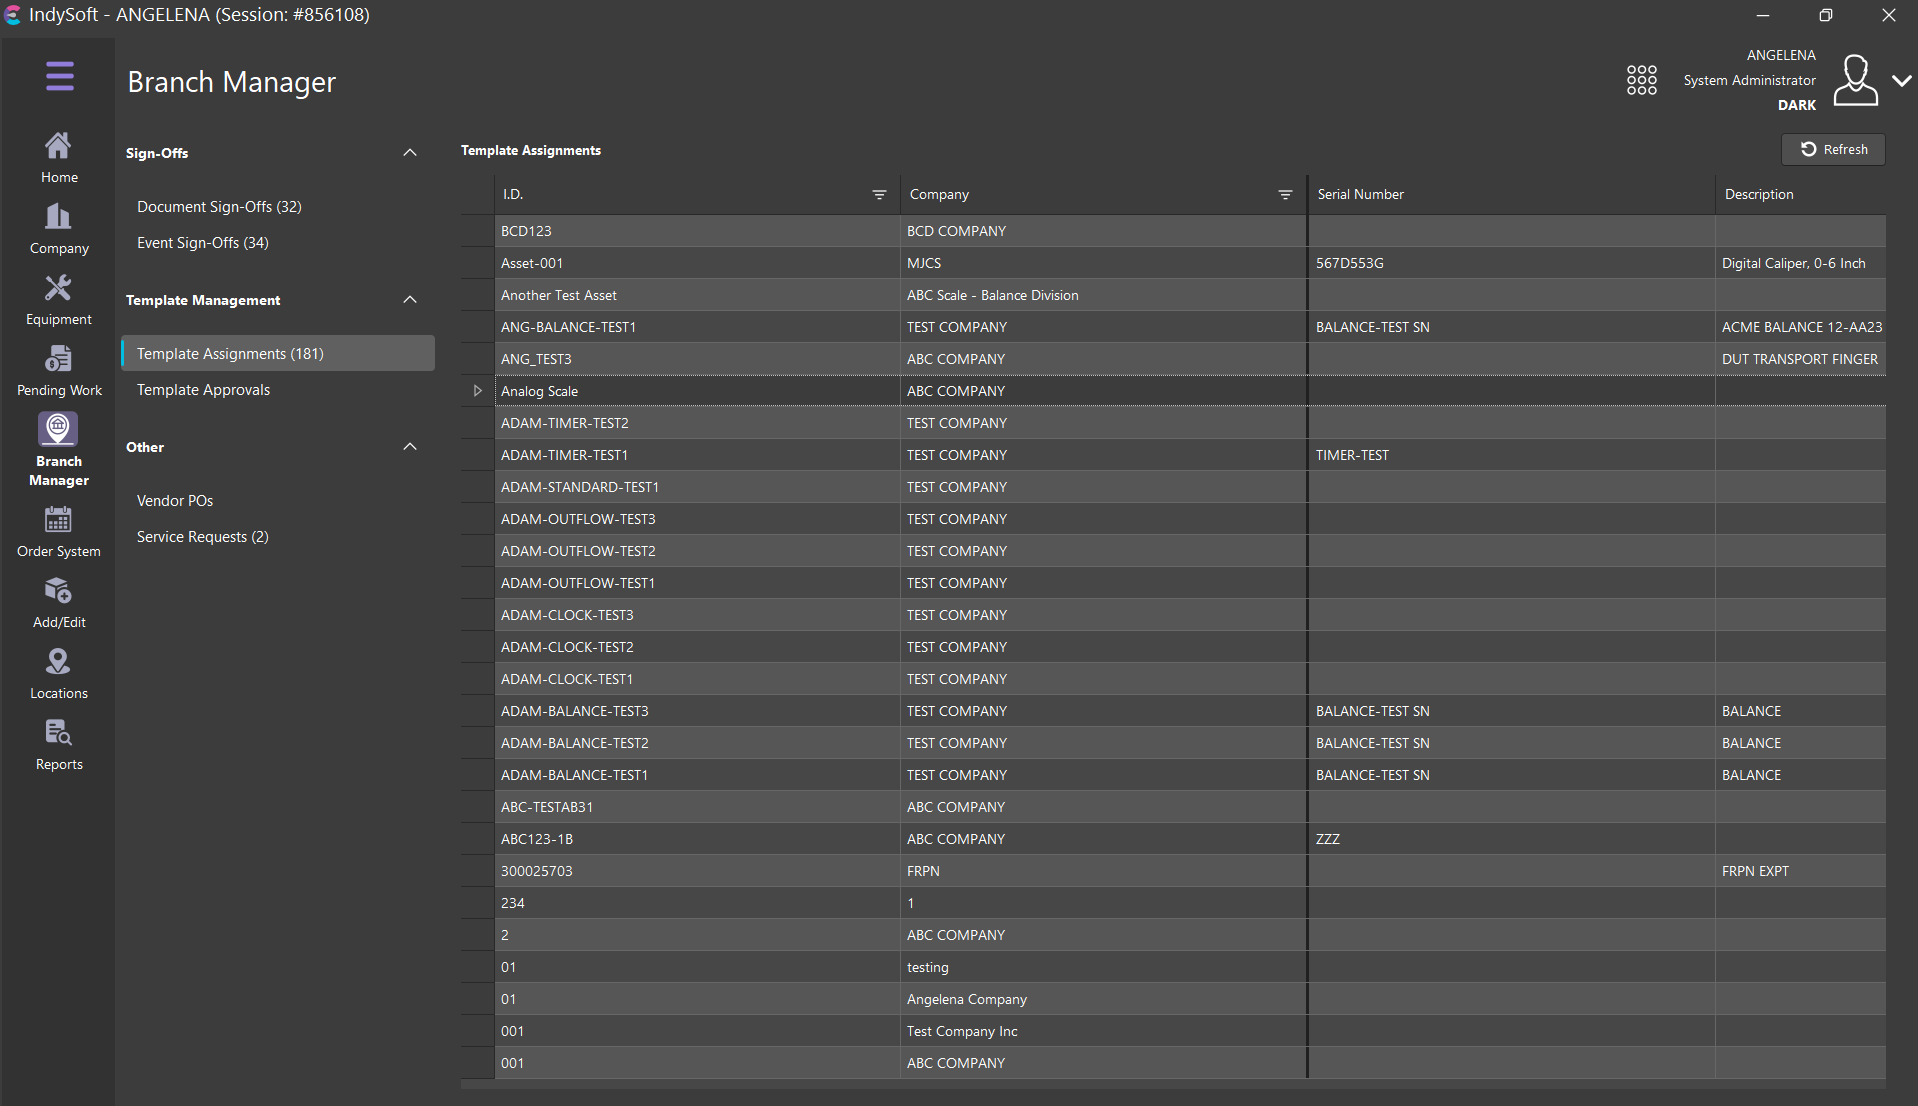
Branch Manager Tab - Template Assignments
Note that only the first 500 assets are shown in the grid by default. This is to speed up the load of the grid. If more than 500 assets are awaiting assignment, you will see the total # listed above the grid, in the format: 'xxx total, top 500 shown below'. When the grid is filtered only to show the first 500 items, you will also note a 'Show All' button above the grid. Press this to force the selection of all assets awaiting template assignment - this operation might take several seconds to complete. Two possible functions can occur when the user double-clicks on an item in the grid. These two possible operations can be toggled from a right-mouse click option in the grid:

Template Assignments Grid - Right-Mouse Click Options
·Launch Template Links Dialog (Option): Select this option if you prefer to launch the Template Links dialog for the selected asset upon grid double-click (or button/menu selection of same option). The template can be quickly selected from this Template Links dialog. This method is typically preferred if you do not need to review the equipment from the Equipment View first.
·Find Asset In Equipment View (Option): Select this option if you prefer launching the Equipment View tab for the selected asset upon grid double-click (or button/menu selection of same option). This method is typically preferred if you must review equipment details before associating the equipment to a template from the Template Links Dialog.
·Refresh Template Assignments: Refreshes the grid contents. This option is also available from a button above the grid.
·Launch Template Links Dialog (or Find Asset In Equipment View): This option will launch the Template Links Dialog for the selected asset. This option is also available from a button above the grid. Note that this option (and matching button) will only be available if the 'Launch Template Links Dialog (Option)' above is selected; otherwise, the option will be 'Find Asset In Equipment View.'
·Print Grid: See Print Grid (Preview) for more details
·Export To...: See Export To Options - Grids for more details
·Grid Setting: See Grid Customization for more details
Finally, you will note that the Template Assignments grid will automatically re-populate as template assignments are made from the Template Links dialog.
Template Approvals
This section displays a listing of all templates awaiting approval. For more information on the Template Approval process in Template Editor, see Template Approvals. By default, only Required Template Approvals are shown. If you prefer to see non-required approvals mixed into the listing - uncheck the 'Required' box above the grid. Each Template Approval Rule that is still outstanding is listed in a subgroup underneath the related template.
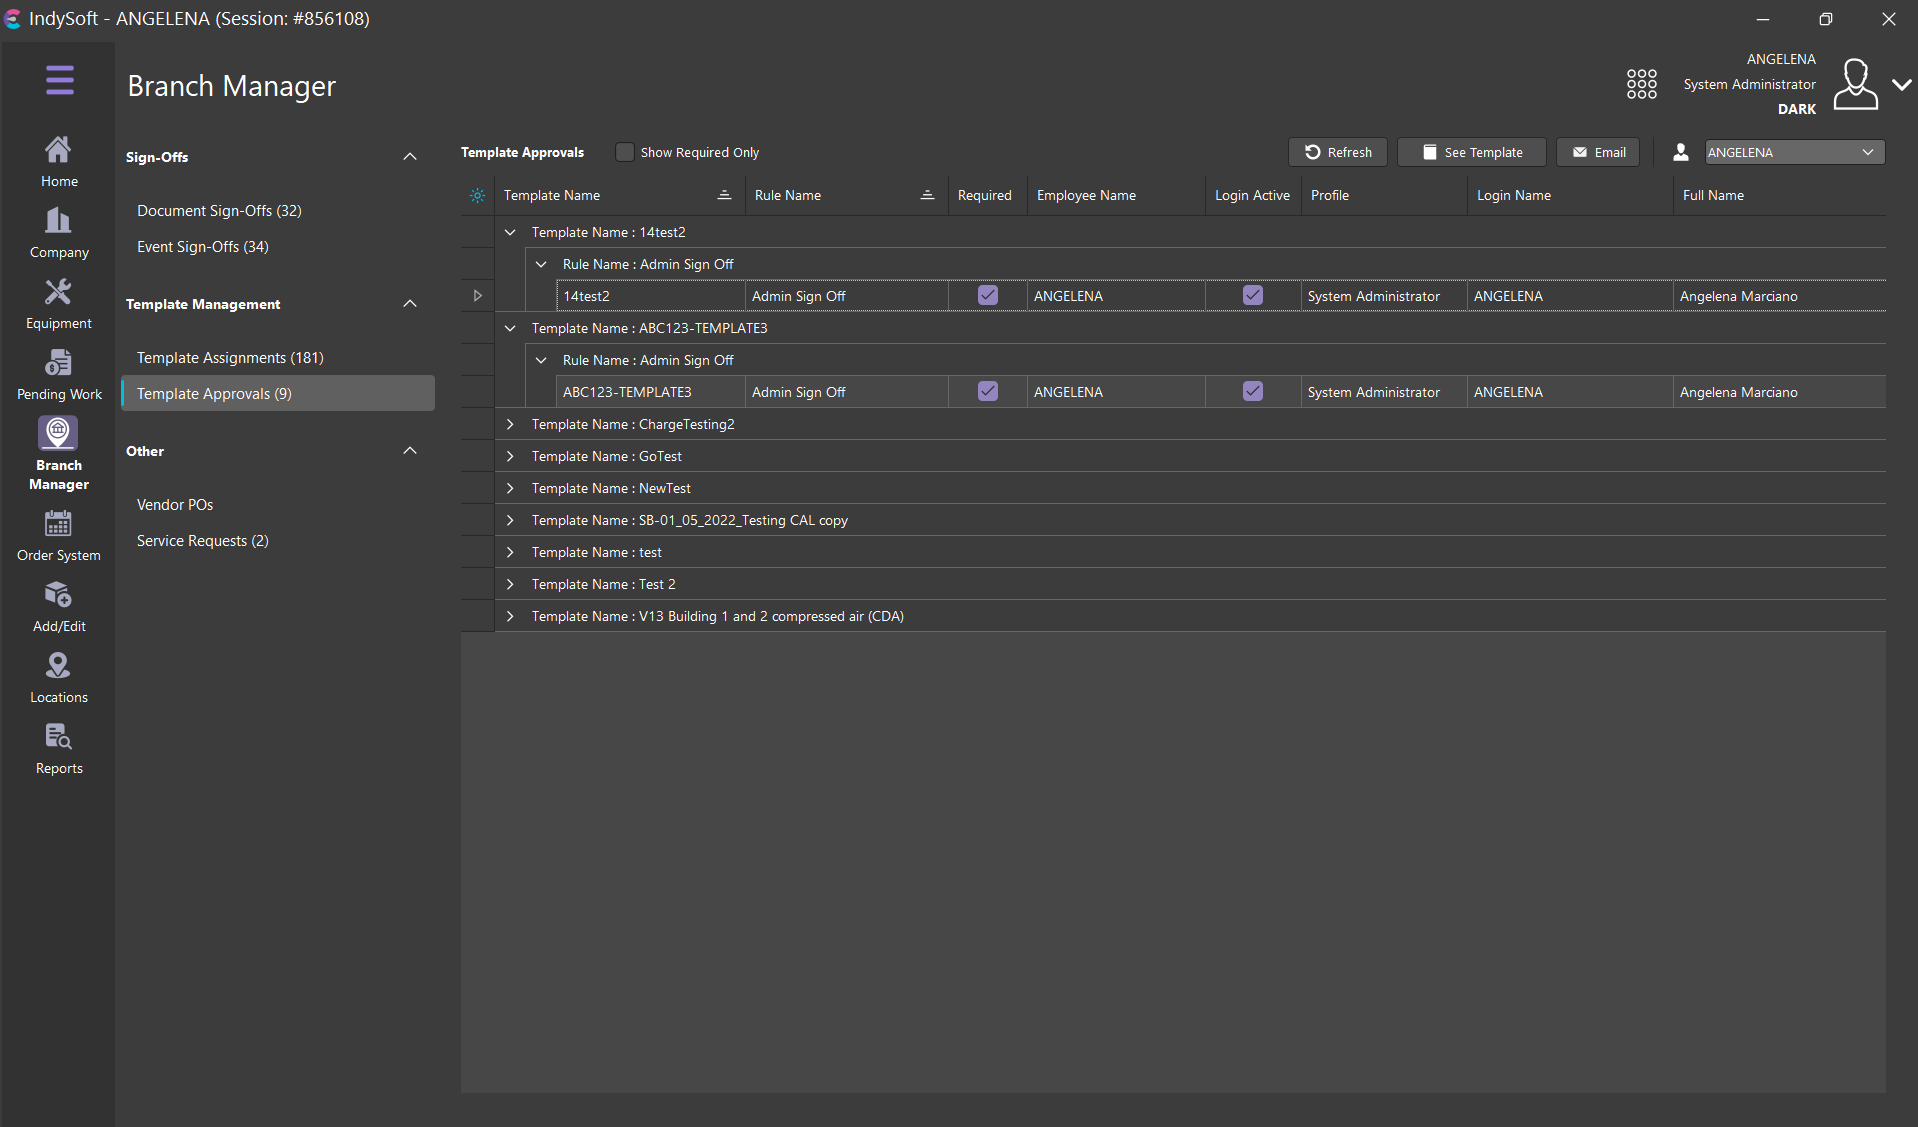
Pending Work Tab - Template Approvals
The pending approvals shown in the grid are filtered by the employee selected above the grid on the right. Typically, this filter is applied to the employee matching the current login - since that user would most readily be performing the approvals. However, a manager could select other employees to review the pending work. Or, the top 'All' selection could be made from the Employee drop-down to remove the employee filter. Double-clicking on a template requirement record in the grid will automatically launch Template Editor (if not already running) and locate the selected template. The Template Approval can then be performed from within Template Editor (after review of the template). There are three buttons above the grid:
![]() Send Reminder EMail - this button will create a reminder email to send to the employee associated with the selected approval in the grid. The reminder email will be first displayed in a preview window (if allowed by current EMail preferences). This operation is also available through a right-mouse click option in the grid.
Send Reminder EMail - this button will create a reminder email to send to the employee associated with the selected approval in the grid. The reminder email will be first displayed in a preview window (if allowed by current EMail preferences). This operation is also available through a right-mouse click option in the grid.
![]() Refresh Pending Template Approvals - this button will refresh the grid's listing of templates pending approval. This operation is also available through a right-mouse click option in the grid.
Refresh Pending Template Approvals - this button will refresh the grid's listing of templates pending approval. This operation is also available through a right-mouse click option in the grid.
![]() Goto Template - this button will automatically launch the Template Editor (if not already running) and locate the selected template. This operation is also available through a right-mouse click option in the grid.
Goto Template - this button will automatically launch the Template Editor (if not already running) and locate the selected template. This operation is also available through a right-mouse click option in the grid.
Right-mouse click options in the grid also allow for quickly expanding or collapsing all pending template approvals.
Vendor POs
The Vendor PO tab allows the user to add, remove, and manage orders for parts from their vendors. Massive improvements were made in version 13 to the vendor PO system. The pending work view was also improved as one can quickly click and view the vendor PO status AND can now see the related repair parts for that PO in the bottom detail section.
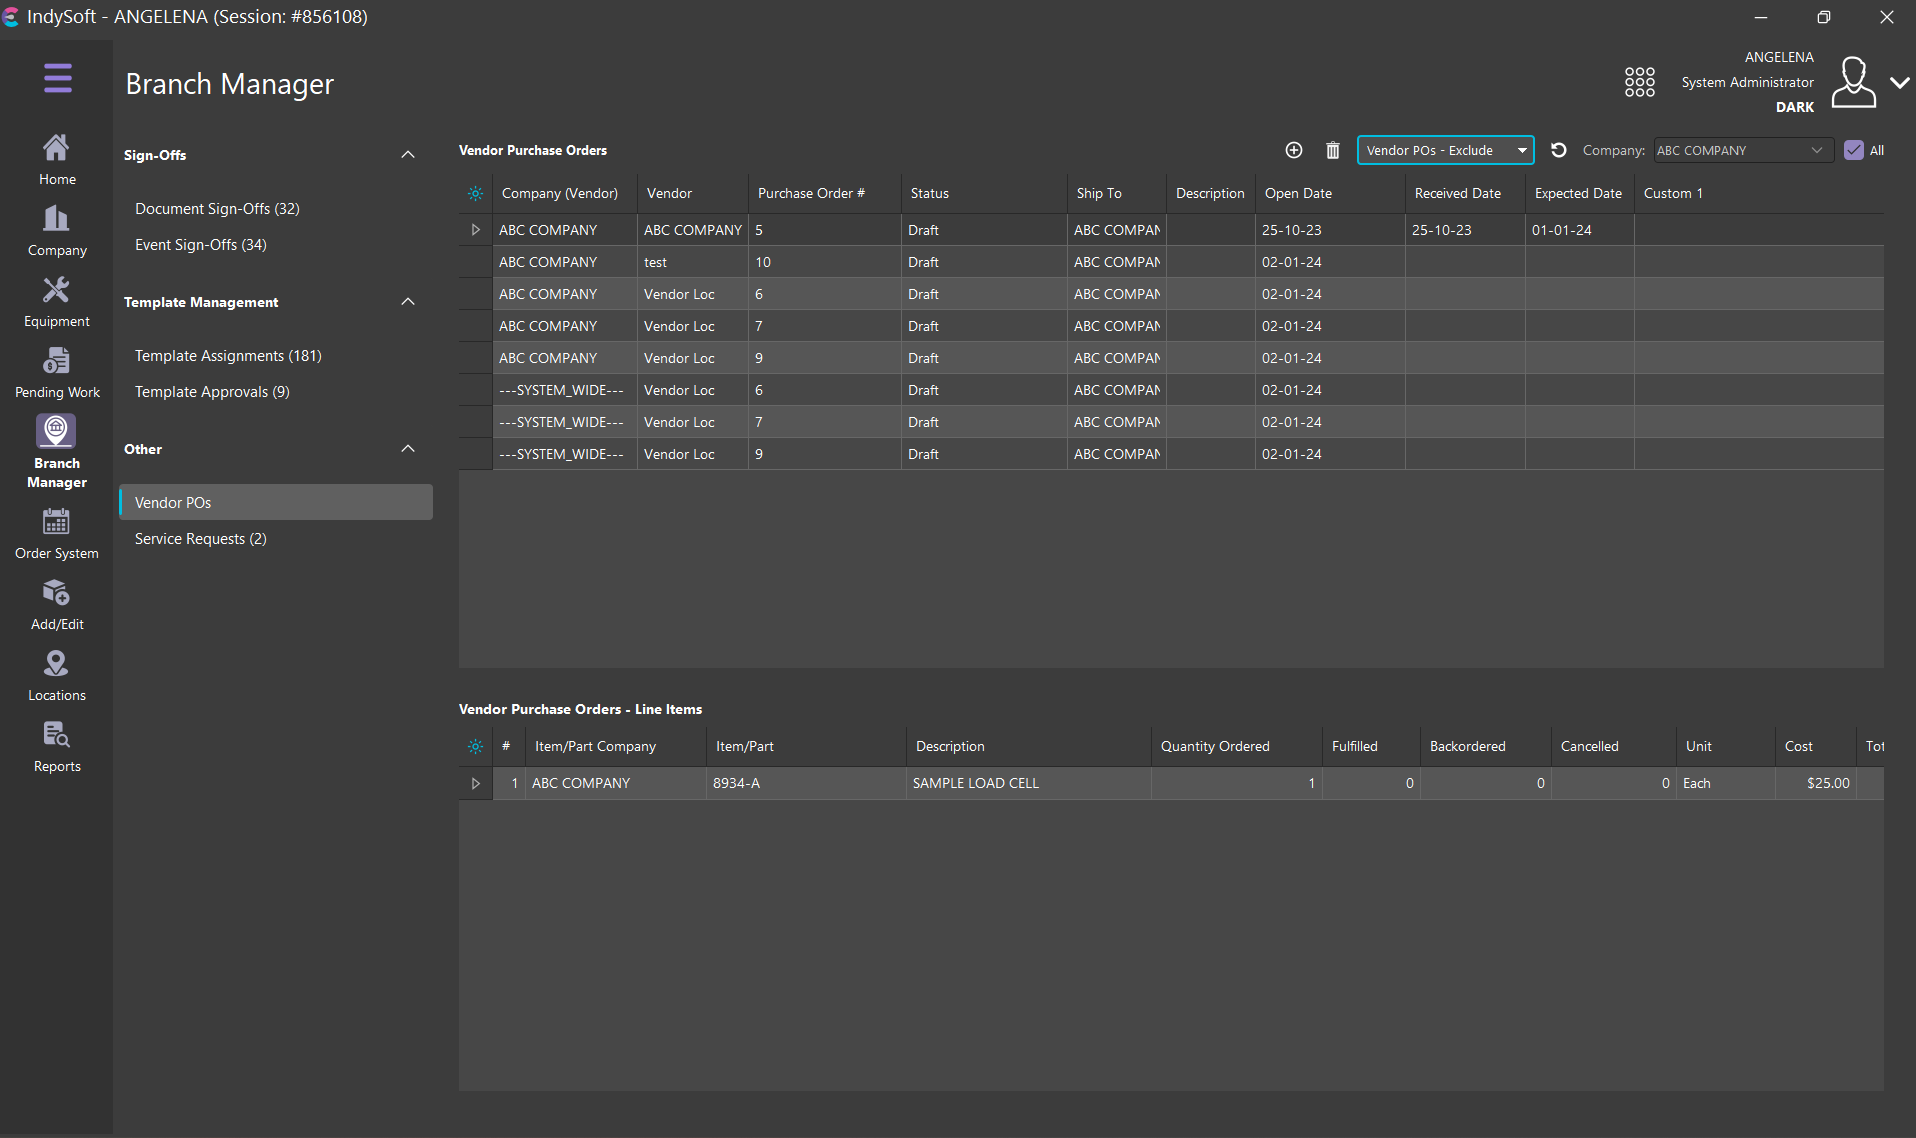 Pending Work Tab - Vendor POs
Service Requests
The Service Requests tab relates back to Service Requests that are setup through the Add/Edit Company dialog. Only requests that have a status of 'Service Requested' will show in the grid of this tab. The user can also sort by branch by using the dropdown in the top-right-hand corner of the grid.
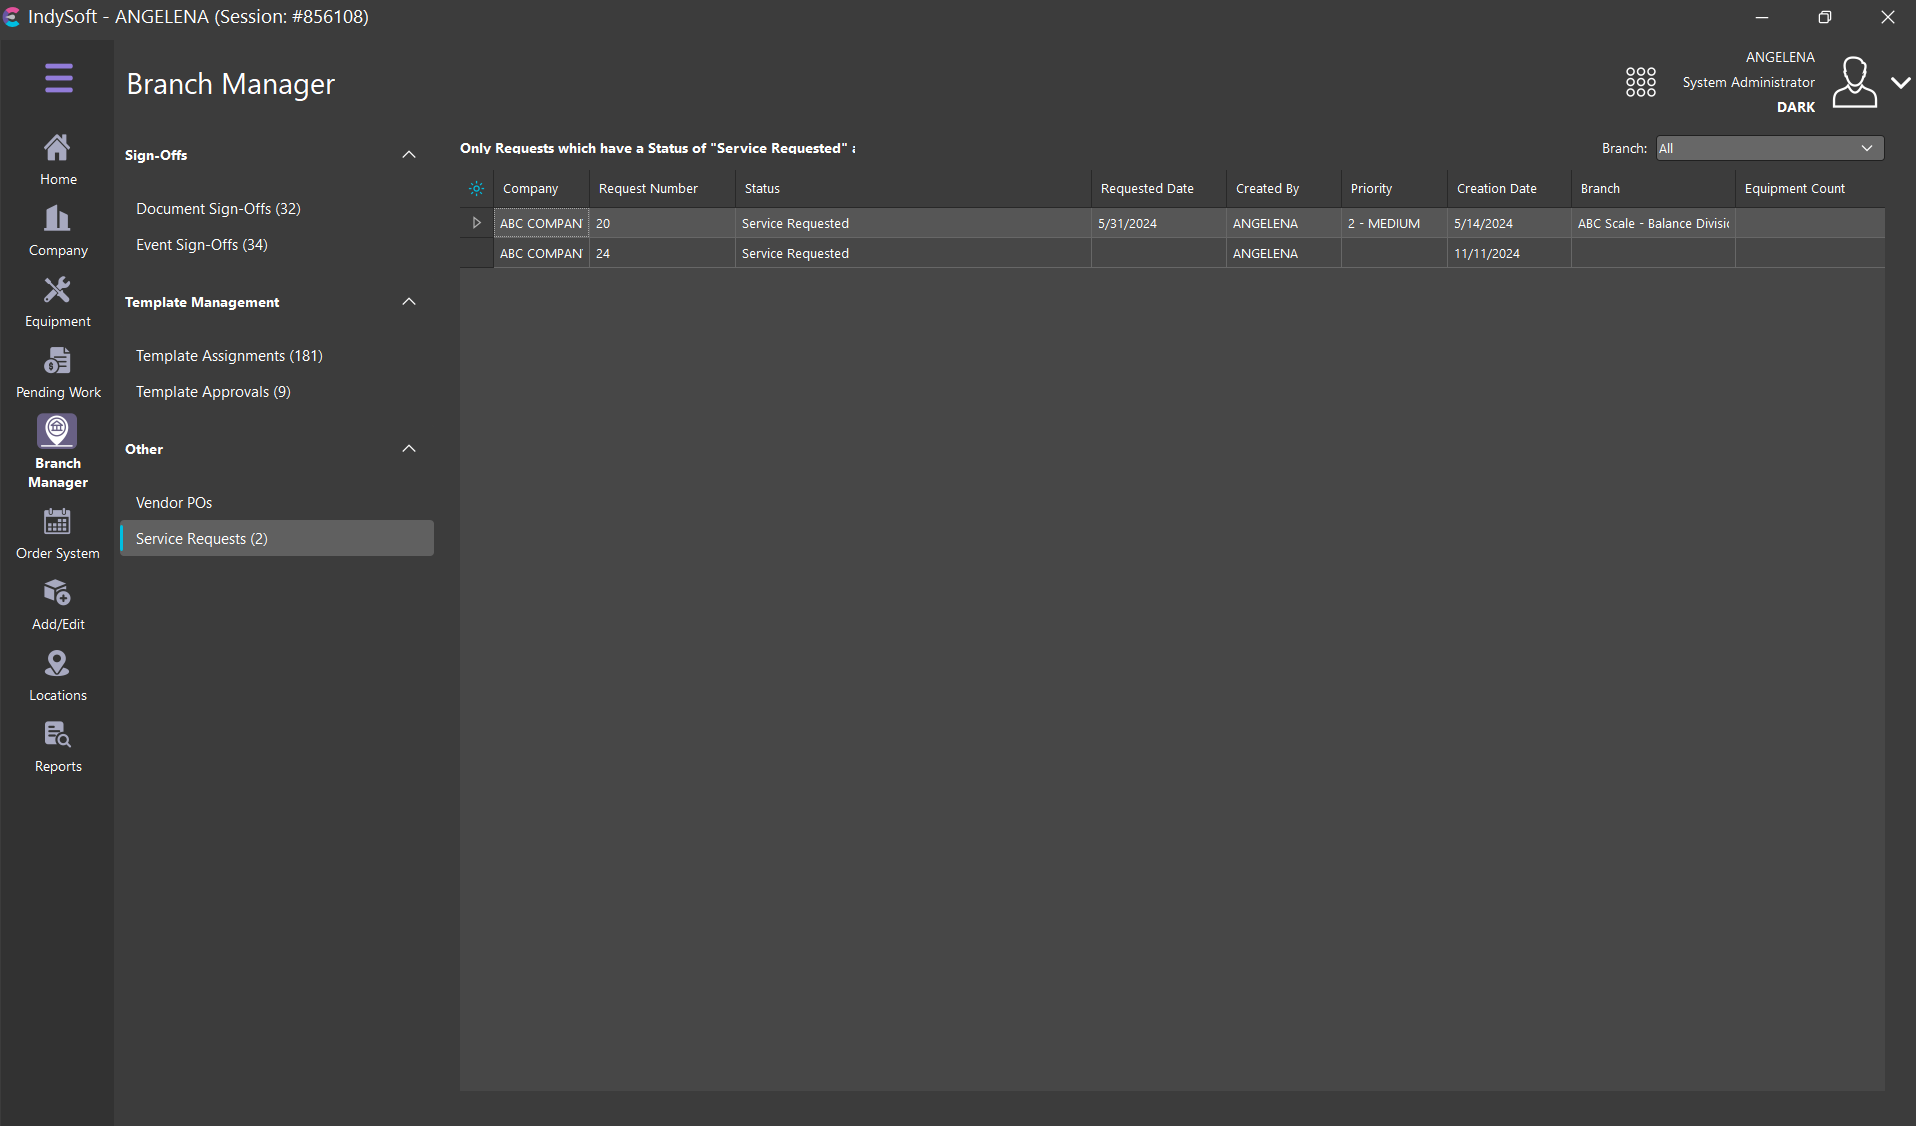 Pending Work Tab - Service Requests
For more information, please see the dedicated Service Requests section.