Add/Edit...Parts...Service/Repair Parts
Service/Repair parts can be maintained per Company. Each Service/Repair part can store inventory information, including quantity on hand, re-order points, manual changes to inventory, references to event-based changes to inventory, associated equipment, vendor information, etc. Links to Service/Repair parts can also be maintained from the main screen's 'Associations' Tab (Service/Repair Parts view). When the Service/Repair Parts add/edit is viewed, a grid displays all Service/Repair parts belonging to the Company selected at the top of the dialog.
Add/Edit Service/Repair Parts
To add to or manage the Service/Repair list, in the IndySoft header, click Add/Edit and select Parts...Service/Repair Lists from the drop-down menu.

Add/Edit Service/Repair Parts Dialog
Ensure you're in the correct Company before adding Service/Repair Parts.
![]() Add a 'New Item'
Add a 'New Item'
![]() To 'View/Edit Item' (Sort by clicking the header above the column)
To 'View/Edit Item' (Sort by clicking the header above the column)
![]() Delete selected item
Delete selected item
![]() The 'Find Item' Icon will allow you to search for a part by its starting characters
The 'Find Item' Icon will allow you to search for a part by its starting characters
![]() This icon allows you to clone the highlighted part in the grid
This icon allows you to clone the highlighted part in the grid
![]() Clicking this icon will open an Advanced Search dialog that will allow you to filter your search
Clicking this icon will open an Advanced Search dialog that will allow you to filter your search
![]() Prints the current grid
Prints the current grid
![]() This icon gives you the following options:
This icon gives you the following options:
Merge this Add/Edit List Into Other Companies
This will add the Manufacturers in this list to another company's list
Replace this Add/Edit List Into Other Companies
This will delete the other Company's Manufacturers' list and populate their list with this one
![]() Productivity Tip
Productivity Tip
The Add/Edit Service/Repair Parts dialog box can be filtered and customized in many ways. See General Interface for more information.
Buttons and Icons are detailed here.When clicking New or View/Edit, the following will launch:
Service/Repair Parts
Service Repair Parts
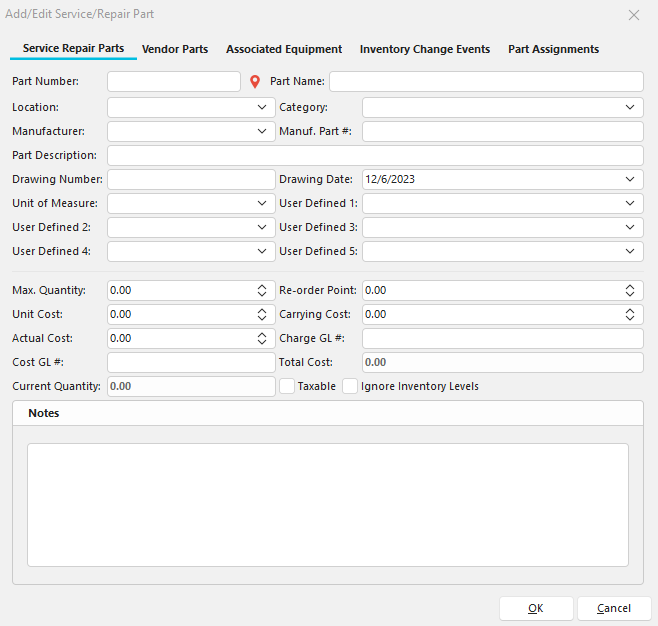
Add/Edit Service/Repair Part Step 1
This first wizard step allows for the entry of basic part information, including manufacturer information, drawing references, and inventory information:
Part Number
The unique name of this Service/Repair part - limited to 30 alphanumeric characters. Clicking this ![]() icon will give you Auto Numbering options.
icon will give you Auto Numbering options.
Part Name
A non-unique additional identifier for this Service/Repair part - limited to 30 alphanumeric characters.
Location
The current or storage location for this Service/Repair part. Items are available from the Add/Edit...Locations list.
Category
Simple text field available for misc. category specification
Manufacturer
Manufacturer of this Service/Repair part. Items are available from the Add/Edit...Manufacturers list.
Manuf. Part #
Model Number of this Service/Repair part. Options are constrained by the Manufacturer selected to the left. Items are available from the Add/Edit...Model Numbers list.
Part Description
Extended description of this Service/Repair part - limited to 40 alphanumeric characters.
Drawing Number
Reference number for any external document file or drawing.
Drawing Date
The date associated with the Drawing Number selected to the left.
Unit of Measure
Standard Unit of Measure for this Service/Repair part. Items are available from the Add/Edit...Units of Measure list.
5 User Defined Fields
These fields can be used for additional information. See User-Defined 1-5.
Max. Quantity
The total # of items that can be stored for this Service/Repair at any time. If you attempt to perform a manual inventory adjustment event (step 3 in the wizard), that will cause the 'Current Quantity' to exceed this 'Max. Quantity'. You will first be alerted and asked if you would like to proceed.
Re-Order Point
Suppose the 'Current Quantity' is equal to or less than this 'Re-Order Point,' either as the result of a Manual Inventory Change (Step 3 in the wizard) or as the result of a Service/Repair part selection during an IndySoft event. In that case, the user will be alerted that they have fallen below (or met) the re-order point.
Unit Cost
The cost of each service/repair part. This unit cost will be added to the carrying cost and multiplied by the 'Current Quantity' to calculate the 'Total Cost.'
Carrying Cost
The cost of carrying this service/repair part in inventory. This carrying cost will be added to the unit cost and multiplied by the 'Current Quantity' to calculate the 'Total Cost.'
Current Quantity
Quantity of items currently in inventory.
Total Cost
The total cost of the items currently in inventory. The unit cost is added to the carrying cost and multiplied by the current quantity to calculate the Total Cost.
Taxable
If the part is taxable, check the box.
Ignore Inventory Levels
Leave it unchecked if you want IndySoft to track inventory levels for this part.
Notes
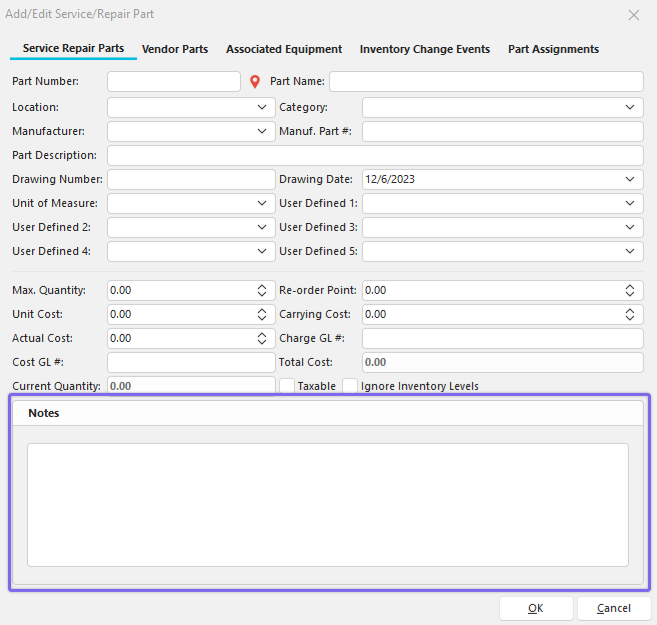
Add/Edit Service/Repair Part Step 2
Service/Repair Parts notes can be stored in this step.
Vendor Parts
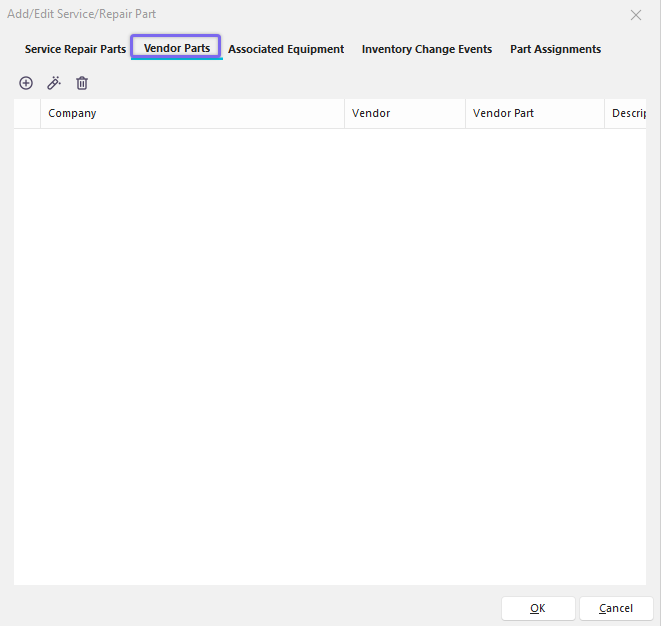
Add/Edit Service/Repair Part Step 3
Step 3 gives you the option to store Vendor Parts. Click ![]() 'New Item' to add a new Vendor Part or
'New Item' to add a new Vendor Part or ![]() to 'View/Edit Item.' (Sort by clicking the header above the column)
to 'View/Edit Item.' (Sort by clicking the header above the column)
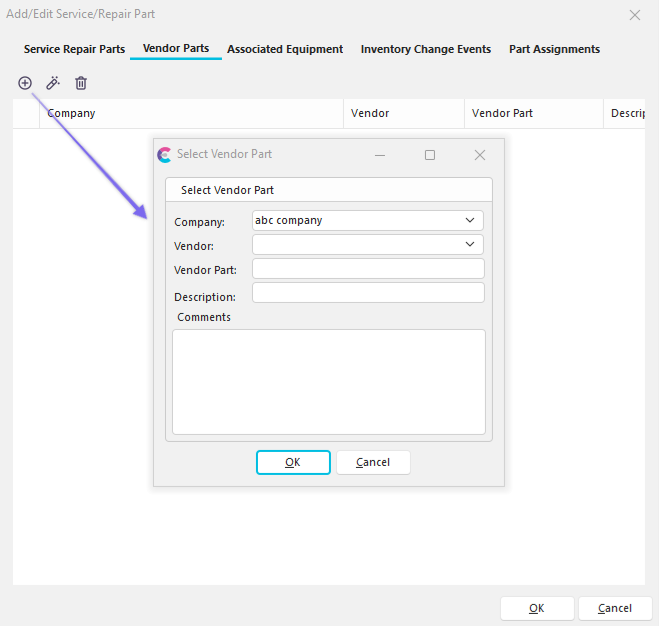
Select Vendor Part
Associated Equipment
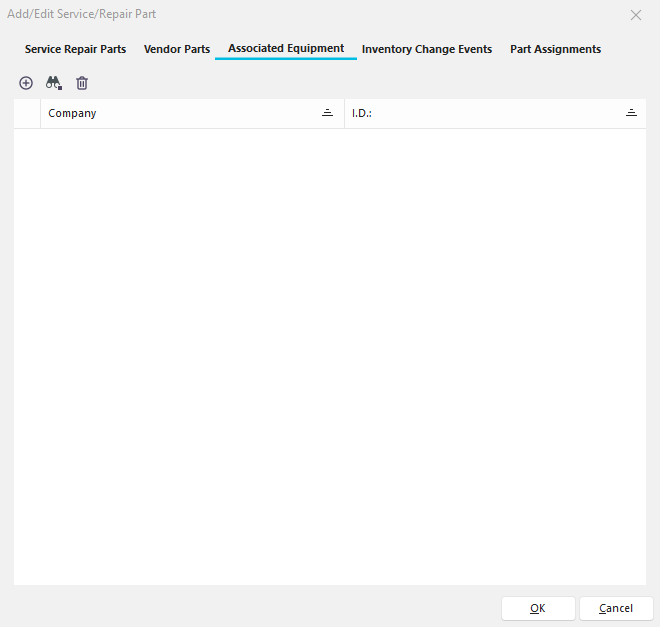
Add/Edit Service/Repair Part Step 4
Step 4 in the Service/Repair parts wizard allows for the viewing/selection/deletion of associated equipment. The equipment listed in the grid corresponds to the equipment with this Service/Repair part selected as a default Service/Repair part on the Equipment View Tab...Details...Repair Parts in Dashboard. Both screens (Dashboard and Step 4 above) show the same linkage but from an opposite perspective. From the Dashboard Main Screen, you see the various Service/Repair Parts appropriate for one piece of equipment. In the Service Repair Parts Wizard Step 4, however, you see the various pieces of equipment that are appropriate for one Service/Repair part. Adding/removing links from either screen will affect the items displayed in both 'views.' Note : Supporting documentation can only be viewed from the Dashboard Main Screen.
3 options are available at the top of Step 4 - Service/Repair parts:
![]() Add Associated Equipment
Add Associated Equipment
This button will pop up a simple dialog for selecting a single piece of equipment by Company and ID. As a result of this link, this Service/Repair part will now be listed as a default Service/Repair part for the selected piece of equipment. Default Service/Repair parts are available for quick selection during a Service/Repair event.

Add Associated Equipment
![]() Click to search for a part by 'ID' in a selected company.
Click to search for a part by 'ID' in a selected company.
![]() Add Associated Equipment from EquipmentFinder
Add Associated Equipment from EquipmentFinder
This button will pop up the EquipmentFinder screen, allowing the quick selection of a group of gages. For more information, see the EquipmentFinder section. After selecting the appropriate equipment, press the 'Add' button in the upper-right-hand corner of EquipmentFinder. This will add an equipment link (like the 'Add Associated Equipment' button) for each selected equipment in EquipmentFinder. This option is preferable if you add multiple items simultaneously or according to a generalized rule. For instance, this service/repair part should be associated with all equipment where 'Company is (exactly) ABC COMPANY' and 'Manufacturer is (exactly) ACME' and 'Model Number is (exactly) 'MD2343'.
![]() Delete Associated Equipment
Delete Associated Equipment
This button will delete the selected associated equipment from the grid.
Inventory Change Events
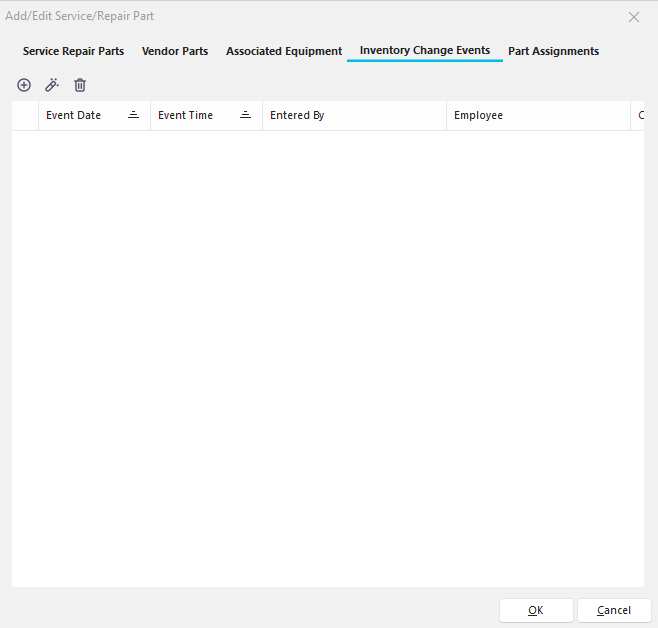
Add/Edit Service/Repair Part Step 5
This step allows for creating and viewing inventory change events for the selected service/repair part. These inventory change events can be of two different types. First, inventory can be added or removed by performing a manual inventory change event (from the buttons above the grid). These items are marked as checked in the 'Manual' grid field. Other items are added to the grid due to IndySoft events (as launched from the Main Screen...Events menu) that include a 'Labor/Repair Items' event tab and the selection of this Service/Repair part. If so, then the appropriate quantity of Service/Repair parts was removed from inventory to perform this IndySoft event, and this deduction is noted as a non-Manual inventory change event in the grid.
3 options are listed above the 'Inventory Change Events' grid:
Change Inventory Event (Manual)
![]() This button will popup the dialog shown below to manually modify the current quantity of items for the selected Service/Repair part:
This button will popup the dialog shown below to manually modify the current quantity of items for the selected Service/Repair part:
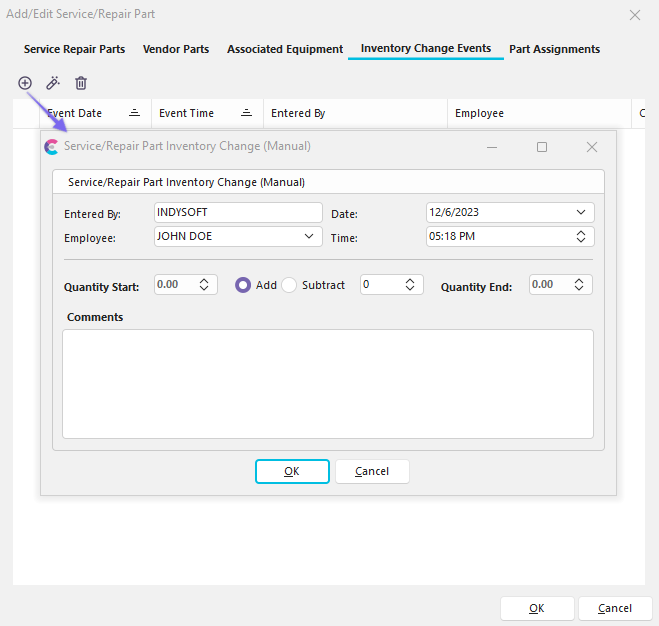
Step 5 - Service/Repair Part Inventory Change (Manual)
This screen allows for a simple event to be created that logs an addition or subtraction to the current quantity of service/repair items. 8 fields are listed:
Entered By
This read-only field lists the user name responsible for the change (the user logged into the workstation performing this event.)
Date
The date this inventory change was performed. The event will begin with the current date as the default.
Employee
The employee making the inventory adjustment. The event will default to the employee associated with the default 'Entered By' user name, as linked in Profile Manager.
Time
The time this inventory change was performed. The event will begin with the current time as the default.
Quantity Start
This read-only field lists the number of items available at the event's start (for historical records).
Add/Subtract Quantity
The amount of items added or removed from inventory.
Quantity End
The resulting quantity (for historical record) - read-only.
Comments
And miscellaneous comments explaining this inventory change and extra details.
When this event is confirmed, the 'Current Quantity' and 'Total Cost' fields in Step 1 of the 'Service/Repair parts' wizard will automatically be adjusted, and the user will be alerted if the resulting quantity is either equal/less than the Re-Order Point or above the Max. Quantity.
View Selected Change Inventory Event
![]() This button is equivalent to double-clicking inside the grid. The resulting operation will vary depending on whether the selected item is a 'Manual' inventory change. If the selected item is a 'Manual' inventory change, the Inventory Change dialog will pop up, as described above. If the item chosen is a non-Manual inventory change (the result of an IndySoft event), then the Service/Repair Parts add/edit will be closed, and the appropriate IndySoft gage and event will be selected on the main screen.
This button is equivalent to double-clicking inside the grid. The resulting operation will vary depending on whether the selected item is a 'Manual' inventory change. If the selected item is a 'Manual' inventory change, the Inventory Change dialog will pop up, as described above. If the item chosen is a non-Manual inventory change (the result of an IndySoft event), then the Service/Repair Parts add/edit will be closed, and the appropriate IndySoft gage and event will be selected on the main screen.
Delete Selected Inventory Change Event
![]() This button will permanently remove inventory change events from the database (after confirmation). Note : Deleting these inventory change events will not re-calculate the 'Total Quantity' or 'Total Cost' fields in Step 1. Also, deleting a non-Manual Inventory Change event will not delete (or modify in any way) the original IndySoft event that caused the inventory change.
This button will permanently remove inventory change events from the database (after confirmation). Note : Deleting these inventory change events will not re-calculate the 'Total Quantity' or 'Total Cost' fields in Step 1. Also, deleting a non-Manual Inventory Change event will not delete (or modify in any way) the original IndySoft event that caused the inventory change.
Group Type
The Group Type section has a drop-down of Employee, Location, and Group. The Employee and Location fields will pull in their respective Add/Edit list in Group Name.
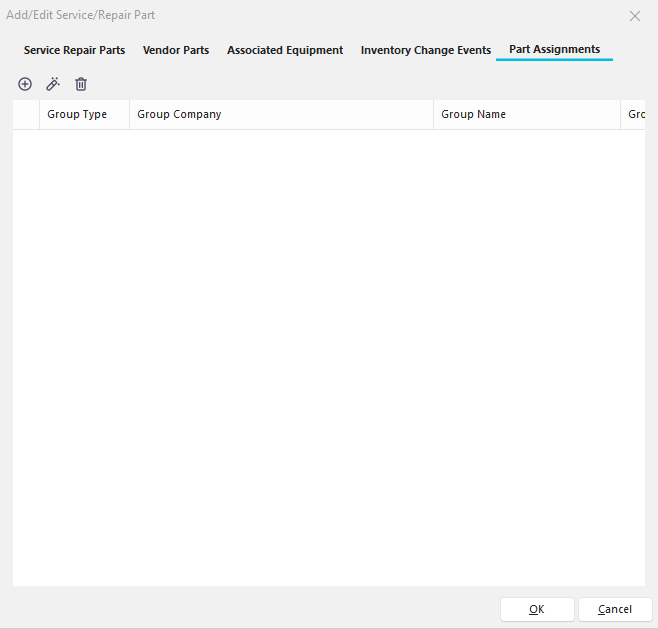
Add/Edit Service/Repair Part Step 6
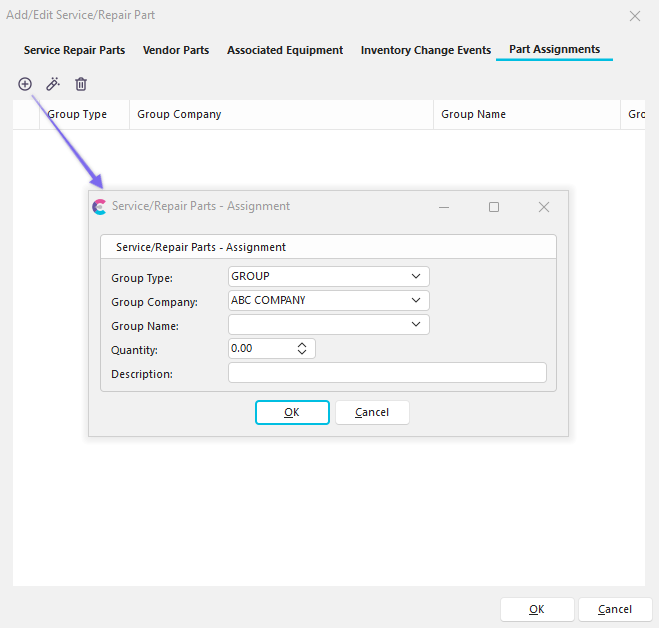
Add New Part Assignment
Note : To add to the Group Type - GROUP, go to Add/Edit-> Parts-> Service/Repair Parts List-> Area Assignments
For more information on selecting Service/Repair parts during an IndySoft event, see the Event Tabs - Choose Service/Repair Parts and Labor topic.
Press 'Finish' to complete the wizard. |