Attributes
The attributes dialog/tab displays 'extended' attributes set up as in the Add/Edit...Attributes...Attribute Types wizard. Attribute Types allow IndySoft users to define a set of equipment fields and give them a common name. These equipment fields are only displayed when an asset has this attribute type selected. For instance, say you have dimensional equipment and electronic equipment in your database. You could create two attribute types, one named 'DIMENSIONAL' and another 'ELECTRONICS,' then define each field. The 'DIMENSIONAL' attribute type might have fields like 'LENGTH,' 'WIDTH,' 'SIZE' and the 'ELECTRONICS' attribute type might have fields like 'FREQUENCY,' 'CURRENT,' etc. So for each asset in the database, you can select one or the other attribute type, and only the appropriate fields will display. This concept can be extended to as many attribute types as are required - so IndySoft users have thousands of attribute types - and many IndySoft users configure a single 'DEFAULT' attribute type.
When configuring an attribute type, there are two different groups of fields:
1) Header Attribute Fields
2) Extended Attribute Fields
See the two sections below for more details.
Header Attribute Fields
Header Attribute Fields are set up in the Add/Edit...Attributes...Attribute Types wizard's Step 2. There are 8 text attributes that can be made visible with custom captions and 8 numeric attributes that can be made visible with custom captions. Also, a 'Resolution' field and a 'Unit of Measure' field can be shown. Numeric header attributes can each have a custom resolution. Header attribute fields are always displayed together.
In the Dashboard main screen header attributes can be displayed through the '!EQUIPMENTATTRIBUTES-DATA!', '!EQUIPMENTATTRIBUTES-CAPTIONS!', and '!EQUIPMENTATTRIBUTES-ALL!' hyperlinks (see Equipment Fields for more details). Typically these fields are displayed together in a table cell or adjacent cells:
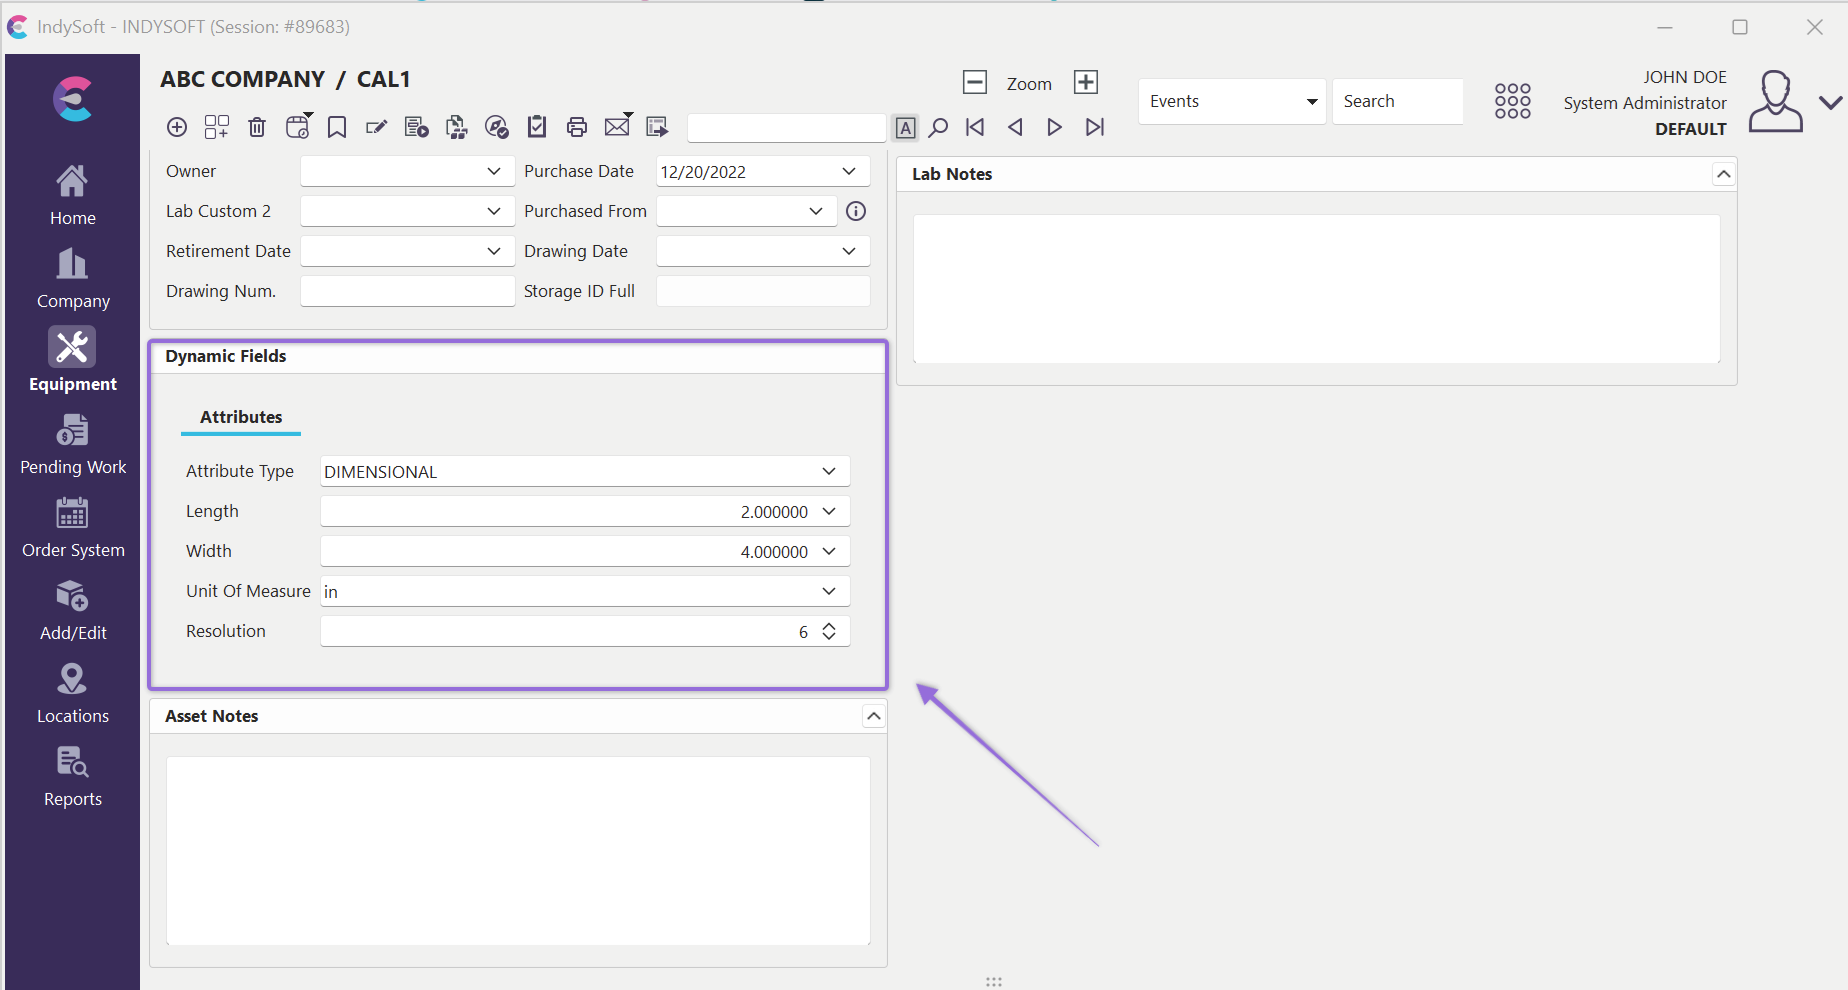
Example - Dashboard Equipment View - Header Attributes
Extended Attribute Fields
Step 3 in the Add/Edit...Attributes...Attribute Types wizard allows users to set 'extended' attributes. Each attribute type can have an unlimited number of these extended attributes. Also, the type of each extended attribute is more flexible (as compared to header attribute fields, which are always either text or numeric). Extended attribute fields can be one of 25 different field types, including text, numeric, date, time, memo, and many common drop-down lists in IndySoft. These extended attributes are displayed on the 'Attributes' tab/dialog. The extended attributes data can be displayed in either 'Card View' or 'Grid View' - examples below:
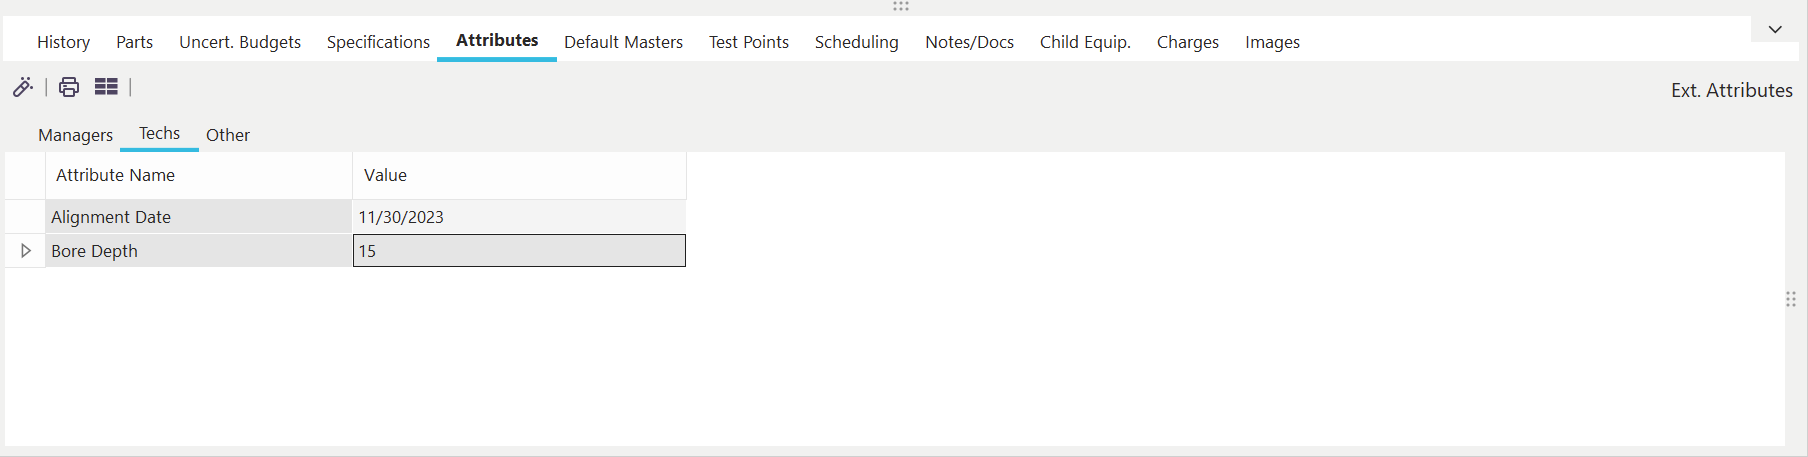
Example - Grid View on Attributes Dialog/Tab
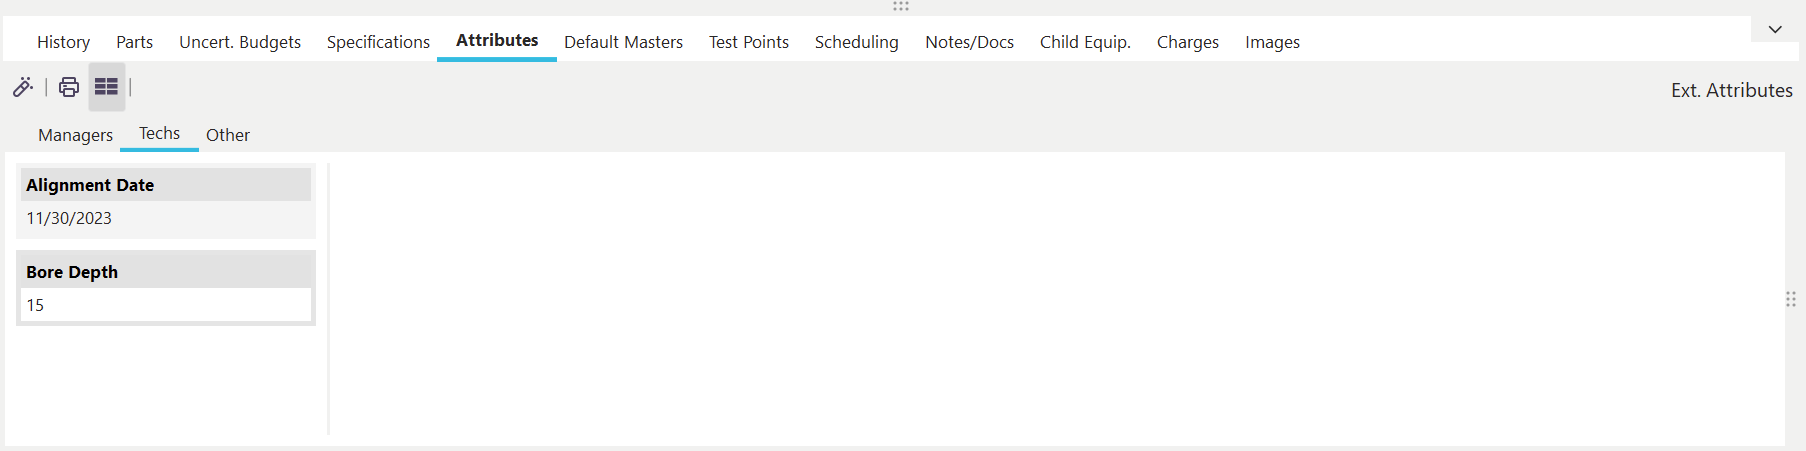
Example - Card View on Attributes Dialog/Tab
Several buttons are available above the grid or card view:
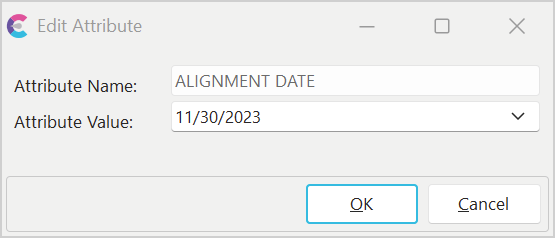
![]() View/Edit Attribute:
View/Edit Attribute:
Use this button to edit the currently selected attribute (card or grid record). You can also edit by double-clicking on any attribute. You will see a small dialog in the format below when editing the attribute. The interface for the 'Attribute Value' edit will vary depending on the attribute type (drop down, calendar, numeric spin edit, calculator, etc.):
![]() Print Data:
Print Data:
Use this option to print the card view or grid, as appropriate. See Print Grid (Preview) for more details.
![]() Toggle Card View / Grid View:
Toggle Card View / Grid View:
Use this button to toggle between the two different data views of Card View and Grid View, as in the examples above. The button will display as toggled 'down' when the card view is visible and 'up' when the grid view is visible.
Keep in mind that IndySoft also allows for extended attributes within events. See Workflow Configuration - Event Attributes for more details. And each event attribute can be automatically defaulted/linked to an equipment attribute. After the event completes, the equipment attribute can be automatically updated from the event attribute. Editing extended attributes through this event/equipment link has the advantage of maintaining an audit trail of all modifications.
Note when selecting an extended attribute that is of 'Memo' type (as setup in Step 3 of the Add/Edit...Attributes...Attribute Types wizard), you will see a preview of the memo text to the right of the grid or card view:

Example - Memo Extended Attribute Type
Also, when extended attributes are configured (Step 3 of the Add/Edit...Attributes...Attribute Types wizard), each attribute can optionally be placed on a 'Group Name.' When one or more groups are set up for the current set of extended attributes you will see sub-tabs displayed below the grid or card view. Select a sub-tab to see attributes that are below that group. If an extended attribute does not have a group name (but other extended attributes do), then they will be displayed on a tab entitled '(none)':

Example - Extended Attributes with Group Names |