Upgrading TechSync Single User Workstations (to 13.0.9 and later).
This article highlights the upgrade process for TechSync workstations between major versions of 13.0.9 and later. The improvements made are intended to give end users the ability to upgrade without having to run ISUPDB.exe locally from their workstation.
Example of Major Version differences.
12.1.x to 12.2.x to 13.0.x to 13.1.x
Before upgrading, there are a couple of things which should happen first.
Before the main upgrade!
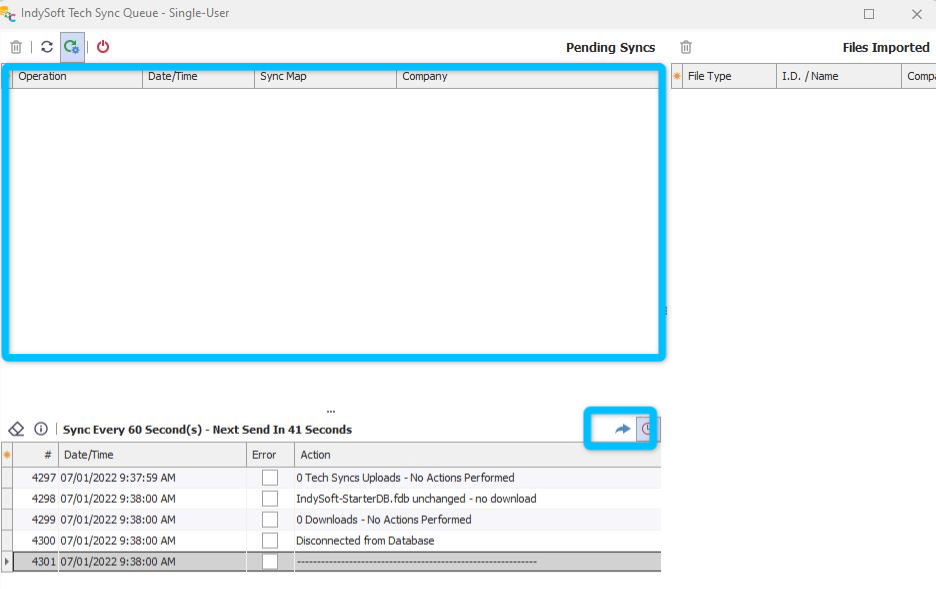
- At the end of the day before the main database upgrade is scheduled, make sure that all of your syncs have left your queue. You can check your queue by right clicking on the TechSync icon in your tray and selecting "View Sync Queue..." Once open look to see if there are any pending syncs in the queue on the left hand side. If not, then close out! You need not manually push! If there are items in the grid on the left, then press the manual sync button indicated by the arrow in the image below... It may appear differently in version 12.
Failing to accomplish this task may cause pending exports to fail in the new version. The syncs may work, but IndySoft cannot guarantee their integrity when exporting from the later version.
- Upgrading the individual Single-User workstations should only be done AFTER all of the protocols are completed on the TechSync Server. Your team should communicate with you when you should download and install the new version of the client.
Once the main database is upgraded, you can now update your local software!
1. Download and install the correct version of your IndySoft Single-User Software. Your local admin should be able to provide you with the install.
2. Log into the software like you always would! You will be logging into an older version of the database than your software. This is where we will take over! After successful login, you will receive the following message.
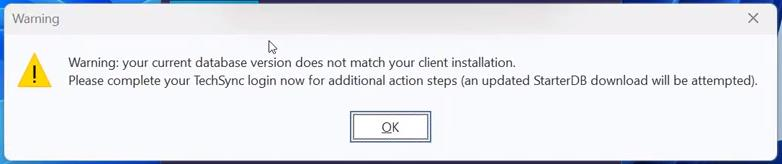
IndySoft will open the IndyTechSync.exe automatically and this will require another log in. Press "OK" in the above prompt and log into the second login which pops up.
Pro Tip: If you find this first step annoying, then simply navigate directly to the IndyTechSync.exe in the installation directory and launch and log in!
Pro Tip 2: If you find navigating to the installation directory annoying, then simply follow the initial directions and consider not complaining to yourself anymore :)
3. After logging into IndyTechSync IndySoft will do some cool stuff behind the scenes like: Download the newly upgraded/created starter database, pause pending syncs, andrealize that we need to use that database to move forward and will show you this message.
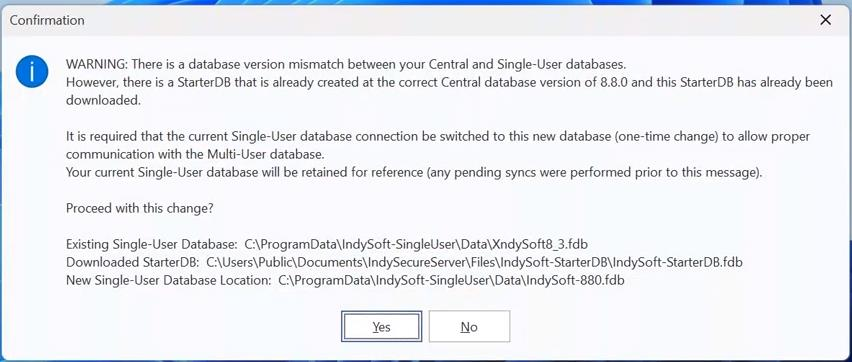
By saying "No," you will point to your former database and be required to run ISUPDB.exe from the installation directory and do it the hard way!
We highly recommend saying "Yes" because a lot of things have to intentionally happen to get you here. Remember, IndySoft will not destroy the older database, but will archive it if you need to access it in the future.
5. Create a New/Updated database with your desired companies****just like you always would from the right click option!
You did it! You are now officially upgraded.
Note.
If syncs were pending when performing this operation and the TechSync utility automatically closed after step 4. (You would know this if the icon were not visible and you could not right click to create a starter database :)) Then open up the IndyTechSync.exe from the installation directory, sign in, and then create a new database.
Installation directory is generally.
C:\Program Files\IndySoft Single-User\IndyTechSync.exe