User PIN Codes and Password Resets
User PIN codes can be utilized to give customers and other end users a quick, easy way to create other users in a specific likeness.
Several steps must take place to set up this functionality.
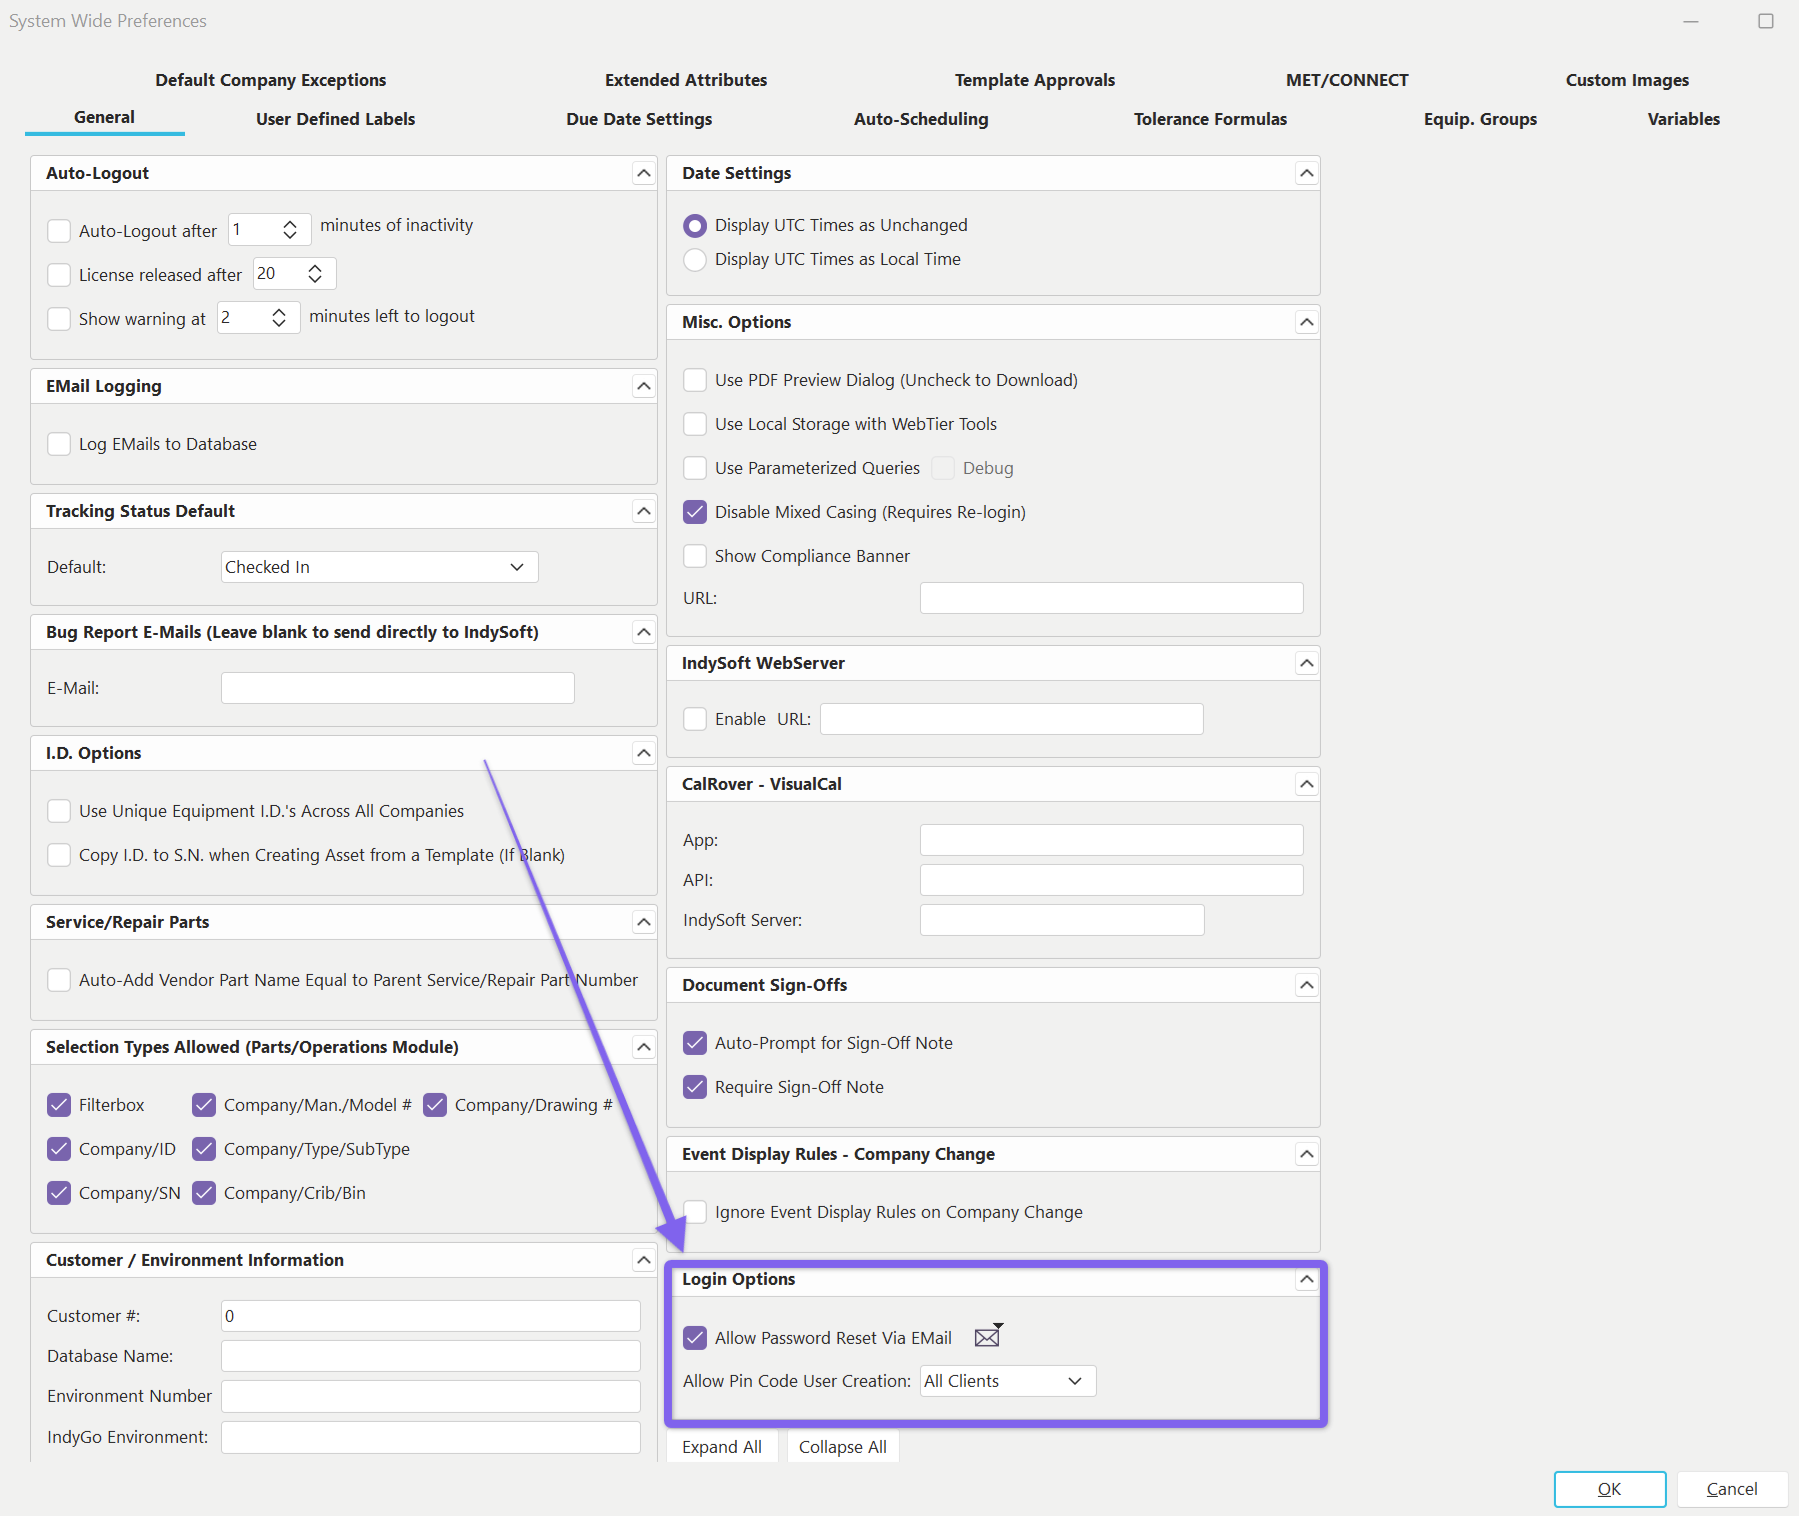
From your System-Wide Preferences, locate the "General" tab. In the lower right-hand corner, under "Login Options," either select "All Clients" or "Webtier Only" to allow Pin Code User Creation for the appropriate scenarios.
 System-wide Preferences - Login Options
You will also likely want to "Allow Password Reset Via Email."
Clicking on the Envelope option above will allow you to set the SMTP email setting, which will be utilized for the password resets and the temporary passwords new users will receive when their accounts are created from a PIN code. **IndySoft allows you to use complimentary SendGrid SMTP email settings for this purpose.**If the default SMTP settings are not working, it is likely due to an internal firewall, and you should consult your local IT professionals to assist.
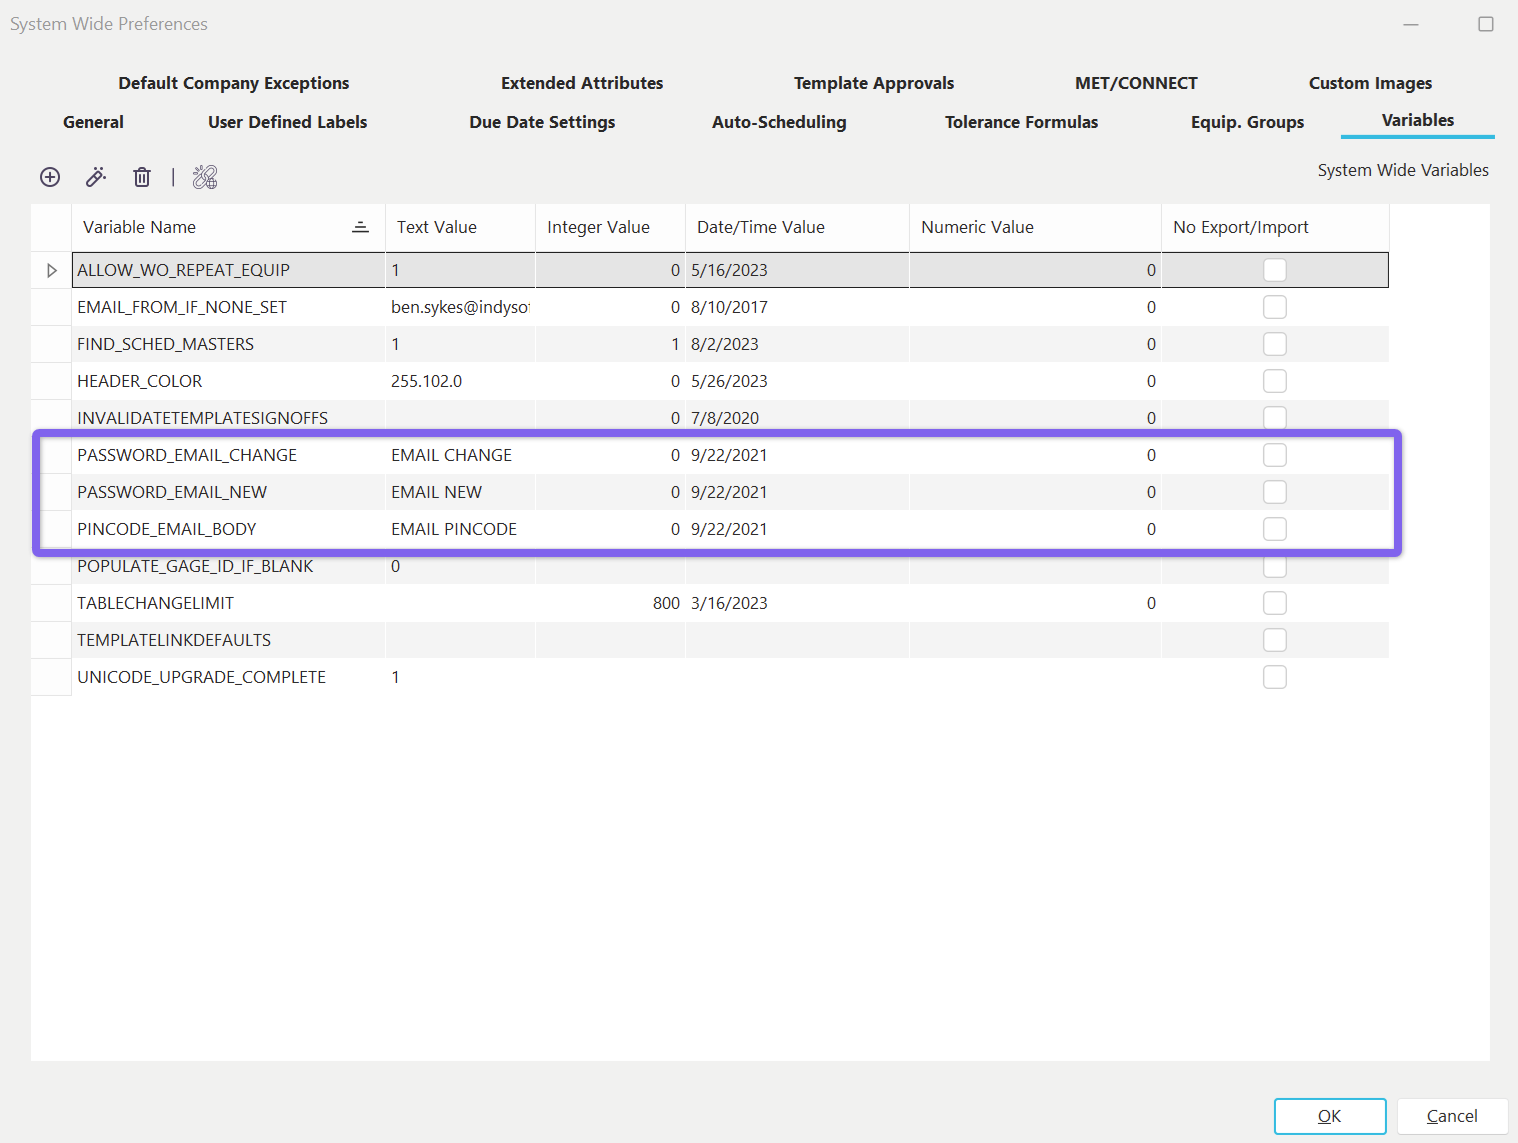
You will likely want to import the Default IndySoft Login Email Layouts so that you can fully customize the email layouts that customers and end users receive. The system will force you to enter an Environment Name above in the system-wide preferences before import. Once the Environment Name is populated and the layouts are imported, you can navigate to the "Variables" tab in system-wide preferences. There you will find three new variables with specific Text Values. **The text values of the Variables are the exact names of 3 new Email style layouts available in Layout Builder for Customization.**You will want to customize your layouts for the specifics of your website/portal/environment.
PINCODE_EMAIL_BODY This layout is sent when sending a PIN code from Profile Manager. This layout must contain the merge item !PINCODE!
PASSWORD_EMAIL_NEW This is the layout sent to the new user when the PIN code user successfully creates that new user from the PIN code.
PASSWORD_EMAIL_CHANGE This is the layout the end user receives when resetting their password from the login screen.
 Global Variables - Password/Pincode
Next, you will need to assign PIN codes to appropriate users. Go to Profile Manager and find a user who needs a PIN code.
(PIN code users can be admins, customers, and/or end users who want to be able to create many end users in a specific likeness and need the power to do so. Users created by that PIN code user will inherit Permissions, Profiles, and Company Exceptions from the particular PIN code user.)
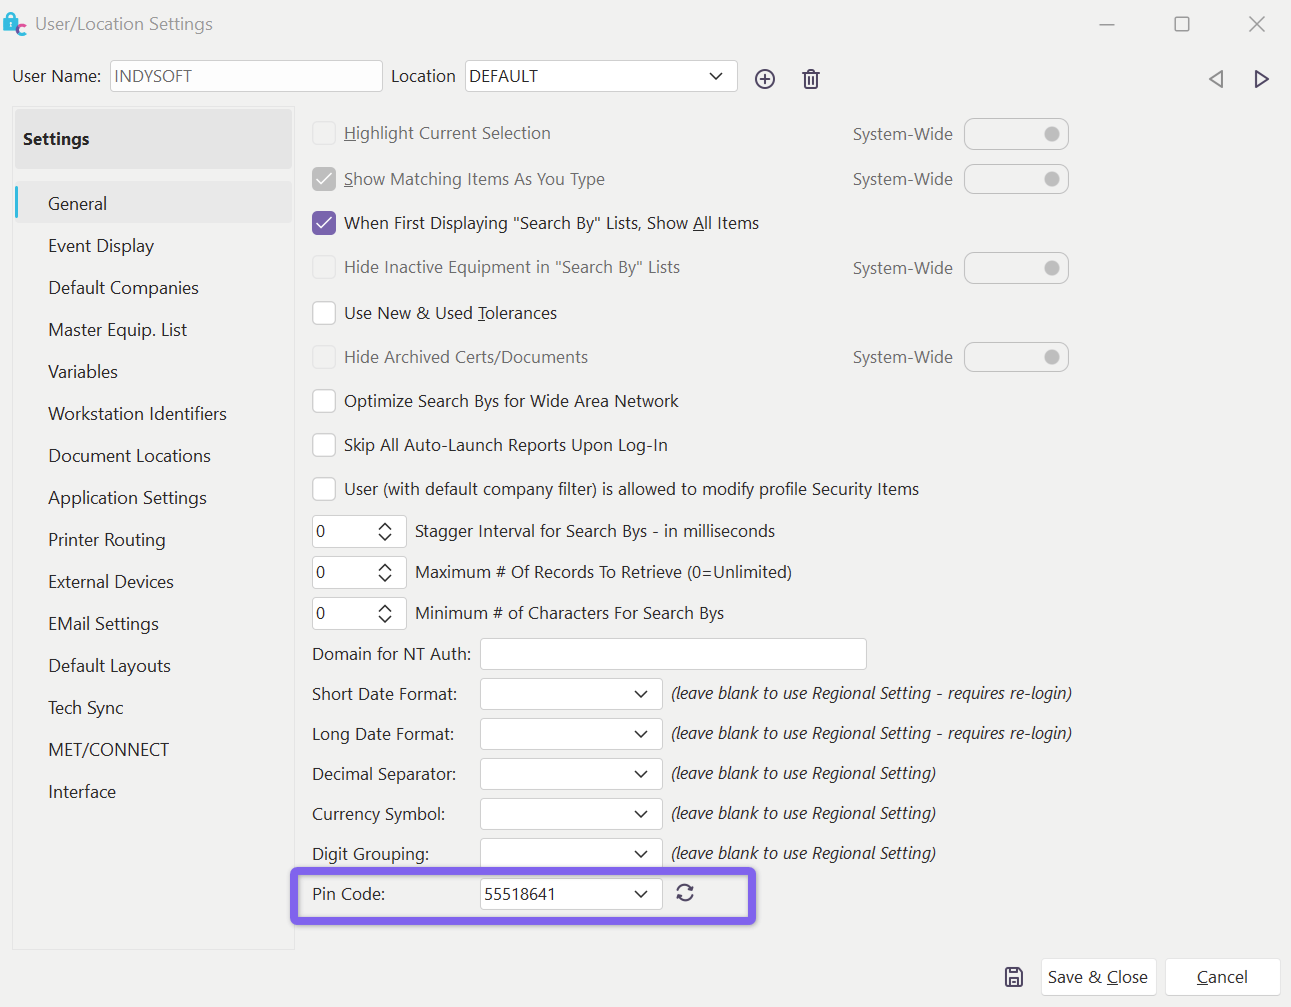
Right-click on the appropriate user and select Edit User/Location Settings...
Once the user/location screen pops up, you can assign the user a randomly generated PIN code by pressing the circular icon: ![]()
 User/Location Settings - Pin Code
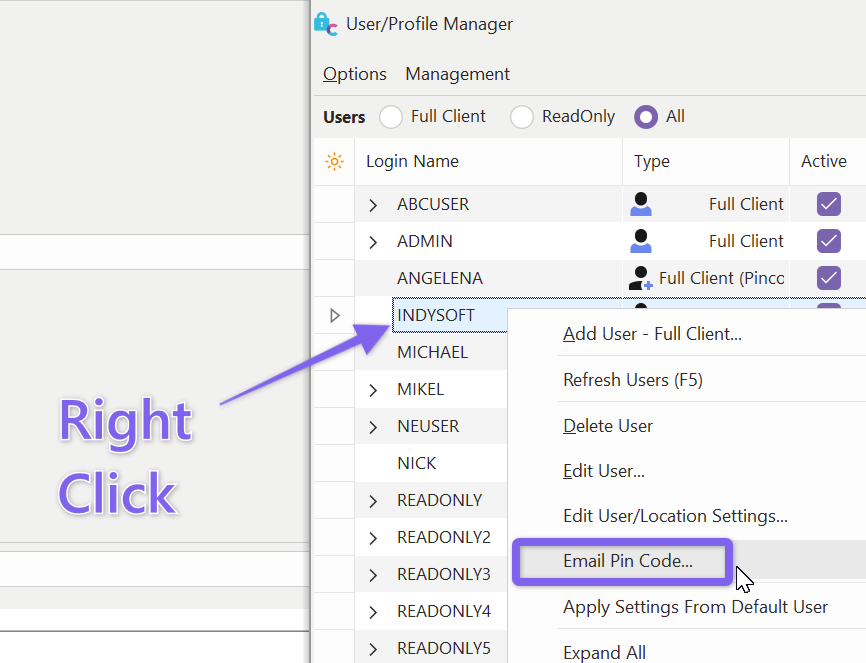
After Saving and Closing, you should now be able to right-click on that user in Profile Manager and select Email Pin Code...
You will then be prompted to send the PIN code to the user's email, or you can change to email to a different requestor entirely. The email settings used to send this email will be the current user's Default Location Email Settings.
Email Pin Code
The PIN code user will receive the email, go to the login screen, and choose the PIN code Icon. There, they will enter the new user's PIN code, email, and proposed username. Once completed, the new user will receive an email (PASSWORD_EMAIL_NEW layout) with a temporary password. They will then proceed to log in with the temporary password and, upon login, will be prompted to set their password to their desired password.
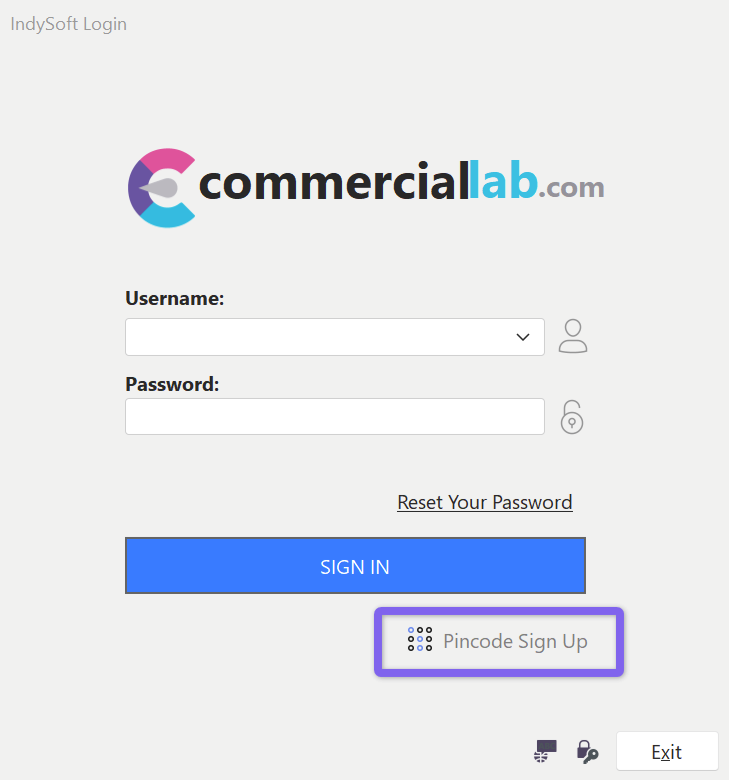 Login Screen - Pincode Sign Up
Note : Once a user is setup for use with a pin code, the icon and license type associated with their user in the profile manager will change:
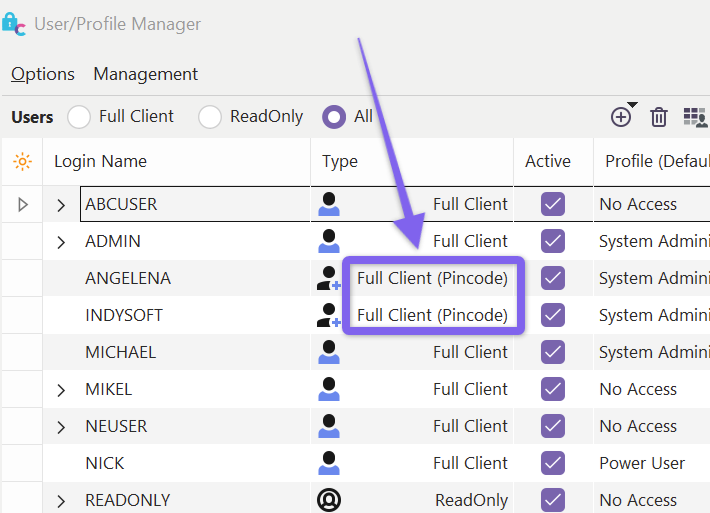 Profile Manager - Full Client (Pincode) Type User