Add/Edit Sync Map Dialog
Sync Name / Type
Sync Name / Type
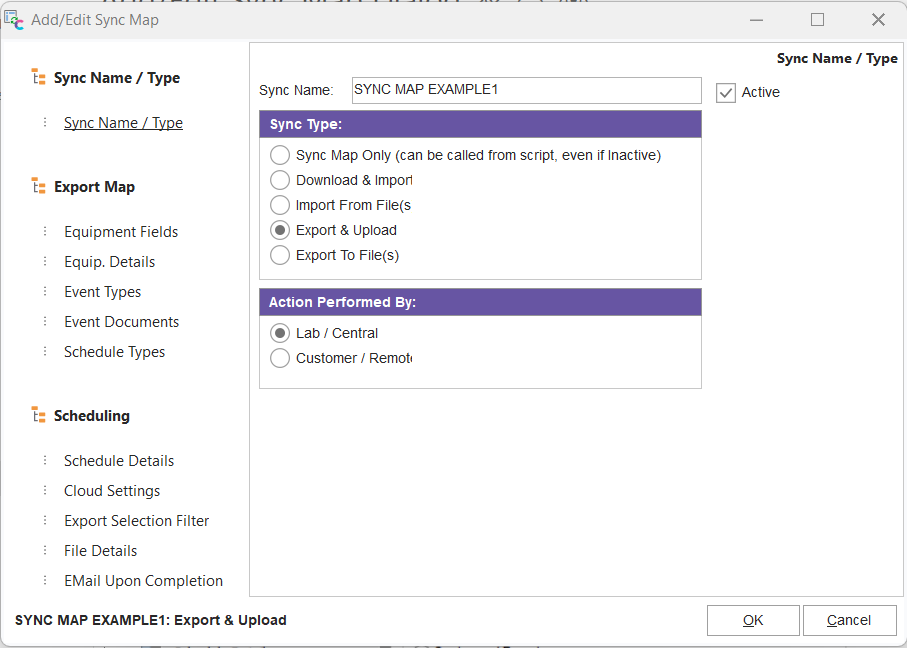
Sync Name
All sync maps require a unique name - 30 characters are allowed.
Active
If a Sync Map is set as active, then the Schedule (as set up under 'Schedule Details') is used to set up a Windows Task to execute the sync. If a sync is not set as Active, then it still can be used for on-demand syncs through the Export/Import module or as called through script procedures.
Sync Type
Five options are available - the type selected here will affect which further wizard steps are available for selection on the left side of the dialog:
o'Sync Map Only' should be selected if the sync will never be scheduled, and you only want to memorize sync settings so they can be called from a script procedure/function.
o'Download & Import' - this is an import-type sync that will use a Cloud directory for the sync. No sync map is set up because the sync maps are already included inside each imported sync map.
o'Import From File(s)' - an import-type sync that imports equipment Sync Map zips from a directory on your network. (Note: This network directory could have been synced through an external utility to the cloud, assuming DropBox (or other cloud utility) was installed external to IndySoft - that setup would be very similar to 'Download & Import' - but would require local installation of DropBox, etc.) No sync map is set up because the sync maps are already included inside each imported sync map.
oExport & Upload - this is an export-type sync that will use a Cloud directory for the sync. A sync map is set up to control all the data exported and establish rules for later import.
oExport To File(s) - an export-type sync that will export equipment Sync Map zips to a directory on your network. (Note: This network directory could then be synced through an external utility to the cloud, assuming DropBox (or other cloud utility) was installed external to IndySoft - that setup would be very similar to 'Export & Import' - but that would require local installation of DropBox, etc.)
Action Performed By
Two options are available - 'Lab / Central' or 'Customer / Remote.' This option affects ONLY the log record created when the sync is performed - this setting does NOT affect any of the functionality of the sync. Noting 'Lab / Central' or 'Customer / Remote' in the log (see the 'History / Status' tab on the IndySoft DataSync Options main screen) can help sort/filter the events.
Export Map - Equipment Fields
Note: this setup step is only visible/relevant for 'Export & Upload' or 'Export To File(s)' Sync Types - as selected in the 'Setup Name / Type' step.
Equipment Fields
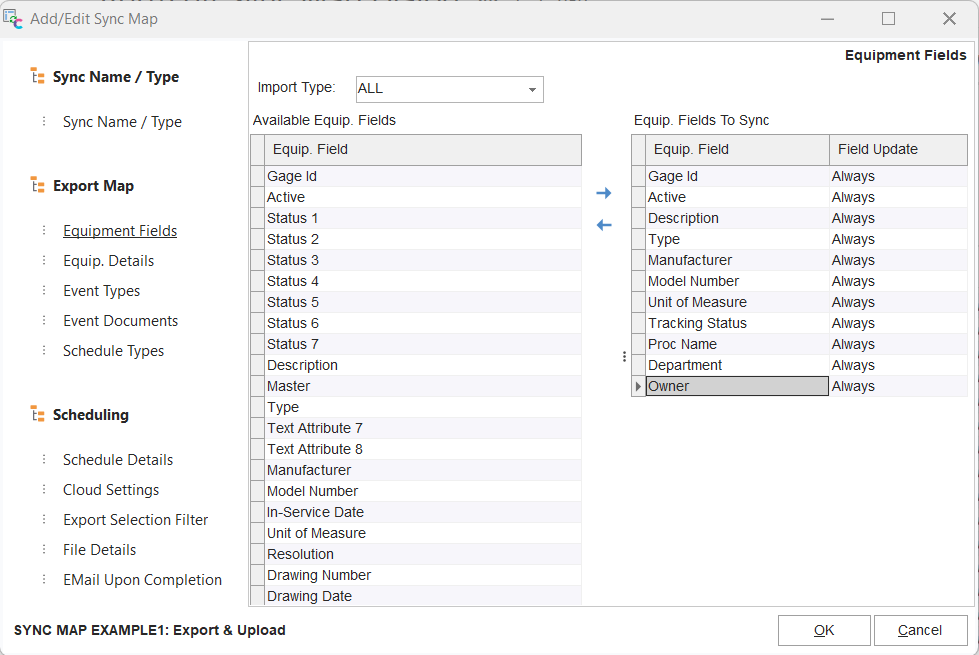
This step controls the fields exported on the equipment level and also import settings for how that equipment record should be imported.
Import Type
This drop-down controls how the destination database will import the equipment record. 'NEW ITEMS ONLY' means the asset will only be imported if it does not exist in the destination database. 'UPDATE ONLY' means the asset will ONLY be imported if the asset already exists in the destination database. 'ALL' means the asset will always be imported into the destination database, whether it previously existed or not.
Available Equip. Fields / Equip. Fields To Sync
The left-hand grid displays all the available equipment-level fields for reference. The right-hand grid displays the fields selected for export using this sync. So if a field is never exported, then there is no risk of that data entering the destination database. A field can be moved from the left-hand grid to the right grid by double-clicking on the field in the left grid. Fields can also be multi-selected in the left grid, then the 'Add Equip. Field' button (>) between the grids can be pressed to move all selected fields quickly. Fields can be double-clicked from the right-hand grid to remove quickly - or the 'Remove Equip. Field' button (<) between the grids will remove the selected field from the right-hand grid. Other options are available from right-mouse click on 'Available Equip. Fields' grid:
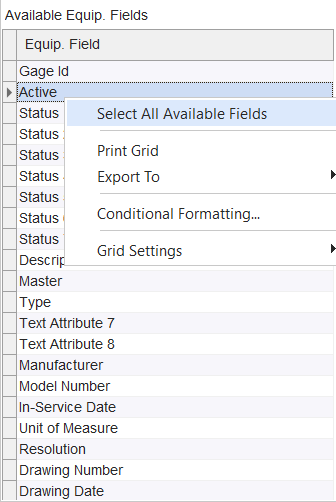
Available Equip. Fields Right-Mouse Click Options
By pressing 'Select All Available Fields,' all fields can be quickly added by pressing the 'Add Equip. Field' button (>). Several options are available via right-mouse click in the 'Equip. Fields To Sync' grid, along with 'Remove All':
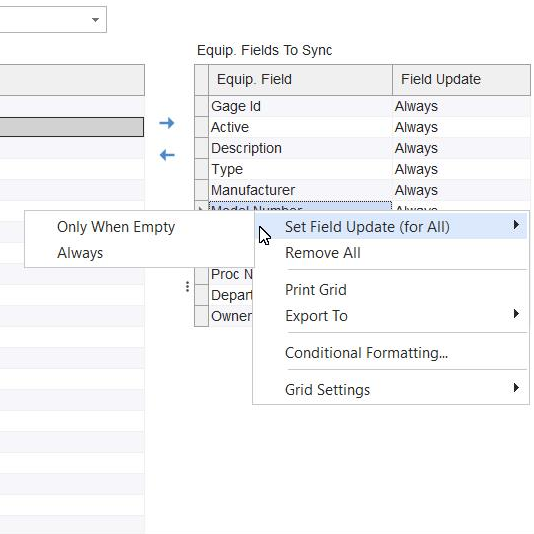
Equip Fields To Sync Right-Mouse Click Options
The 2 'Set Field Update (for All)' menu options will quickly set the 'Field Update' field for all records in the grid (then only the exceptions could be modified if that is quicker than setting each). 'Remove All' will quickly remove all records from the grid.
Field Update (in the 'Equip Fields To Sync' grid)
This option controls how this field should be synced upon import. This works similarly to the 'Import Type' option above, but down on a per-field level rather than the equipment level. So the 'Import Type' determines if the sync for the asset being imported occurs at all - but then per-field, you can specify if this data should be synced only if the matching field in the destination database is empty ('Only When Empty') or always synced ('Always').
Export Map - Equip. Details
Note: this setup step is only visible/relevant for 'Export & Upload' or 'Export To File(s)' Sync Types - as selected in the 'Setup Name / Type' step.
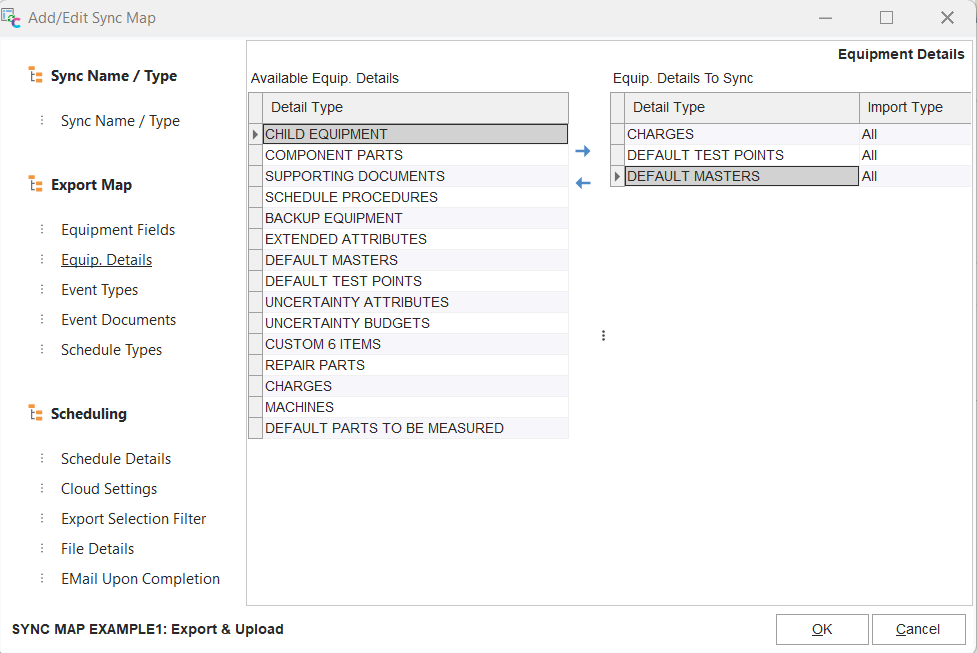
Equip. Details
This step sets up the detail tables that should be synced for the related asset. Typically these mirror the detail tabs/dialogs on the Equipment View of the IndySoft main screen. For instance, you might want most equipment-level fields to sync (as set up in the 'Equip. Fields' step), but you only want the 'Default Masters' tab/dialog to sync, not the 'Default Test Points' or 'Charges,' etc.
The interface is like the 'Equipment Fields' step - select the detail from the 'Available Equip. Details' grid and double-click to add it to the 'Equip. Details To Sync' grid, or double-click from the right-hand grid to quickly remove. Or, one/more records can be selected from the left grid and the 'Add Equip. Detail' (>) button between the grids can quickly add. Then use 'Remove Equip. Detail' (<) to quickly remove. History and Scheduling options are not listed - these options have their setup steps later in the Sync Map wizard.
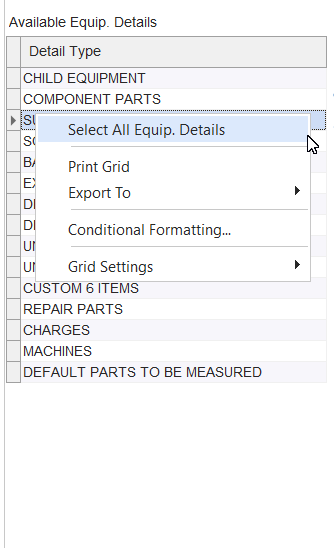
Available Equip. Details - Right Mouse Click Options
Use the 'Select All Equip. Details' right-mouse click option to quickly select all details - then press 'Add Equip. Detail' (>) to add all.
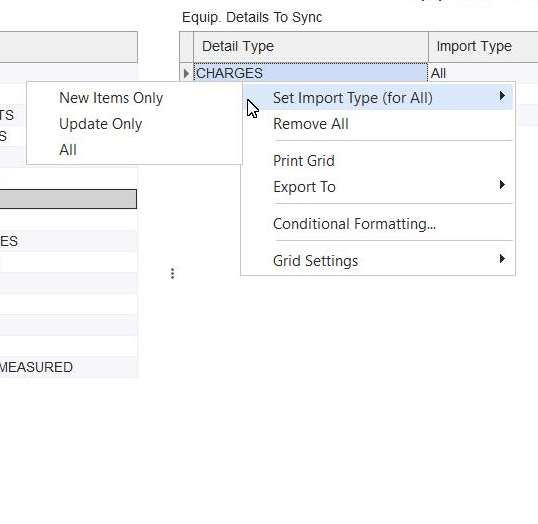
Equip. Details To Sync - Right-Mouse Click Options
'Remove All' will quickly remove all records from the 'Equip. Details To Sync grid. Use 'Set Import Type (for All)' to quickly set the 'Import Type' field for all records in the 'Equip Details To Sync' grid (then only the exceptions can be modified - if that is quicker than setting all manually). These 'Import Type' options parallel the 'Import Type' option available on the overall equipment level on the 'Equipment Fields' setup step.
Export Map - Event Types
Note: this setup step is only visible/relevant for 'Export & Upload' or 'Export To File(s)' Sync Types - as selected in the 'Setup Name / Type' step.
Only selected event types will be included when an asset is exported with this sync map. Also, a filter of event dates can be used ('Filter Events From' and 'Event Filters Through'). The interface is like 'Equipment Fields' or 'Equipment Details' - double-click on records in the left-hand grid to add to the right and double-click on records in the right-hand grid to remove. Right-mouse click options are available for quickly selecting all items, etc.
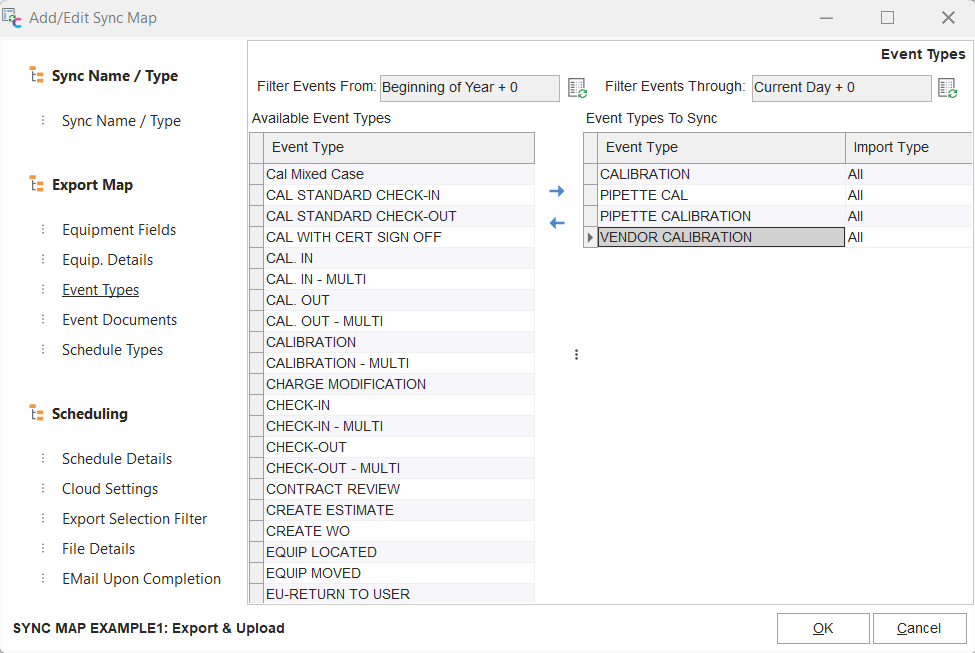
Event Types
Events can be filtered (optionally) by exact or relative event dates. To set up a relative date for either 'Filter Events From' or 'Filter Events Through,' select the 'Modify Relative Dates' button:
![]() Modify Relative Dates
Modify Relative Dates
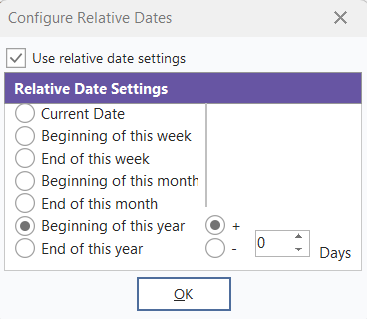
Modify Relative Dates
These relative date options are equivalent to the options available from User/Location Settings - but they control which events are included in the export, not simply a filter of the imported events.
Export Map - Event Documents
Note: this setup step is only visible/relevant for 'Export & Upload' or 'Export To File(s)' Sync Types - as selected in the 'Setup Name / Type' step.

Event Documents
](/it/Storage/indysoft-help-publication/hm_clip0027.png)
These options control the export of event documents from each event that passes the previous step's 'Event Types' filtering. Often certain event documents need to be excluded if they contain sensitive data, etc.
Docs Only (only basic event fields + documents are exported)
Turn on this important checkbox if you desire ONLY the documents to be synced for events. This means that only basic event fields (like those seen in the History grid on the main screen Equipment View) + the selected documents (as specified in this step) will be synced. Further, the synced event will be flagged as an event synced as 'documents only' - meaning any attempt to edit this event from the History grid in the destination database will be blocked. So the assumption is that the basic event fields (in the History grid) and the synced documents contain all the details needed. This is an advantage because the database receiving the asset/event does not need to utilize the same 'Workflow Configuration' settings for this event type as the sending database. For instance, if you perform a CALIBRATION event in your database, which produces a certificate, then when you send this event and cert to another database, that system might have a different CALIBRATION event (in terms of event setup). It might have the same name ('CALIBRATION') but might have more/fewer event steps, etc. So, in this case, a sync of 'Docs Only' is best.
Available Event Documents / Event Documents To Sync
From the left, you will see options for selecting a document type; then, in the right-hand grid, you will see a listing of document types set up for sync. For each rule, you choose whether it relates to a Certificate or an Event Doc (2 radio boxes). Next, the Template Type and Template Name are selected. Instead of selecting an exact Type/Name, you can select [ANY] to allow for any type/name.
When filtering for Certificates, you can select a Type of '[ANY],' 'CERTIFICATES,' 'ATTACH,' or 'EXCEL.' 'ATTACH' means any certificate scanned as an event attachment (not created from a PrintBuilder Certificate template). 'EXCEL' means any certificate created from an Excel-based test point template. Filtering by 'Template Name' is only possible if the Template Type is 'CERTIFICATES.'
When filtering for Event Docs, all PrintBuilder template types are available. The 'Template Name' options will match the templates setup for that type in PrintBuilder. Use the 'Add Event Document' (>) or 'Remote Event Document' (<) buttons to quickly add/remove items from the 'Event Documents To Sync.' Documents can be quickly removed with a double click in the grid.
Finally, any document type setup for sync can also use an optional 'Required Prefix' (last editable column in the grid). Type the initial characters in place for that document to be synced. This option is helpful if a Prefix is always created through the Report Rule in Workflow Config. - use this option to identify a subset of documents (of this type) to be synced.
All items in the 'Event Documents To Sync' can be quickly removed through a right-mouse click operation ('Remove All')
Export Map - Schedule Types
Note: this setup step is only visible/relevant for 'Export & Upload' or 'Export To File(s)' Sync Types - as selected in the 'Setup Name / Type' step.

Schedule Types
](/it/Storage/indysoft-help-publication/hm_clip0028.png)
Finally, the sync map can specify the exact schedule types that should be synced, and each schedule type can have its own rule based on a comparison of Due Dates between both databases. The interface for adding/removing Schedule Types is similar to the 'Equipment Fields' and 'Equip. Details' steps - double-click on a schedule type to move it from the 'Available Schedule Types' grid to the 'Schedule Types To Sync' grid. Double-click on a schedule in the right-hand grid to quickly remove it. Or multiple Schedule Types can be selected from the left, and the 'Add Schedule Type' button (>) in the middle can add them in one operation.
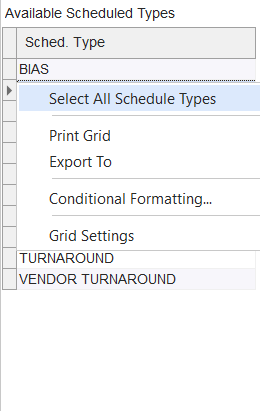
Available Schedule Types - Right-Mouse Click Options
'Select All Schedule Types' can be used for quickly selecting all types.
Schedule Types To Sync - Import Type
This second column in the right-hand grid is much like the 'Import Type' selected in the 'Equipment Fields' and 'Event Types' steps. Select 'New Items Only,' 'Update Only,' or 'All.' If 'New Items Only,' the schedule type will only be synced if it does not exist in the destination database. If 'Update Only,' then the schedule type will only be synced if it already exists in the destination database. If 'All,' then it will always be synced.
Schedule Types To Sync - Due Date Update
The syncing of the 'Due Date' field per Schedule Type has its own set of rules. Three options are available. 'Skip Due Date Update' will skip the due date from being included in the update (other fields will still be synced). 'Always Update Due Date' will always update this field. 'Only Update if Due Date in File > DB' will only sync the schedule's due date if the Due Date in the file (which came from the sending database) is greater than the due date on the schedule of the equipment in the receiving database.
Scheduling - Schedule Details
Note: this setup step is hidden/non-relevant for the 'Sync Map Only' Sync Type - as selected in the 'Setup Name / Type' step.
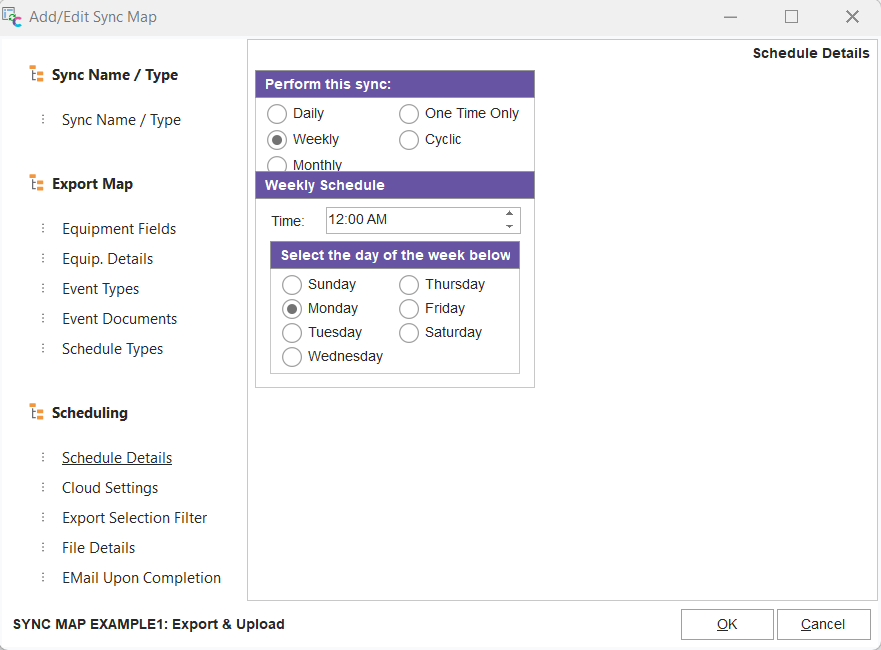
Schedule Details
These options are only relevant if the Sync Map is activated so that a scheduled task is created in Windows. These options are similar to the scheduling options available for alarms in the Alarm System. Select a frequency and then any other details relevant to this type (date/time, etc.)
Scheduling - Cloud Settings
Note: this setup step is only visible/relevant for 'Download & Import' or 'Export & Upload' Sync Types - as selected in the 'Setup Name / Type' step.
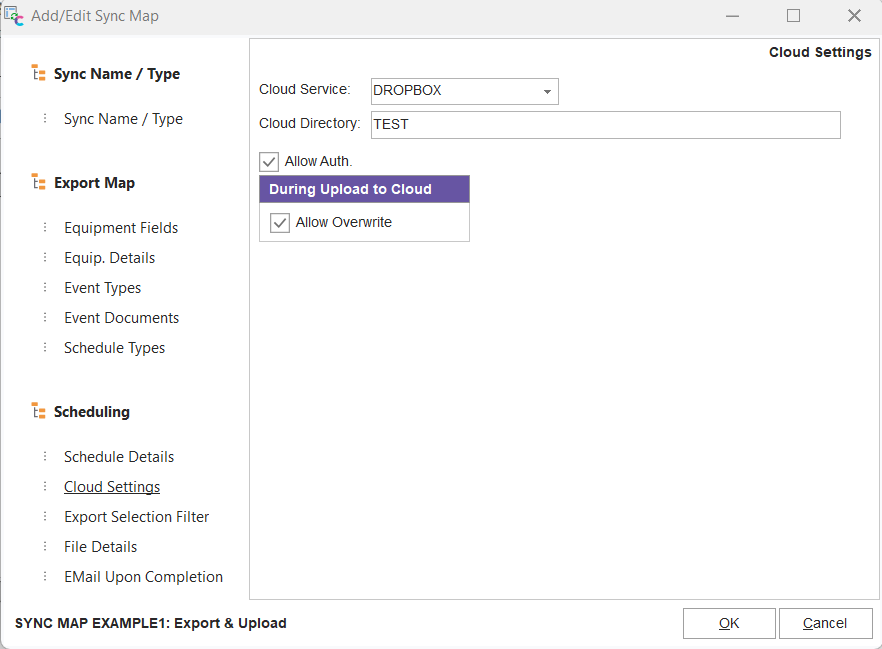
Cloud Settings
Cloud Service
Select either DROPBOX (Dropbox.com) or BOX (Box.com). An account with the selected service is required.
Cloud Directory
This cloud directory is where the zip file(s) will be uploaded for export operations. This is the cloud directory for import operations where the zip file(s) will be downloaded. Input the directory's name relative to the service's root directory.
Allow Auth.
Check this option if you want to prompt for authentication when the sync map is executed - if no authentication has been input previously. Typically this is a one-time operation since valid authentication credentials are saved to the database as a secure token for later use. But if you know that an end-user will never be looking at the screen when the sync is run (completely automated), then it makes sense to turn this option off - better to have the sync fail because of lack of authentication (will be noted in the log).
During Upload to Cloud - Allow Overwrite
If a file is uploaded to the selected Cloud directory and another file already exists with the exact name, this option controls whether it can be overwritten. Typically this condition would rarely occur - since all sync map file names are automatically generated from the Company+ID+Date+Time file name format - they are uniquely named per second.
Scheduling - Export Selection Filter
Note: this setup step is only visible/relevant for 'Export & Upload' and 'Export To File(s)' Sync Types - as selected in the 'Setup Name / Type' step.
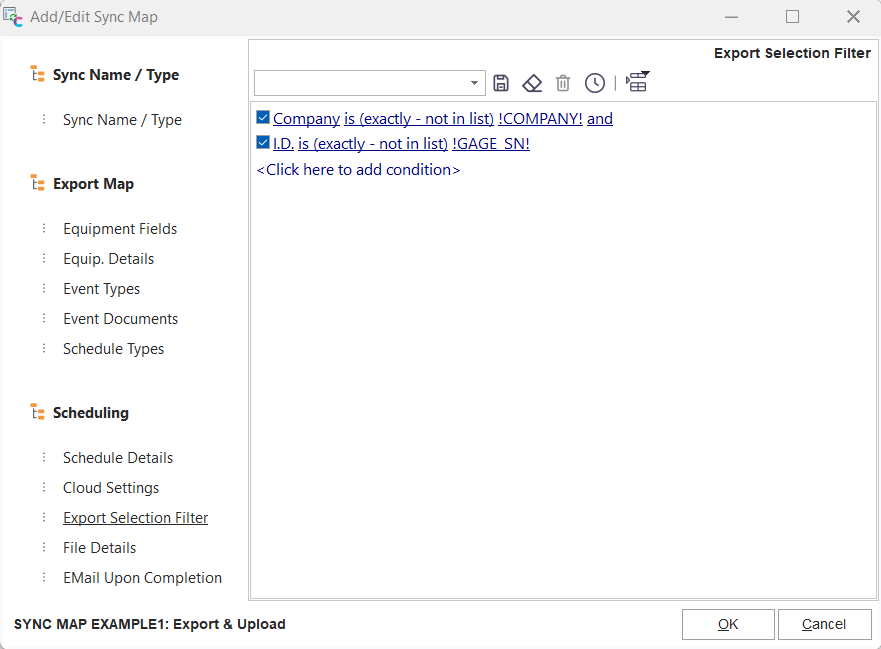
Export Selection Filter
This filter controls which assets are exported with this sync map. The common filter box interface is used - as is common in many other places in IndySoft. Note that the !COMPANY! alias can automatically select the company currently on view in Equipment View on the main screen, and !GAGE_SN! can be used to return the current ID. These aliases would only be helpful if the sync were being called on-demand from an event script, etc.
Scheduling - File Details
Note: this setup step is hidden/non-relevant for the 'Sync Map Only' Sync Type - as selected in the 'Setup Name / Type' step.
This step will look slightly different depending on whether the sync map is export or import-related. If the Sync Type is either 'Export & Upload' or 'Export To File(s),' then only one option will be shown:
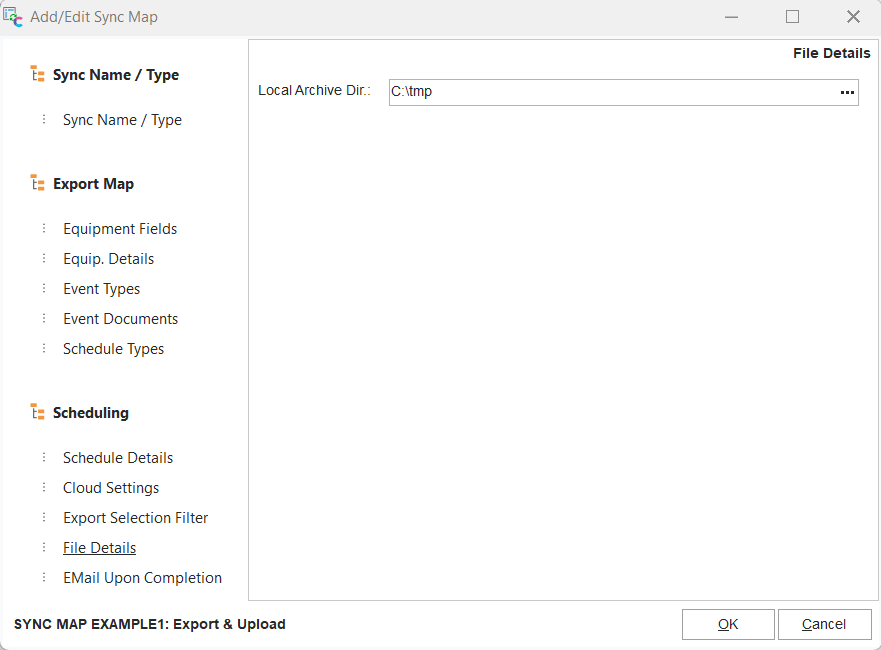
File Details - Export Types
Local Archive Dir (When Exporting)
After each export, the zip file created can be archived in a local directory if specified here.
If the Sync Type is either 'Download & Import' or 'Import From File(s),' then these options will be available;
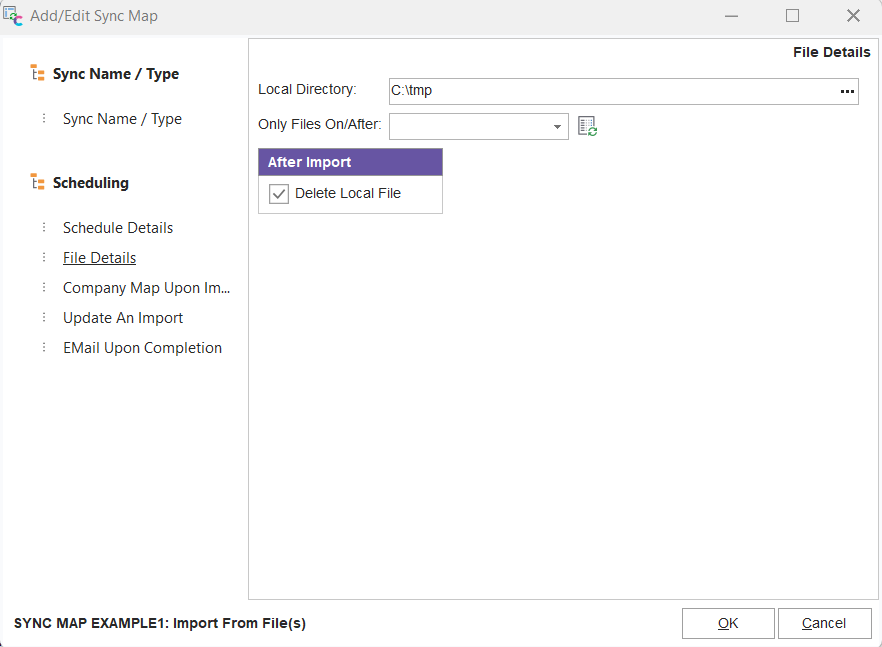
File Details - Import Types
Local Archive Dir (When Importing)
Specify the local directory that should hold the zip file downloaded from the Cloud during the import.
Only Files On/After
Leave this field blank if you want to sync all files from the Cloud directory. Or, specify a date on/after which all files should be synced. Press the 'Modify Relative Dates' button to set a relative date.
After Import - Delete Local File
After a successful import of each asset's zip, check this option if you would like the local zip to be deleted. The zip will be retained as an archive if this option is unchecked.
Scheduling - Company Map Upon Import
Note: this setup step is hidden/non-relevant for the 'Sync Map Only' Sync Type - as selected in the 'Setup Name / Type' step.
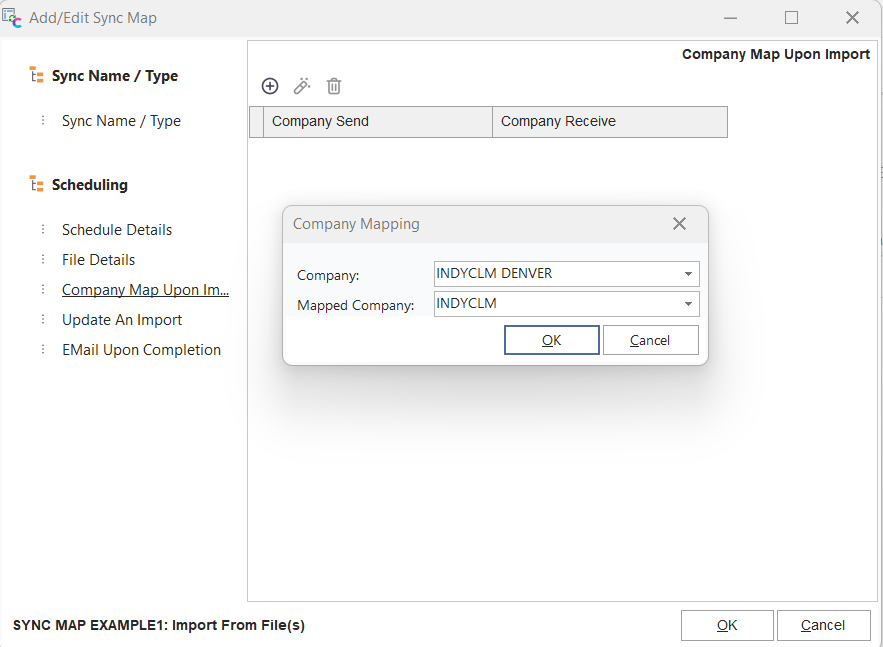
Company Map Upon Import
When importing assets from a different database, the company names used in the sending company might not necessarily match the company names used in the receiving database. For instance, the sending database might use generic company names like 'ABC COMPANY.' Still, the receiving company might use account numbers for companies - but they need to track the same assets. In this instance, a Company Map can be used. Press the 'Add Company Map' to add a mapping, select 'Company' for the company's name in the sending database, and 'Mapped Company' for the company's name in the receiving database. Note that a Company drop-down is shown for convenience. Still, any item can be typed into either edit - the company listing for the drop-downs matches the current database (which could be either the sending db or the receiving db - depending on the setup of the sync map). Multiple company mappings can be applied for a sync map - all will be enforced on the import file before it is executed.
Scheduling - Update After Import
Note: this setup step is hidden/non-relevant for the 'Sync Map Only' Sync Type - as selected in the 'Setup Name / Type' step.
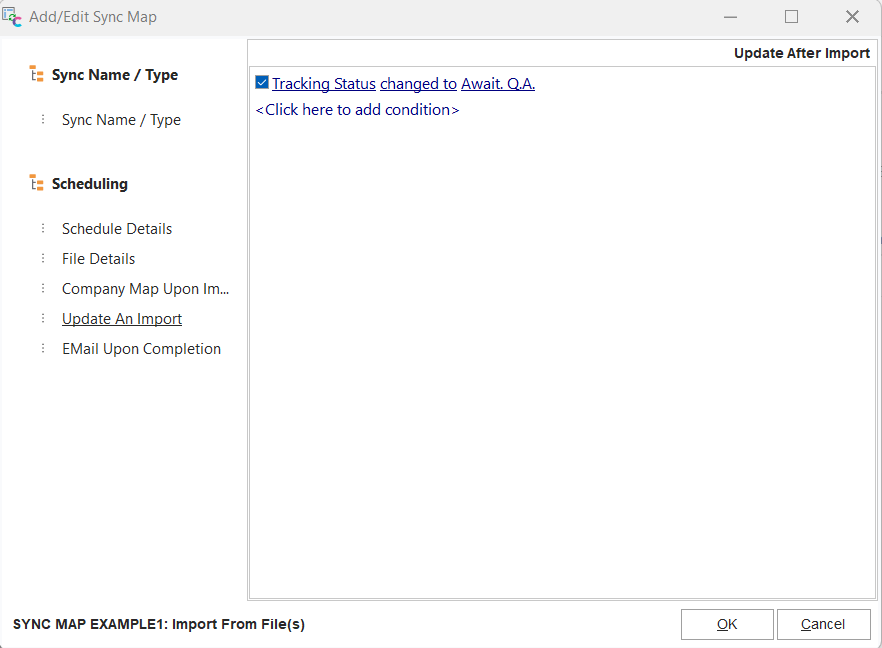
Update After Import
An update can be applied after an asset is imported from a sync map. This update can help place the newly imported asset into a specific position in your database's workflow - while retaining all other asset details imported. This update will apply to ALL assets imported with this sync map.
Scheduling - EMail Upon Completion
Note: this setup step is hidden/non-relevant for the 'Sync Map Only' Sync Type - as selected in the 'Setup Name / Type' step.
Email Upon Completion
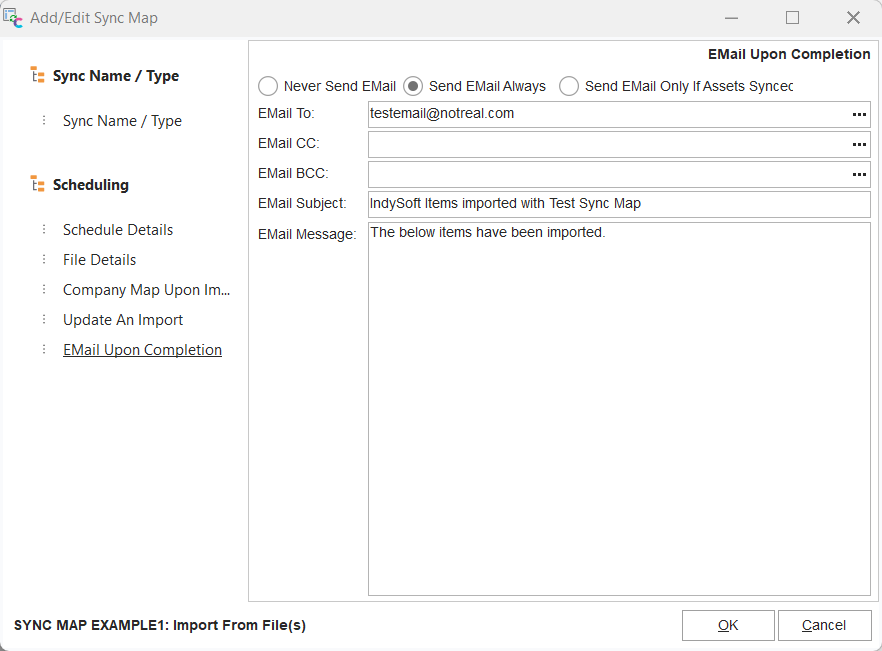
After any sync map is executed, an optional email can be sent to confirm the sync map execution. (This is in addition to the sync log shown in Sync History). Select 'Send Email Always' or 'Send Email Only If Assets Synced,' then input the 'Email To,' 'EMail CC,' 'EMail BCC,' 'EMail Subject,' and 'Email Message.' The ... button can be used for either 'EMail To,' 'EMail CC,' or 'EMail BCC' for quickly selecting email addresses already stored in the current IndySoft database. Note that the 'EMail Message' text will automatically be appended with a summary of the assets synced, including a count and a location for each file. See the example below:
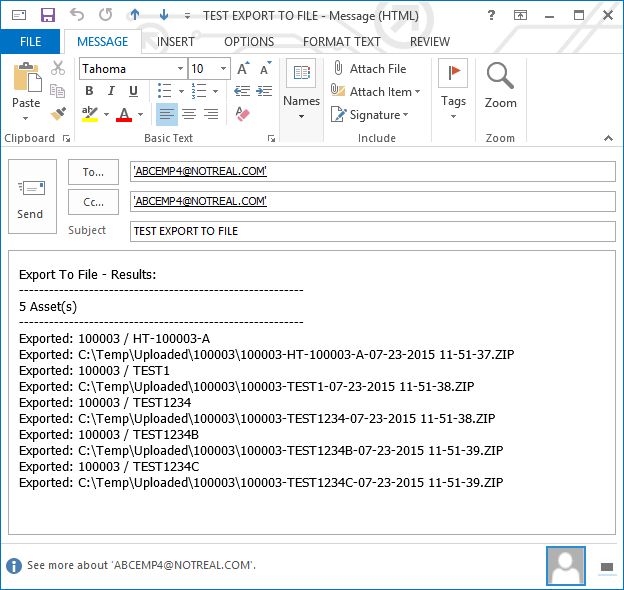
Example EMail after Sync Map Export |