Alarm System - Adding/Editing Alarms
To start the IndySoft Alarms Manager application, click on the IndySoft Alarms Manager icon from the appropriate IndySoft program group (usually in your Start Menu). In version 14, a button can also be added within the Admin Panel to launch the Alarms Module. You will be prompted to log in after clicking the IndySoft Alarm Manager Icon.
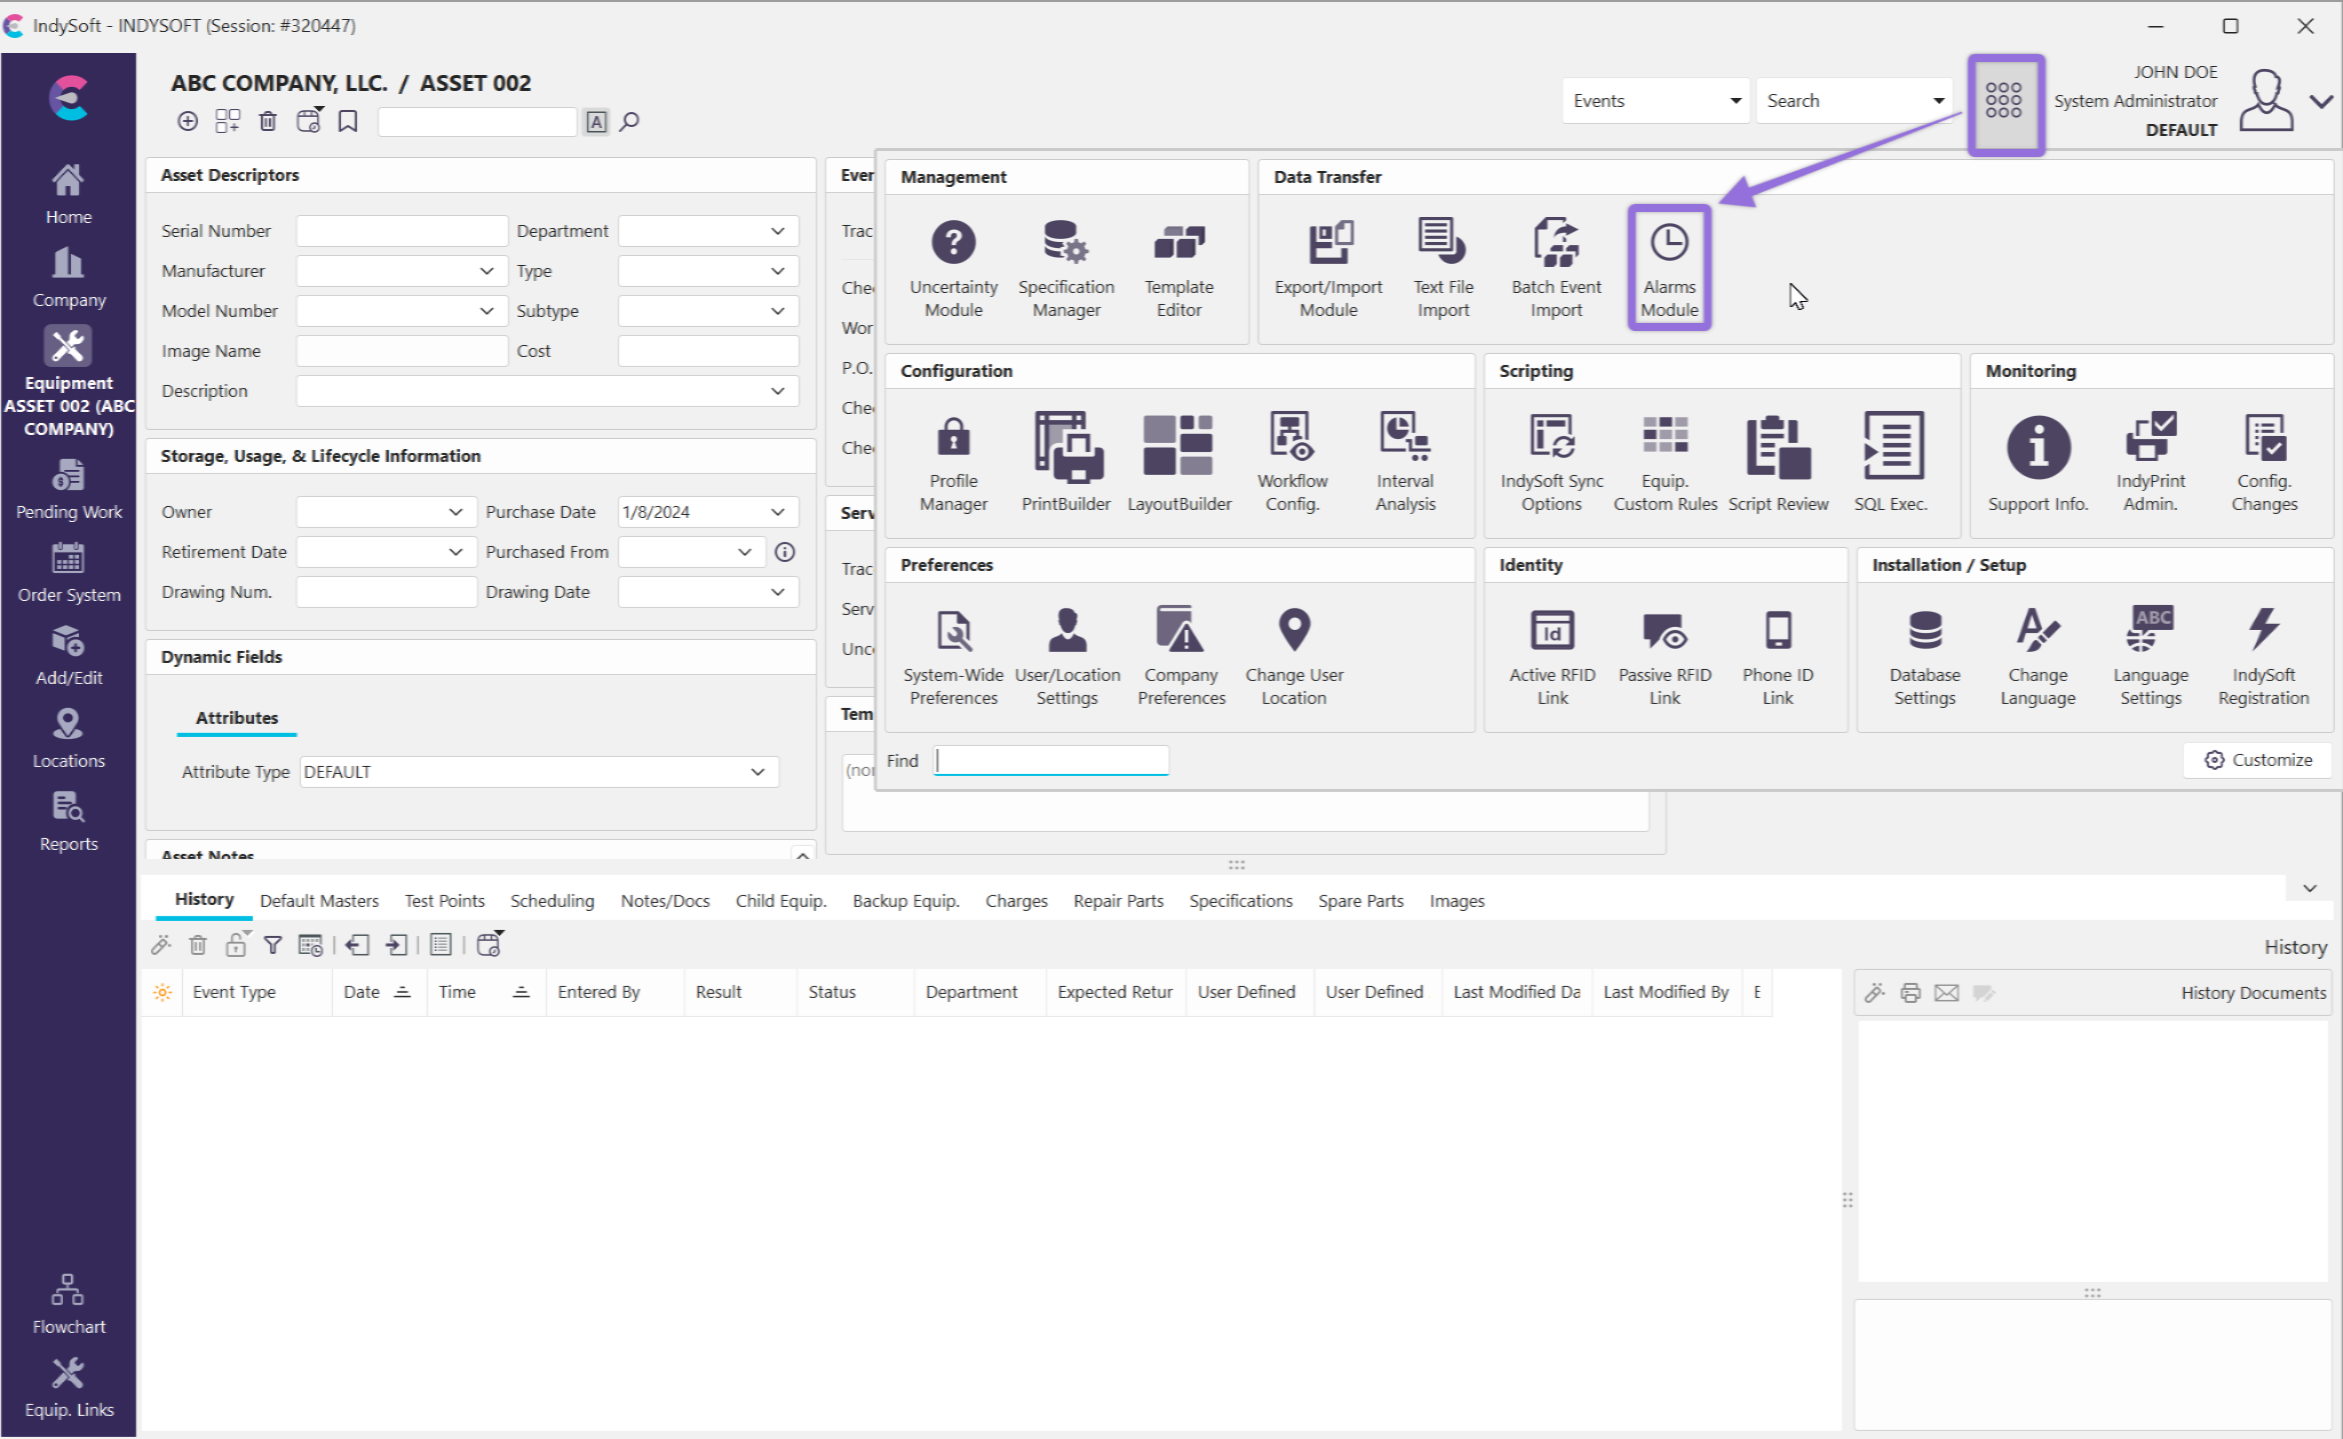
File Finder - Locate IndyAlarm
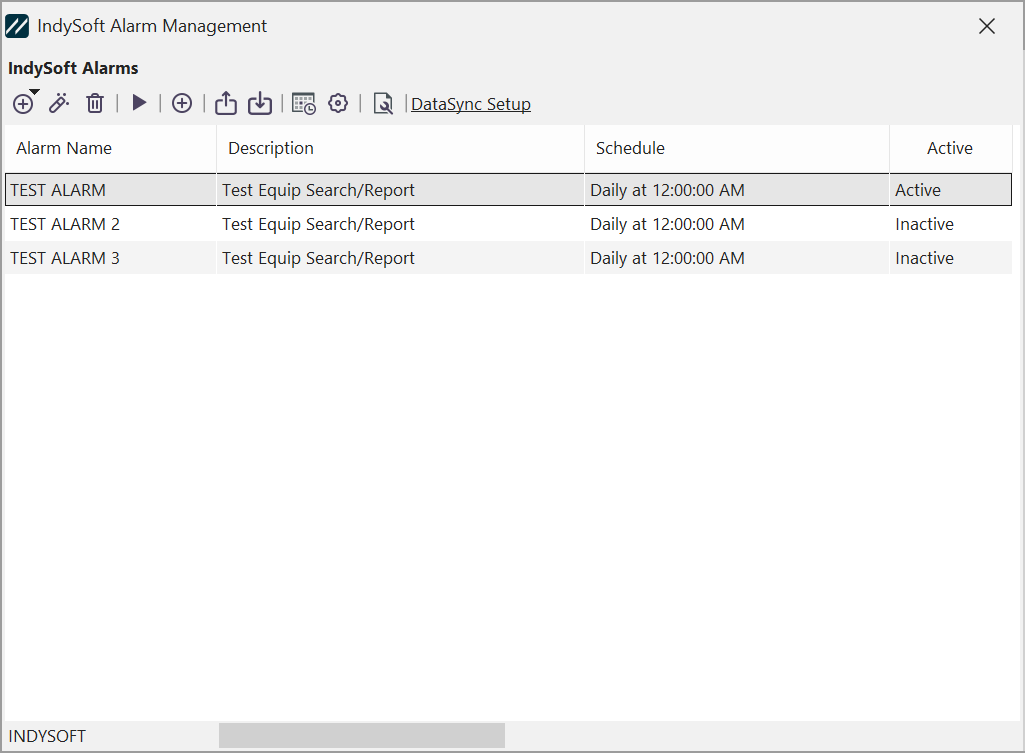
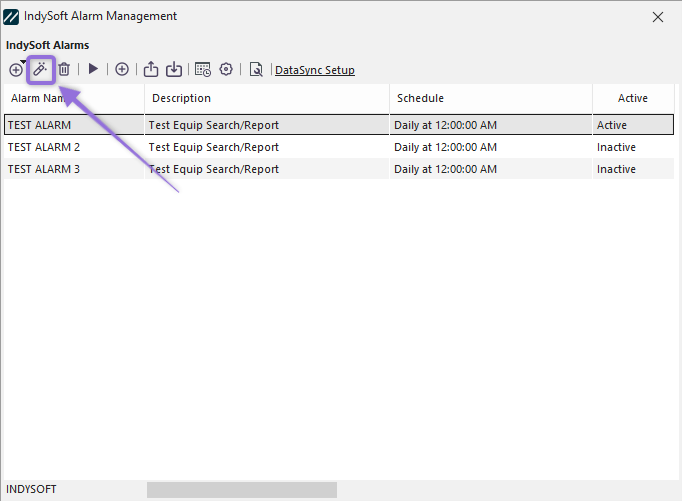
IndySoft Alarm Management Dialog
The user can easily create, edit, and delete different alarms in their system from this dialog.
Note: Please see the Alarm System - Main Interface section (linked here) for more information about the interface and icons.
Adding New Alarm
Once you click the ![]() icon to add a new alarm, the following dialog appears:
icon to add a new alarm, the following dialog appears:

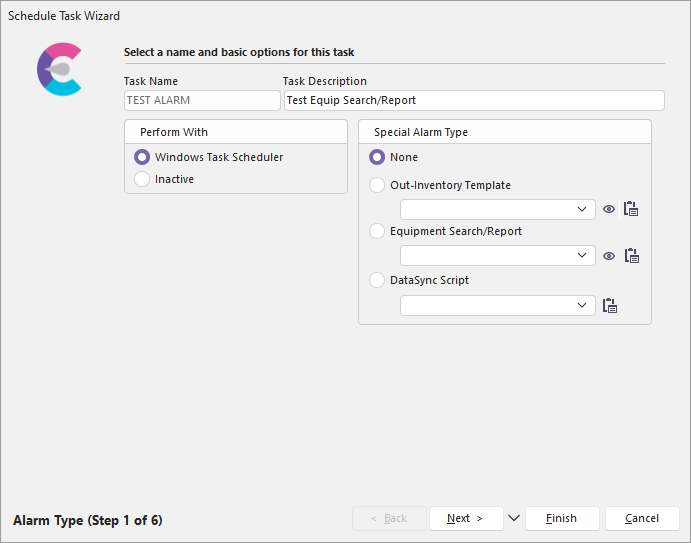
IndySoft Alarm Scheduler - Step 1
This screen represents the first step of the alarm scheduling wizard. You can name your task in this step and easily write a short description. You are also able to choose how to perform the scheduled task.
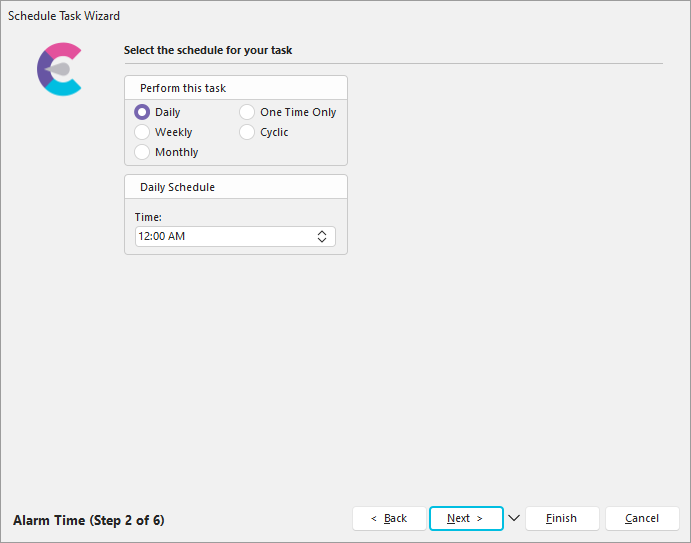
IndySoft Alarm Scheduler - Step 2
The next step of the Alarm Scheduler is where you can select the day and schedule of your alarm. In the example above, this alarm will be triggered weekly on Sundays at 12:00 PM.
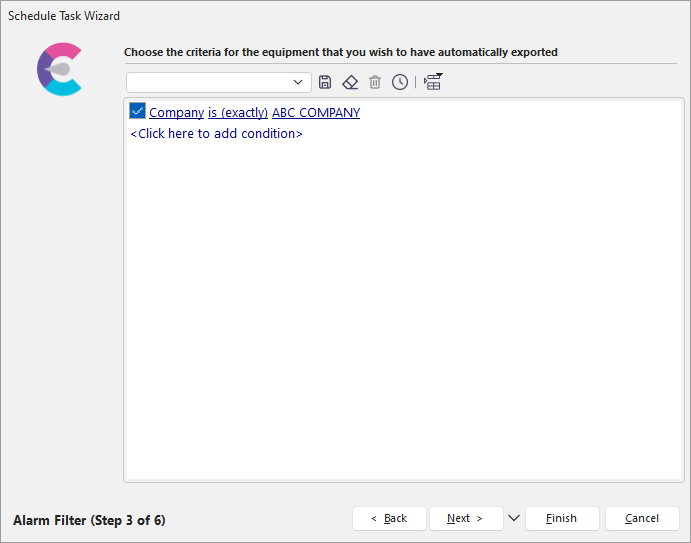
IndySoft Alarm Scheduler - Step 3
The 3rd step of the wizard is to choose the criteria for equipment you wish to have automatically exported. In this example, our only criterion is that the equipment belongs to ABC COMPANY.
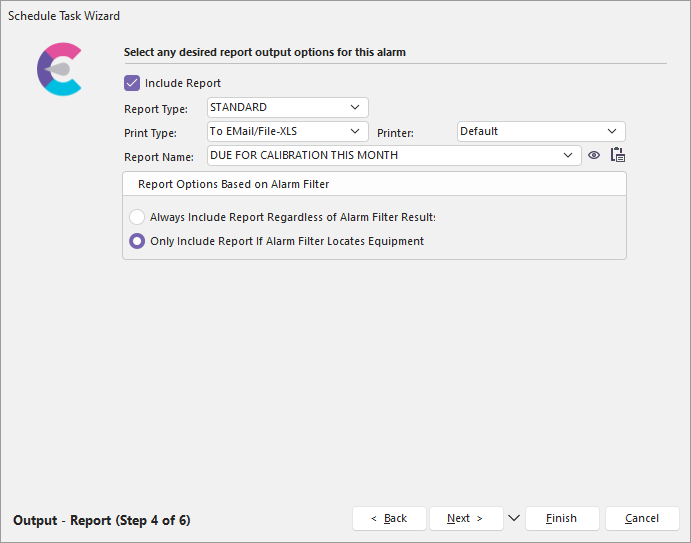
IndySoft Alarm Scheduler - Step 4
In the 4th step, we can select any desired report output options for the alarm. You must select the report type, report name, schedule type, printer, and print type to include a report. You can use the arrows on the right-hand side of the dialog boxes to choose from a drop-down of options. You do not have to include a report with the alarm if you do not want to; un-check the 'Include Report' box at the top.

IndySoft Alarm Scheduler - Step 5
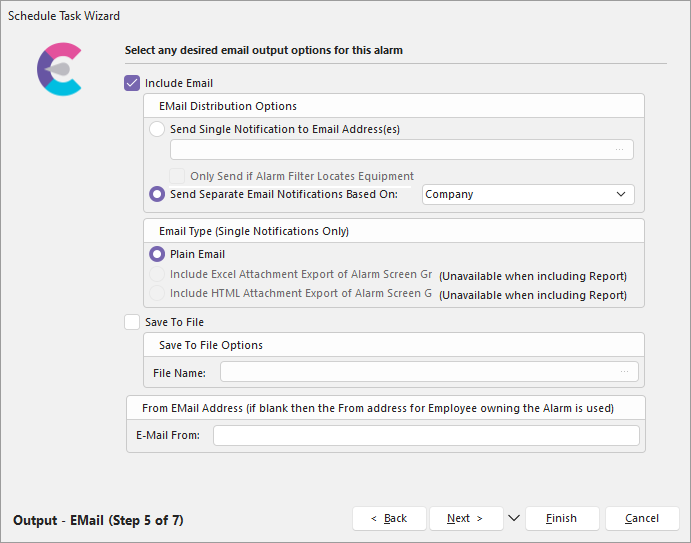
Send Separate Email Notifications Based On Breakdown
The 5th step allows you to select any desired email output options for the alarm. If you choose to Send Separate Email Notifications Based On a breakdown, a new step will appear where you can enter the email distribution rules.
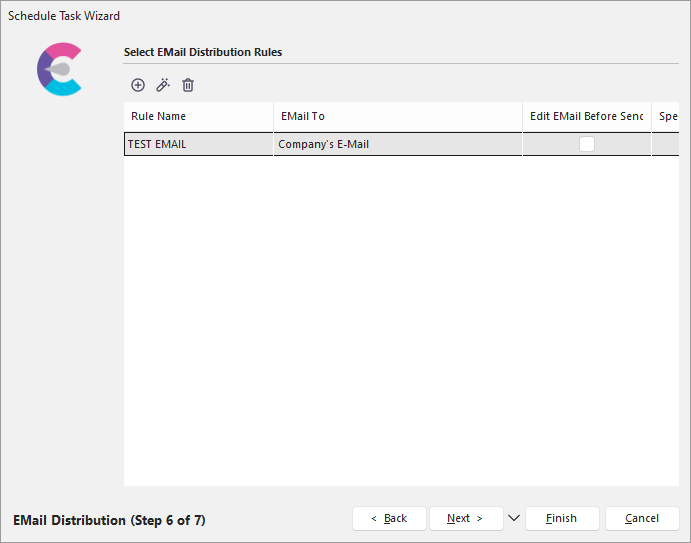
IndySoft Alarm Scheduler - Step 6 Email Distribution

Email Distribution Rule
The 6th step of the wizard gives you the option to select any desired options for email distribution (if applicable). This step would apply if you checked the radio button for Send Separate Email Notifications Based On the breakdown within Step 5.
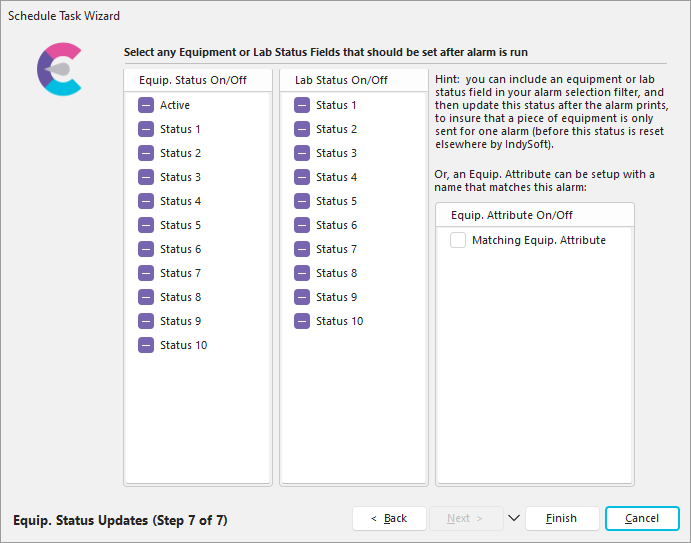
IndySoft Alarm Scheduler - Step 7
Lastly, the 7th step allows you to select any equipment or lab status fields to be set after the alarm is run. The settings currently selected in the example above are default.
Editing Alarms
IndySoft Alarm Management - Edit Alarm
Select an alarm from the IndyAlarm grid (highlighted blue above) and click on the ![]() 'Edit Alarm' icon to edit it. The same wizard we worked with to add the alarm will pop up again, this time filled in with information instead of empty.
'Edit Alarm' icon to edit it. The same wizard we worked with to add the alarm will pop up again, this time filled in with information instead of empty.
You can easily navigate through the wizard's steps to make the necessary edits using the 'Next >' and '< Back' arrows at the bottom of the dialog.
Deleting Alarms
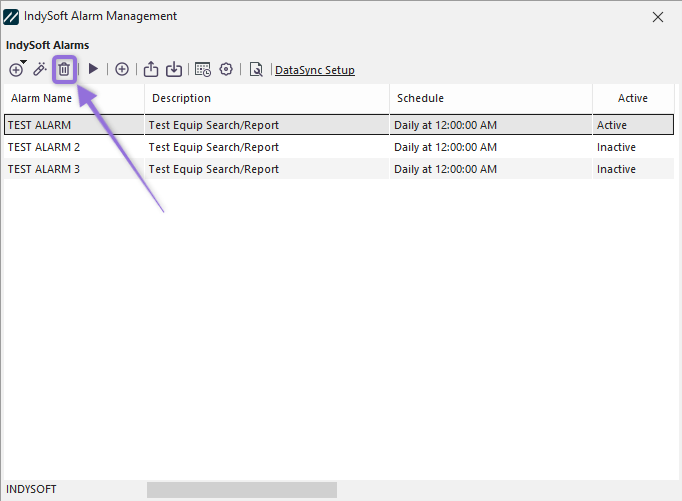
Select the desired alarm from the IndyAlarm grid (highlighted in blue above) and click on the ![]() 'Delete Alarm' icon to delete an alarm. The following pop-up will appear:
'Delete Alarm' icon to delete an alarm. The following pop-up will appear:

If you click 'Yes,' the alarm will be permanently deleted. If you click 'No,' it will remain active and in your grid.
![]() Please see the sections below for more details on this group.
Please see the sections below for more details on this group.
Adding/Editing Alarms
ØAlarm Type
ØAlarm Time
ØAlarm Filter
ØOutput - Report
ØOutput - Email
ØOut Inventory Options
ØEquip. Status Updates