Export options
The export options will vary according to the export type/group selected. But in general terms, there is always a grid showing the sub-groups included in the selected export group. An example below for 'Export Add/Edit Lists':

Export/Import Utility - Export Options
Each sub-group is listed in the grid with two options (columns 2 and 3):
·Include: check this option on or off to determine if the subgroup is included in the Export. When exporting a single group (like Export Add/Edit Lists' in the above example), this column defaults all items to ON. You can quickly uncheck or check all items by right mouse clicking inside the grid:
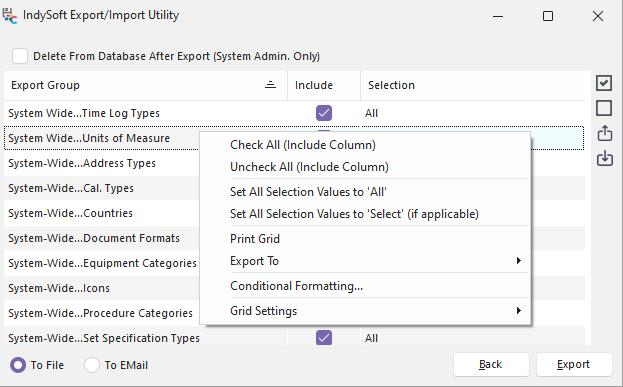
Select 'Check All (Include Column)' to quickly check all items, or select 'Uncheck All (Include Column)' to quickly uncheck all items. The 'Check All Export Groups' and 'Uncheck All Export Groups' buttons to the right of the grid can also be used (equivalent functions):

·Selection: use this option to determine if all the data in the sub-group is exported or if the data should be filtered. Note that filtering is not always an option (this option is not available in rare cases). Select 'All' to include all records in the sub-group or a specific filtering option to filter. Note that the filtering options will vary according to the sub-group. For most sub-groups, you will see these options:
All
Select
Choosing 'Select' will cause a filter dialog (per sub-group) to be displayed during Export. See the Filtering Exported Data for more details. For some more important sub-groups, you will see more details options. For example, on the Equipment sub-group (when exporting 'Equipment, Events, and Action Requests'), you will see these options for Selection:
All
Select: EquipmentFinder
Select: Equipment Filter Only
These two selection dialogs are specific to equipment and will interface users are familiar with from the IndySoft main screen, etc. See the Filtering Exported Data for more details. You can quickly mark all sub-groups with an 'All' Selection Type by selecting 'Set All Selection Values to 'All'' from the right-mouse click options:
·
Select 'Set All Selection Values to 'Select' (if applicable) to set all sub-groups to 'Select' - if that is a valid option.
Saving/Recalling Past Export Options
You can memorize the current set of Export Options for any group by pressing the 'Save Export Settings to File' or 'Read Export Settings From File' buttons to the right of the grid:

When saving your settings, remember that the settings are specific to your current Export Group and only should be recalled in the future for this group. The settings are saved locally; you will be prompted for a file name. The default file name is the name of the Export Group. Settings are stored by default in a sub-directory of your IndySoft client installation directory named 'Export Settings' (although a different save location can be specified). All checkboxes (if any) above the grid will also be saved, along with the grid settings.
IMPORTANT: if you press the 'Save Export Settings to File' button from the Export Options step, you will ONLY save the grid settings (which categories to Export and whether a 'Select' dialog should be called). Still, you will NOT save the exact selections in any 'Select' dialog. If you want a snapshot of your export settings and your selections made in an export, wait until after the export is completed and press the 'Save Recently Completed Export Settings' button from the bottom left of the final wizard step.
Include W.O.'s from Equip.

This option is only available for the 'Export Equipment, Events, and Action Requests' and 'Export All' export groups. This option allows you to quickly include all work orders matching the equipment in the Export. For example, say you have 2,500 assets in your database, and for this Export, you filter the equipment only to export 150 assets. If this option is enabled for the 150 assets exported, IndySoft will find any Work Orders with Scheduled Work items. If found, these Work Orders (and all Work Order detail table data) will be included in the export file. All Work Orders are included, regardless of Order Status.
Include Equip. from W.O.s

This option is only available for the Export Order System and Export All export groups. This option lets you quickly include all equipment matching the Work Orders selected in the Export. For example, say you have 200 work orders in your database, and for this Export, you filter the Work Orders to only the five open orders assigned to your user name (using OrderFinder). If this option is on for the 5 Work Orders exported, IndySoft will find all equipment listed with Scheduled Work items. If found, these assets (and all equipment detail table data and all events and events detail table data) will be included in the export file. All matching equipment is included, regardless of status.
Delete From Database After Export
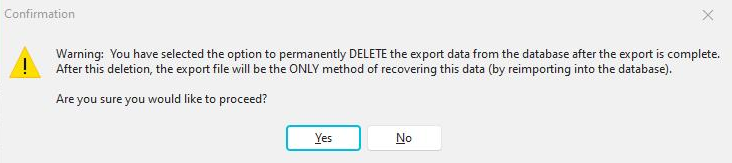
This option is only visible/available for 'System Administrator' users. If this item is checked, the data will be deleted from the main database after the data is exported to the zip file. This operation is very powerful (and useful), so please use it carefully! After the data has been deleted, it can only be restored by importing the zip file created from the Export - so make sure this zip file is backed up to a secure location. If this option is selected, all sub-groups (included and passed the filter) will be deleted. At the time of Export, a confirmation message will be shown:
Export Destination (File / EMail)
Finally, you can select the destination for the export zip file. These two options are shown in the lower left, in the same panel as Back/Next:

To File: you will be prompted with a dialog to select the location on your computer/network where you would like the file saved.
To Email: this option still creates the same zip file as 'To File'; it just automatically pops up an IndySoft email dialog and attaches the zip to the email preview form. The same effect could be accomplished by saving the export 'To File' and manually attaching the zip to an email generated by your client. The standard IndySoft EMail dialog will allow you to email a company/vendor/employee, etc, quickly.

If you select 'Cancel' from this dialog, the export operation will also be canceled.
What Exactly Will Be Exported?
The exact tables and mechanisms for Export are controlled behind the scenes by a Data Dictionary distributed to each IndySoft client. This data dictionary controls several hundred tables and thousands of fields, most of which can be exported and imported from this utility. So the Data Dictionary is beyond the scope of this help file. But the easiest way to see a complete list of the tables and fields included in export is to try an example export and preview the contents. See the Previewing Import File Contents topic for more details. A preview shows 'friendly' names for all tables and fields - this is typically most useful for IndySoft users. If you have additional questions on the exact table names or fields, please get in touch with IndySoft support for more details. |