Alarm Type
Setting Up Alarms
The scheduling of alarms is quick and easy in the IndySoft Alarm Manager. Select the method you want from the list below for more information.
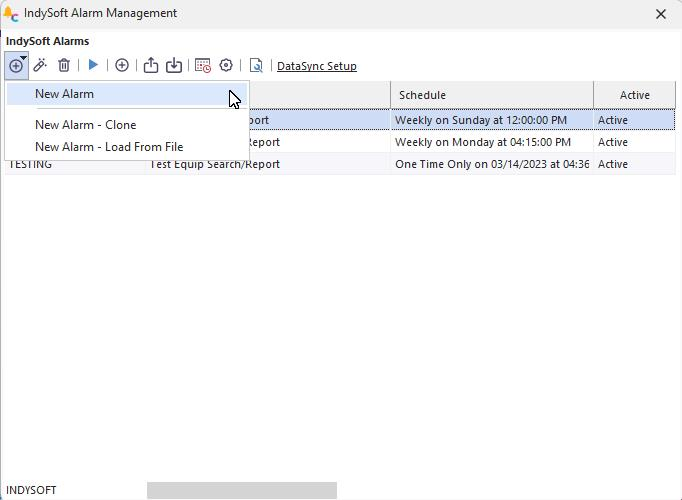
New Alarm Menu
Setting a New Alarm
To set a new alarm, click the New Alarm button and choose New Alarm from the drop-down menu on the top toolbar. The alarm scheduler window shown below will open. (Note that you can also clone from an existing alarm or load an alarm that has been previously exported.)
Cloning an Alarm
To clone an existing alarm, press the 'Clone Alarm' button, and you will be prompted for an alarm to clone from.
Enter the Alarm Name and Description
First, enter the name of the alarm. The alarm name is only shown on the alarms interface and the subject of any emails generated by IndySoft alarms. Next, enter a description. This description will appear on all reports generated by the IndySoft Alarm module.
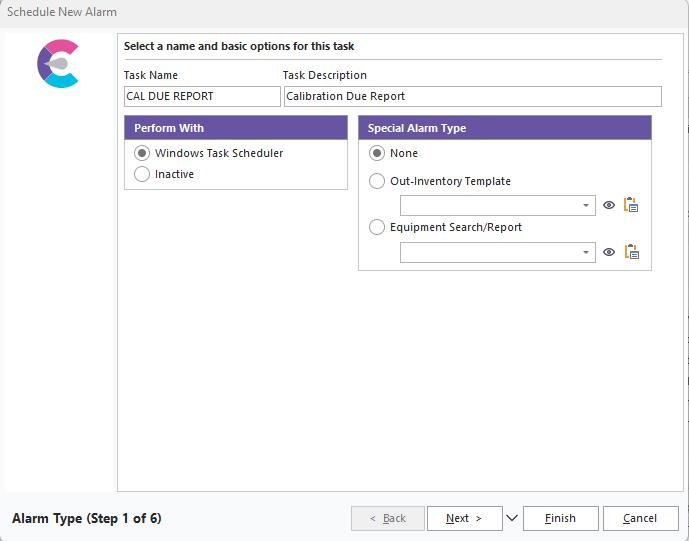
Alarm Type Step 1 - Task Name and Description
Perform With
·Windows Task Scheduler
With this setting selected, the Alarm will be automatically added to your Windows Task Scheduler system.
·Inactive
If this option is chosen, the alarm settings will be saved. Still, no Windows Task Schedule will be setup, and it will not automatically execute the Alarm until the alarm is no longer marked as Inactive.
Special Alarm Type
![]() Note: the option below only applies to the Tool Management version of IndySoft.
Note: the option below only applies to the Tool Management version of IndySoft.
Out-Inventory Template
When checked, you can select a template from PrintBuilder from the drop-down menu used for reporting on the equipment currently checked out. If checked, the number of steps in the Schedule New Alarm will change from 6 to just 4. Out Inventory Options are available in Step 3. |