Event Steps - Calibration Results
Calibration Result Methods in Events
The 'Calibration Results' event tab appears if the 'Test Point Measurements' event tab has been selected for the current event type through the Work Flow Configuration Wizard - Event Steps.
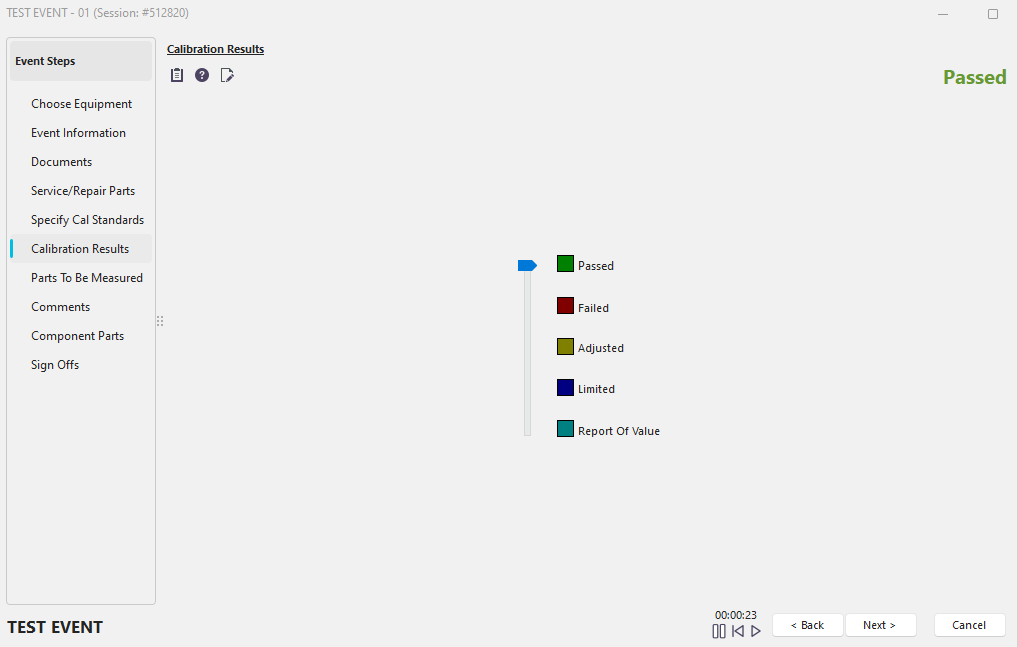
Event Steps - Calibration Results (no Test Points)
Typically this event step will only be used during a calibration event. This event step can have two 'looks' based on whether the calibrated gage has test points. If the gage has test points, this event step will appear below. If no test points exist, this event tab will display as above.
If the event tab is displayed like the above, you may select the appropriate event result by moving the slider control among the five available options. Five options are available:
Passed
The gage passed the calibration event.
Failed
The gage failed the calibration event.
Adjusted
The gage failed the calibration but was adjusted back into acceptable tolerance.
Limited
The gage failed but should be marked as only 'Limited In Use.' The specific nature of the gage's limitation can be defined in Calibration Closing Options.
Report of Value
The gage should not be marked as 'Passed' or 'Failed.' Instead, the gage was measured to report a value.
Several buttons are also available on the test points event screen:
Launch Procedure
![]() This button will launch the calibration procedure for the selected equipment, assuming a calibration procedure has been specified from the IndySoft Equipment View Tab, 'Calibration Info.' section.
This button will launch the calibration procedure for the selected equipment, assuming a calibration procedure has been specified from the IndySoft Equipment View Tab, 'Calibration Info.' section.
Help
![]() This button will launch the IndySoft help system.
This button will launch the IndySoft help system.
Show Test Points
![]() This button can change the display to one similar to the one shown below, where you can manually add test points during the event.
This button can change the display to one similar to the one shown below, where you can manually add test points during the event.
If the selected equipment contains test points, the event tab will contain the 'Calibration Results' grid, as shown below:
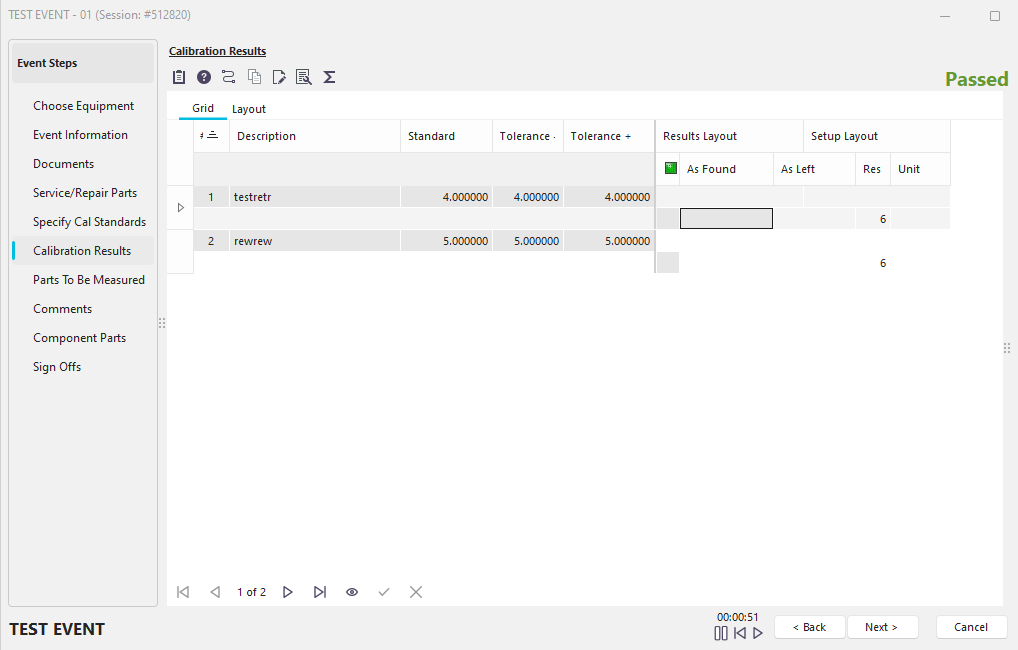
Event Steps - Calibration Results (With Test Points)
Enter the As Found reading for the current test point when inputting the calibration results. As you exit this test point, you will see the 'Verdict' field (the small green indicator) display whether the test point Passed or Failed (the 'Verdict' field will be blank if the test point passed). If the gage has failed and is also adjustable, then the gage can be adjusted at this point. If this occurs, an additional Final reading will need to be taken. Note: Often, if no adjustments are made to the gage, filling in the Final field is unnecessary. If you adjust one or more test points, however, then ALL of the test points should be measured again with a Final reading. If the result of the Final reading is acceptable, then the test point will be marked as (A) - Adjusted. Otherwise, it will be marked as (F) - Failed.
For general help using the Calibration Results grid, see the Grid Features section. The appearance of the Calibration Results grid will follow the selected Calibration Results Grid on the 'Test Points' tab of the Equipment View main screen. However, the grid appearance (including the number, size, and ordering of fields) can be overwritten once an event is launched. All fields located in the grid's left-hand fixed band are locked and marked read-only unless the 'Edit Grid' button is pressed. All information in the Calibration Results grid (except the 'As Found', 'As Left,' 'As Found (Text),' 'As Left (Text),' 'Failed,' 'Adjusted,' 'R.O.V.,' and 'Limited In Use' fields) defaults from the Default Test Points grid data on the Test Points tab in the Equipment View main screen. This information can be overwritten during the actual event if desired.
For a detailed explanation of all the fields in the grid, see Equipment Detail Tabs/Dialogs...Test Points...Test Points - Overview topic.
The following topics are also vital to understanding the Test Points Grid:
·Default Tolerances
·Excel, Word and VisualCal Integration
·Tolerance Calculator
·Copy/Paste Test Point Duplicator
·Formulas
·Test Point Wizards
·Trend Chart
·Automatic Field Calculations
Several buttons are also available on the test points event screen:
Launch Procedure
![]() This button will launch the calibration procedure for the selected equipment, assuming a calibration procedure has been specified from the IndySoft Equipment View Tab, 'Calibration Info.' section.
This button will launch the calibration procedure for the selected equipment, assuming a calibration procedure has been specified from the IndySoft Equipment View Tab, 'Calibration Info.' section.
Help
![]() This button will launch the IndySoft help system.
This button will launch the IndySoft help system.
RS-232
![]() This button will launch the RS-232 module, allowing you to use external hardware to input readings into the Test Points grid. See the RS-232 Module section for more details.
This button will launch the RS-232 module, allowing you to use external hardware to input readings into the Test Points grid. See the RS-232 Module section for more details.
Edit All Test Point Information
![]() This button can be used to modify the grayed-out fields in the left-hand fixed band of the grid. When this button is pressed, the gray fields will be enabled for editing. Also, you will have more options for inserting and deleting rows.
This button can be used to modify the grayed-out fields in the left-hand fixed band of the grid. When this button is pressed, the gray fields will be enabled for editing. Also, you will have more options for inserting and deleting rows.
Average Numbers
![]() This button will pop up a small dialog where you can quickly average up to 5 numbers. When you press 'OK,' IndySoft will average all the numbers input and insert the answer at the current cursor position.
This button will pop up a small dialog where you can quickly average up to 5 numbers. When you press 'OK,' IndySoft will average all the numbers input and insert the answer at the current cursor position.
Customize Grid Fields
![]() This button will pop up the Customize dialog for adding/removing grid fields. For more details, see the Grid Features section.
This button will pop up the Customize dialog for adding/removing grid fields. For more details, see the Grid Features section.
Finally, there are several options available when you right-mouse click within the test point grid:
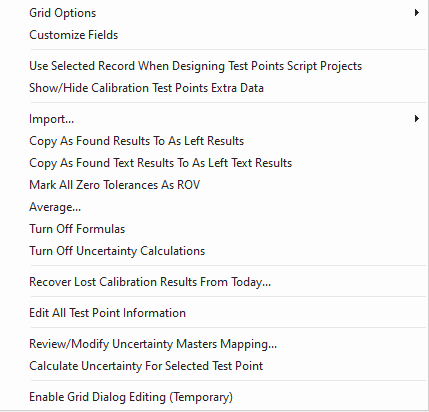
Test Point Grid - Right Mouse Click Options
Grid Options
See the Grid Features section for more details.
Customize Fields
See the Grid Features section for more details.
Import Menu Item
Allows you to import test point results from a flat file or clipboard.
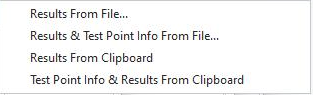
Import Menu Options
Import, Results From File
Allows you to import test point results from a flat file, possibly created from external hardware. Imports 1 column of data into the As Found column. 2 columns will import into both As Found and As Left columns.
Import, Results & Test Point Info From File
Allows you to import test point info and results from a flat file, possibly created from external hardware. Imports 1 or more columns of data, separated by tab characters. You have the option of your choice of columns to import, read from left to right.
The following tabbed columns are imported in this order:
·Description
·Standard
·Tolerance Minus
·Tolerance Plus
·As Found Result
·As Left Result
·Unit of Measure
·Numeric Resolution
·Group
·Attribute 1
·Attribute 2
·Custom 1
·Custom 2
·Uncertainty
So, if you want to import the first five columns, simply import a file with five tab-separated columns. The other columns will default to empty.
Import, Results From Clipboard
Allows you to import test point results from the Windows clipboard, utilizing a tabbed column format. (Excel is a standard tool for performing this cut/paste) Imports 1 column of data into the As Found column. 2 columns will import into both As Found and As Left columns.
Import, Test Point Info. & Results From Clipboard
Allows you to import test point info and results from the Windows clipboard, utilizing a tabbed column format. (Excel is a standard tool for performing this cut/paste) Imports 1 or more columns of data, separated by tab characters. You have the option of your choice of columns to import, read from left to right. The tabbed columns are imported as noted above.
Copy As Found Results to As Left Results
Upon confirmation, copies all the values in the 'As Found' column into the 'As Left' column.
Copy As Found Results to As Left Text Results
Upon confirmation, copies all the text values in the 'As Found' column into the 'As Left' column.
Mark All Zero Tolerances As ROV
If both the 'Tolerance -' and 'Tolerance +' fields are zero (0.0), then this option will mark these test points as 'Report of Value.'
Average
Performs the same function as the 'Average Numbers' button, as described above.
Turn Off Formulas
Disables any calculations relating to formula fields.
Turn Off Uncertainty Calculations
Disables any calculations relating to uncertainty.
Edit All Test Point Information
When this menu item is checked, the gray fields will be enabled for editing.
Review/Modify Uncertainty Masters Mapping...
See Uncertainty Masters Mapping for more info.
Calculate Uncertainty For Selected Test Point
Enables uncertainty calculation on the selected test point.
![]() *Version 13.0.12 ||*New Global Variable CAL_FIELDS_POST_ON_CHANGE to enable that custom calculations will be applied on each column change rather than each row change in the Cal Results TP grid
*Version 13.0.12 ||*New Global Variable CAL_FIELDS_POST_ON_CHANGE to enable that custom calculations will be applied on each column change rather than each row change in the Cal Results TP grid
Event Steps - Calibration Results
ØRS-232 Module
ØUncertainty Masters Mapping