Find Serv./Repair Parts
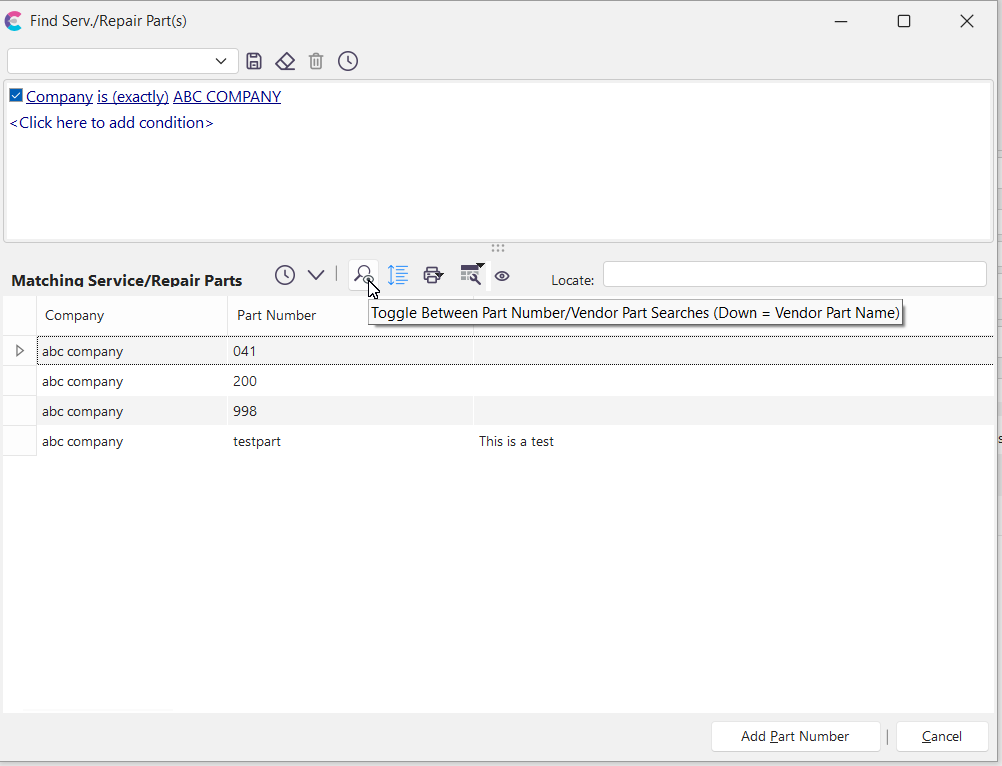
Service/Repair Parts are selected in several places in IndySoft - notably from the Repair Parts dialog/tab and the Event Tabs - Choose Service/Repair Parts and Charges step within events. An example of the dialog is shown below. You can also toggle using the highlighted icon based on the vendor part name or the actual part name in-house.
Find Serv./Repair Parts
The dialog is in 2 main sections - similar to the structure of a Custom Search By: 1) Service/Repair Parts Filter (see the section below), and 2) Matching Service/Repair Parts (see the section below)
Service/Repair Parts Filter
Find Service/Repair Parts - Service/Repair Parts Filter
You are familiar with the filterbox interface, commonly used in EquipmentFinder, EventFinder, Custom Search By's, etc. This filterbox is much the same, but instead of searching on equipment or events fields, you are searching on repair parts fields - fields from the Add/Edit...Parts...Service/Repair Parts wizard (Step 1 of the wizard). The default filter is often 'Company is (exactly) [current company].' Once you have selected the appropriate filter, use the 'Test' and 'Select' buttons in the middle header bar to find matching repair parts.
Matching Service/Repair Parts

Matching Service/Repair Parts
Use the header bar in the middle of the screen to test and select service/repair parts displayed in the bottom grid. Several button options are available:
![]()
![]() Test Service/Repair Part Selection
Test Service/Repair Part Selection
Use this option to test how many service/repair parts will be selected when the filterbox above is executed - a count is returned in a confirmation dialog.
![]() Select Matching Service/Repair Parts
Select Matching Service/Repair Parts
Use this option to select all matching service/repair parts based upon the above filter - results will be added to the grid below. Note: the number of records returned will be constrained by the 'Maximum Number of Records to Retrieve' setting in User/Location Settings - General.
![]() Toggle Between Part Number / Vendor Part Searches
Toggle Between Part Number / Vendor Part Searches
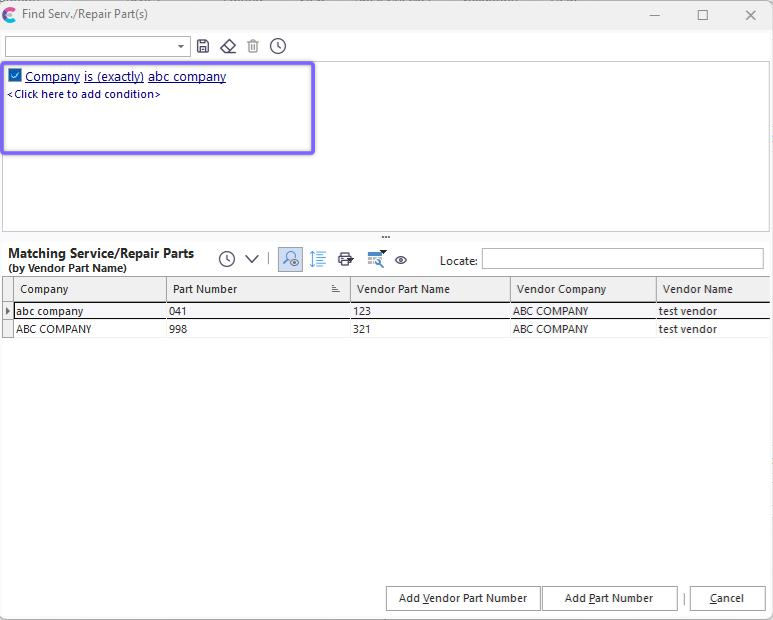
This dialog allows for two different types of searches. The Add/Edit...Parts...Service/Repair Parts allows for the input of service/repair parts that are unique according to their 'Part Number' - which is the top-left field in Step 1 of the Add/Edit...Parts...Service/Repair Parts wizard. However, in Step 3 of the same wizard, you can input multiple 'Vendor Part' references for the same service/repair part. These 'Vendor Part' entries allow you to note the vendor's part code, which likely differs from your internal Part Number. When searching for Service/Repair Parts, sometimes users are more comfortable searching for parts using the Vendor Part codes rather than the internal Part #'s, or vice versa. When this button is toggled 'down,' the searching is in terms of 'Vendor Part' (Step 3 from the wizard). When the button is toggled 'up,' the searching is in terms of 'Part Number,' the default. Note that when the search is in terms of 'Vendor Part, ' this will be noted in the caption in the header bar. Also, in this mode, the 'Vendor Part Name,' 'Vendor Company,' and 'Vendor Name' fields will be added to the results grid for reference.
Note: when the searching is in terms of 'Vendor Part, ' you will see two buttons on the bottom of the screen that can be used to select the current record (labeled 1 and 2 in the screenshot below):
![]()
When 'Add Vendor Part Number' is pressed, the selected service/repair part is returned, and the 'Vendor Part Number' text is used. When the 'Add Part Number' button is pressed, the selected service/repair part is returned, and the 'Part Number' text is used.
![]() Toggle Between Sort By Part Number / Sort By Vendor Part Name
Toggle Between Sort By Part Number / Sort By Vendor Part Name
As a companion option to the one above, when the search is in terms of 'Vendor Part, ' it is often helpful to have the grid default to sorting by 'Vendor Part Name' rather than 'Part Number.' Use this toggle to switch between the two sort by options. This option would only be relevant if the search is in terms of 'Vendor Part.'
![]() Print Service/Repair Part List
Print Service/Repair Part List
Use this option to print the grid contents. See Print Grid (Preview) for more details.
![]() Grid Options
Grid Options
This button will display a submenu with many familiar grid options. These same options are available through a right-mouse click in the grid:
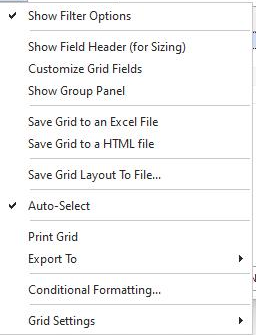
·Allow Sorting/Grouping/Filtering - this option must be enabled to use the filtering and grouping options below. This option ensures that all grid contents are loaded into memory, even if the records are not currently visible onscreen.
·Show Filter Options - Use this option to enable per-column filtering. When this mode is enabled, you will see small filter buttons to the right of each column in the grid header: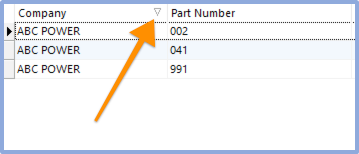
·Show Filter Header (for Sizing) - This option shows the band header for the grid fields. This header band is often easier to resize larger/smaller to allow for additional column space.
·Customize Grid Fields - See Customize Fields
·Show Group Panel (Requires Sorting/Grouping/Filtering) - See Show Group Panel
·Save Grid to an Excel File - See Save Grid To An Excel File
·Save Grid to a HTML File
·Save Grid Layout To File - Use this option to save the grid layout to a temporary file. If this file is copied to another IndySoft workstation, the settings will be used to format that workstation's grid when the 'Find Serv./Repair Parts' dialog is used. The file must be deleted when the settings are no longer required.
·Auto-Select - if this option is enabled, then the 'Select Matching Service/Repair Parts' button will be automatically pressed upon entry into the dialog. If this option is disabled, the grid loads empty, and the user must confirm the filter before executing the first search. The default mode is checked.
![]()
Use this 'Locate' edit box to quickly add an additional filter for the grid contents based upon either 'Part Number' or 'Vendor Part Name,' as applicable. The extra filter created will be a 'like' search where the 'Part Number' or 'Vendor Part Name' value must match the initial characters input here. Clear this edit box if you want to modify the filterbox and begin a different type of search. |