Workflow Configuration - Report Rules
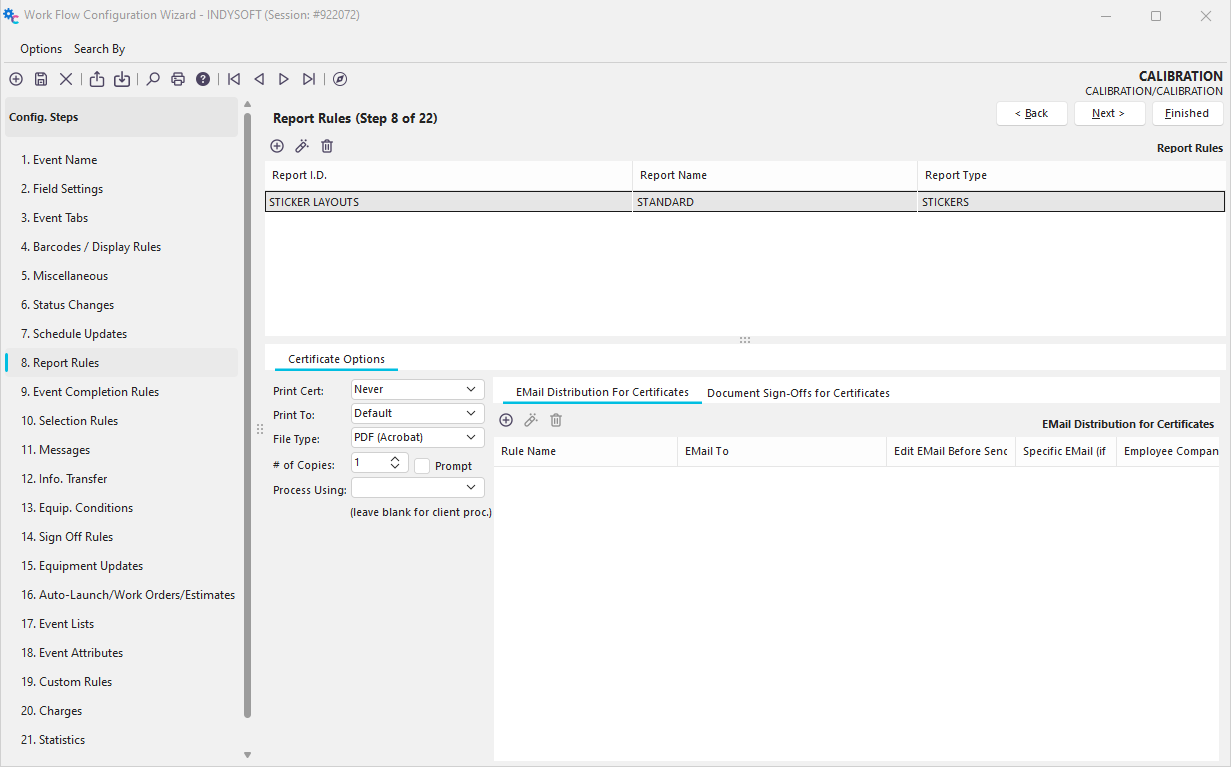
Configuration Wizard - Report Rules (Step 8 of 22)
The Report Rules tab allows for reports to be printed for specific types of equipment after completing the event.
Configuration Wizard - Step 8 of 22 - Report Rules
![]() To add a report rule, click the 'Add Equipment Report Rule' button, as displayed below. The following dialog will then be displayed:
To add a report rule, click the 'Add Equipment Report Rule' button, as displayed below. The following dialog will then be displayed:
 ../Storage/indysoft-help-publication/hm_clip3261.png
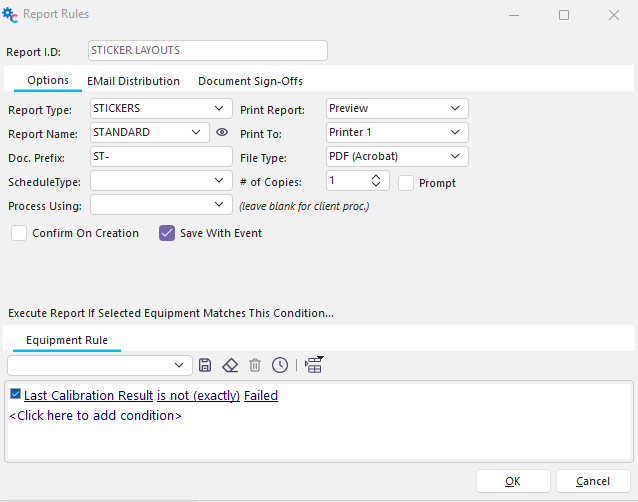
Report Rules Dialog - Options Tab
This dialog describes what should be printed in the report and how it should be displayed.
Options
Report ID.
The Report ID is an identifier for this Report Rule.
Report Type
The Report Type indicates the type of report that you wish to use. IndySoft supports seven different Report Types. They are:
MULTI-EQUIP CERTIFICATES
This report type allows you to combine multiple calibration certificates into one.
NON-CONFORMANCE
Non-conformance reports are very similar to the format of a certificate of calibration. They are often set up to send out automatically whenever a calibration or repair has 'Failed.'
PACKING SLIPS
Packing Slips contain event information and linked company, vendor, and employee information. Detail lists are also available for equipment info. (with linked scheduling info. for a pre-selected schedule type)
RECEIPTS
Receipts can be used to print out or email lists of equipment involved in an event. For example, if you would like to print out a list of all equipment that a user had checked in, you would use this report type.
STICKERS
Stickers are used to printout status stickers for different types of events.
WORKSHEETS
Worksheets are used to print out 'fill-in-the-blank' reports used for calibrations.
EMAIL-ONLY
This report type does not create a report - it ONLY sends an email, as set up from the 'EMail Distribution' tab.
Report NameThe Report Name is the description of the report that you would like to use. You must select an existing one from the list. Press the ![]() button to add or edit existing reports (see Using PrintBuilder for more details).
button to add or edit existing reports (see Using PrintBuilder for more details).
- Prompt for Report will simply allow the user to select from the valid list of related PrintBuilder reports for that Report Type. This option will pop up after the event is completed.
- Related Sticker Template will, as the name implies, only show up when the "Sticker" report type is selected. When using this, then whichever sticker is stored at the equipment level 'Sticker Template" field at the completion of the event, will be the sticker which is printed. (User defined drop down lists can reference "Active" sticker templates to assist in this endeavor within your event.)
Doc. Prefix
The Doc prefix is used to store the report with the event. If so, the document will be labeled with the specified prefix plus a randomly generated number.
Schedule Type
Reports can display equipment schedules for only 1 schedule type at a time. Choose the appropriate schedule type from BIAS, CALIBRATION, LINEARITY, RR, and SERVICE, which will be displayed in the report.
Print Report
This option determines if your report will be sent to a printer, previewed to a screen, or neither.
Never
This option will never send the report to your printer. Usually, this option is combined with checking the 'Save With Event' option below. That way, a document is created that can be printed later.
Always
This option will always send the report to the device specified in the 'Print To' option below.
Upon Confirmation
This option will send the report to a printer only after first prompting the user. If the user says it's ok to print the report, it will be sent to the device specified in the 'Print To' option.
Preview
This option will preview the report to the screen. You will then have the option of printing the report from the report preview screen. The report will be previewed in Adobe Acrobat.
Print To
The Print To option specifies which device to use if printing a report. By choosing 'Default,' the report will always be printed to your default printer. If you choose Printer1-5, the report will be printed to the device that your Printer1-5 printer types are pointed to in the User/Location Settings setup. See User/Location Settings - Printer Routings for more information on setting up a printer on a workstation.
File Type
Reports can be created in 7 different types: PDF (Acrobat), RTF (Rich Text), JPG (JPEG), XLS (Excel), XLSX (Excel), XLS-Data (Excel), XLSX-Data (Excel). IndySoft defaults to PDF since PDF files are generally smaller, taking less database space to store.
# of Copies / Prompt
Specify the number of copies if this report is being sent to a printer. Or, you can check 'Prompt,' and you will receive a popup dialog before the report is finally sent to the printer, allowing you to input the # of copies.
Process Using
IndySoft can send this print job to a specific user name rather than defaulting to the user name currently logged into the client performing the event. Event reports are created in IndySoft by an external application in the user's system tray. This system tray application is always 'listening' for new print jobs and makes them when appropriate, storing them in the database and/or sending reports to printer, screen, or email, according to the settings in the Event Configuration Module. Since some users' workstations are faster than others, sending all print jobs to a user name that will be logged into an alternate workstation is sometimes preferable. If this drop-down is left blank, the client computer that created the event will process the print job.
Confirm On Creation
This option will pop up a confirmation message (yes/no) before creating the report job.
Save With Event
This option allows the report to be saved with the event, allowing for future viewing by selecting the appropriate equipment and event from the IndySoft main screen's History tab and finding the appropriate report icon.
Execute Report If Selected Equipment Matches This Condition...
If you wish only to print a report for certain types of equipment, use the Equipment Rule to filter certain conditions:

Report Rules - Equipment Rule
Editing Report Rules
![]() To edit a report rule, click the 'View Report Rule' button.
To edit a report rule, click the 'View Report Rule' button.
Deleting Report Rules
![]() To delete a report rule, click the 'Delete Report Rule' button.
To delete a report rule, click the 'Delete Report Rule' button.
Calibration Certificate Options
In addition to the standard Report Rules, every event can print a special type of report called a certificate of calibration. These certificates are treated differently from other reports. Here's how:

Report Rules - Certificate Options
- Every certificate of calibration is always stored with an event
2) If an event containing a calibration certificate is ever made 'incomplete' and is modified, the most recent certificate is archived, and a new certificate is generated when the event is 're-completed.'
3) A Vendor and Certificate Number combination uniquely identifies each certificate of calibration.
4) Certificates of Calibration are exported between the lab and the customer when calibration data is exchanged.
5) For an event to be 'qualified' to create and maintain calibration certificates, there are several features that must be turned on:
Field Settings
You must have Cert Type, Cert Number, Vendor, and Event Result marked as visible.
Event Tabs
At least Event Information and Test Point Measurements should be checked.
Miscellaneous
Check the Show Calibration Type Results option
Print Cert
This option determines if your certificate of calibration will be sent to a printer, previewed to the screen, or neither.
Never
This option will never send the certificate to your printer.
Always
This option will always send the certificate to the device specified in the 'Print To' option below.
Upon Confirmation
This option will send the certificate to a printer only after first prompting the user. If the user says it's ok to print the certificate, it will be sent to the device specified in the 'Print To' option.
Preview
This option will preview the certificate on the screen. You will then have the option of printing the certificate from the preview screen. The certificate will be previewed in Adobe Acrobat.
Print To
The Print To option specifies which device to use if printing a certificate. By choosing 'Default,' the certificate will always be printed to your default printer. If you choose Printer1-5, the certificate will be printed to the device that your Printer1-5 printer types are pointed to in User/Location Settings. See User/Location Settings - Printer Routings for more information on setting up a printer on a workstation.
File Type
Reports can be created in 7 different types: PDF (Acrobat), RTF (Rich Text), JPG (JPEG), XLS (Excel), XLSX (Excel), XLS-Data (Excel), XLSX-Data (Excel). IndySoft defaults to PDF since PDF files are generally smaller, taking less database space to store.
# of Copies / Prompt
Specify the number of copies of this cert being sent to a printer. Or, you can check 'Prompt,' and you will receive a popup dialog before the cert is finally sent to the printer, allowing you to input the # of copies.
Process Using
IndySoft can send this print job to a specific username rather than defaulting to the username of the user currently logged into the client performing the event. Event reports are created in IndySoft by an external application in the user's system tray. This system tray application is always 'listening' for new print jobs and creates them when appropriate, storing them in the database and/or sending reports to printer, screen, or email, according to the settings in the Event Configuration Module. Since some users' workstations are faster than others, sending all print jobs to a user name that will be logged into an alternate workstation is sometimes preferable. If this drop-down is left blank, the client computer that created the event will process the print job.
Email Distribution for Certificate
When a certificate is generated, you can email it to one or more recipients.
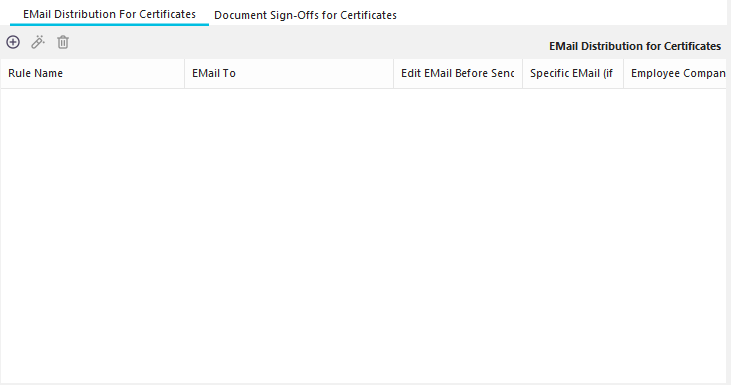
Report Rules - Email Distribution
To add a new email distribution rule, click the ![]()
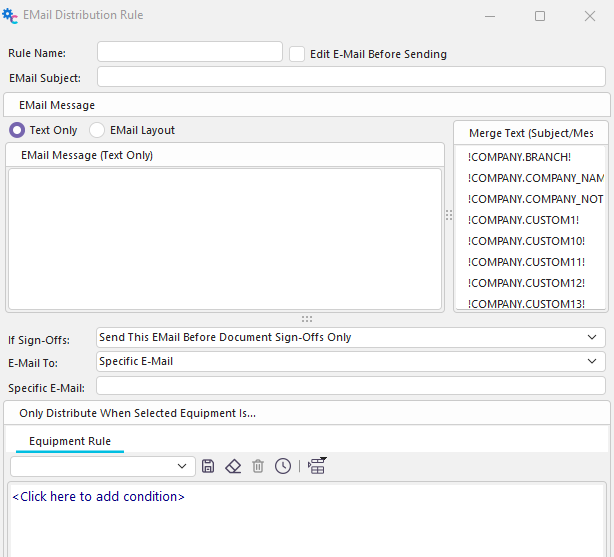
Add New Email Distribution Rule
Document Sign-Offs for Certificates & Reports
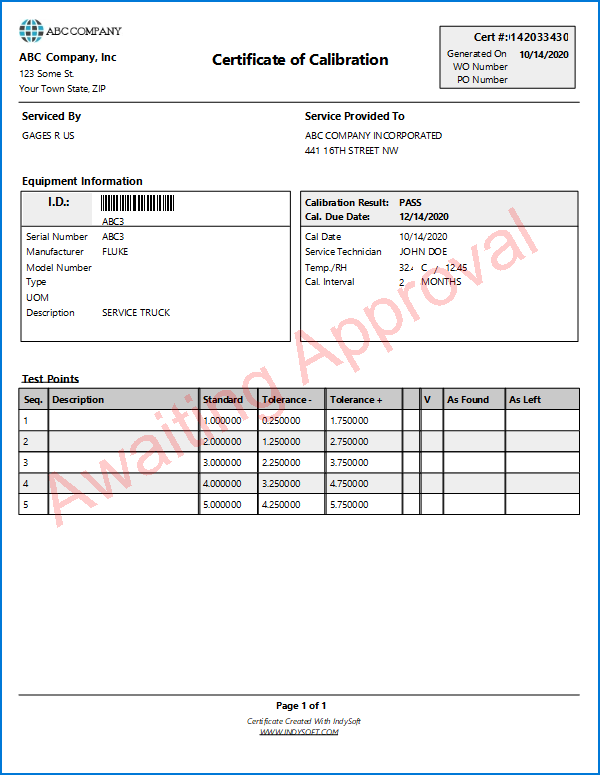
Document Sign-Off Rules allow you to require sign-offs from other IndySoft users to approve a previously created document. Documents that are awaiting sign-off contain a watermark noting 'Awaiting Approval,' like:
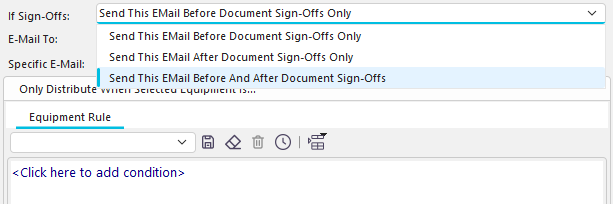
After all document sign-offs for a particular document are completed, the document can be emailed using EMail Distribution Rules. Note the 'If Sign Offs' option for each EMail Distribution Rule:
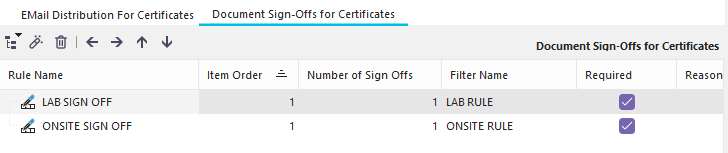
The 'Document Sign-Offs For Certificates' and 'Document Sign-Offs for Event Reports' interface is very similar to the Event Sign-Off Rules in Step 14:
As an event completes and the certificate is created, a snapshot is taken of all the database users who could fulfill the remaining sign-off requirements for this certificate. These users are populated on the main screen's Pending Work...Document Sign-Offs grid. Each time an event is finished as complete and documents are created, this listing is repopulated.
Sign-Off Rules - Structure
Two methods can be used for organizing Sign-off rules: 1) Tree level and 2) Item Order. These two organizational tools can also be used together. Both methods allow you to structure which sign-offs must be performed before others. When organizing rules as a tree, all parent sign-offs must be completed before child sign-offs in the tree. When organizing rules based on Item Order, all lower-ordered sign-offs must be performed before higher-order items. If multiple sign-off items exist at the same tree level (for instance, all root levels), then the Item Order will prioritize sign-offs. Multiple items may be performed in any order if they have the same tree level and Item order.
Take the following simple example:
Both sign-offs exist at the root level, but the 'USER LOGGED IN' has an Item Order of 1, and 'ADMIN SIGN OFF' has an Item Order of 2. So, the 'USER LOGGED IN' must occur before the 'ADMIN SIGN OFF.' The same functionality could be accomplished by organizing the same two items:

So, either method may be used to provide order - or they can be used in combination. Note that there are four arrow buttons available above the tree that can be used for quickly re-arranging the tree:![]()
Pressing the 'left' button will move the selected rule one indent position to the left, and the 'right' button will move it one indent position to the right. The 'up' button will lower the Item Order by one step, and the 'down' button will raise the Item Order by one step.
Certificate & Document Sign-Off Rules - New Rules
There are five different options when adding a new sign-off rule:
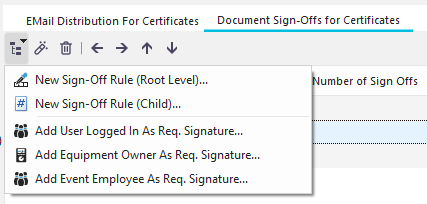
New Sign-Off Rule (Root Level)...
This option adds a new sign-off rule to the root level (left-most in the tree). Root level sign-offs must be performed before any child (or grandchild, etc.) nodes. If multiple sign-off rules exist at the root level, then the sign-off ordering will be according to the 'Item Order'. If multiple sign-offs at the root level (or any same level) have the same 'Item Order,' then they can be performed in any order.
New Sign-Off Rule (Child)...
This option adds a new sign-off rule as a child of the currently selected sign-off. Child rules must always be performed AFTER the parent.
Add User Logged In As Req. Signature...
This special option will require the user currently logged into IndySoft to perform a sign-off before the event is completed.
Add Equipment Owner As Req. Signature...
This special option will require the user associated with the equipment owner of the event asset to perform a sign-off before the event is completed. Note that this user might be different than the user currently logged into IndySoft (so this user might more conveniently perform the sign-off later from the 'Pending Work'...'Event Sign Offs' grid.)
Add Event Employee As Req. Signature...
This special option will require the user associated with the employee in the 'Performed By' field in the event to perform a sign-off before the event is completed. Note that this user might be different than the user currently logged into IndySoft (so this user might more conveniently perform the sign-off later from the 'Pending Work'...'Event Sign Offs' grid.)
Add/Edit Certificate & Document Sign-Off Rules
Document sign-off requirements are based upon a filter of users - this filter can be as generic or specific as needed.
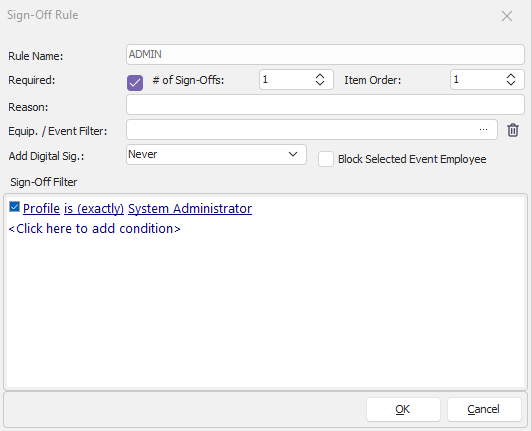
Rule Name - a unique name for this rule
Required - whether this rule is merely a suggestion or if it is necessary for the document.
# of Sign-Offs - the number of equal sign-offs (all following the filter box requirements input in this dialog) must be performed before the sign-off requirement is completed.
Item Order - the order of the rule relative to other rules on the same tree level
Reason - an optional descriptive reason of the rule. If this description is empty, the 'Rule Name' will be used when displayed on the final sign-off.
Equip. / Event Filter - an optional equipment/event filter can be associated with each rule. Press the ... button to add/modify these filters.
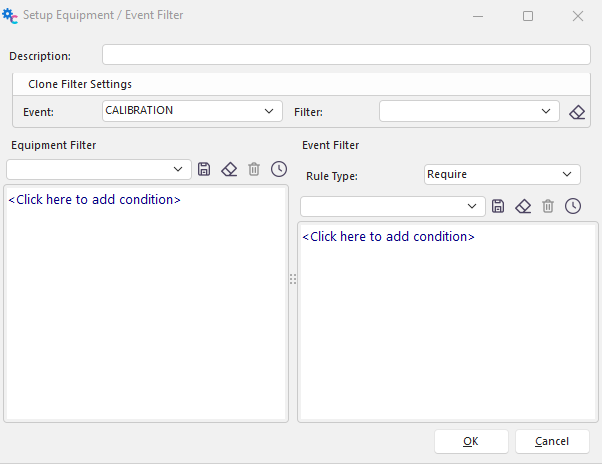
Use the above dialog to add an optional equipment and event filter. The equipment filter is input on the left, and the event filter is on the right. The event filter can either be a 'require' or 'forbid' type of rule. Note that previously created equipment/event filters can be selected from the 'Clone Filter Settings' group box. Once a previously created filter has been selected, press the ![]() button to clone the filter. This does NOT mean that the filter is held in common - instead that the filter is quickly cloned to this new name, saving you the time of assembling a similar rule.
button to clone the filter. This does NOT mean that the filter is held in common - instead that the filter is quickly cloned to this new name, saving you the time of assembling a similar rule.
Add Digital Sig. - use this option to add an optional digital signature to the pdf for this sign-off. This user must have a digital ID already attached from within Profile Manager on the Edit User dialog for this to be effective.
Block Selected Event Employee - if this option is chosen, then regardless of the sign-off filter, the login associated with the 'Performed By' employee in the event will be excluded from being able to perform this sign-off.
Sign-Off Filter - the filter for available users. Available filter fields include user-based fields and linked employee fields. (Each user login in IndySoft is mapped to one and only one employee record from Add/Edit...Employee...Employees. This association is made from Profile Manager - Adding/Removing Users. |