Scheduling
Scheduling Tab/Dialog
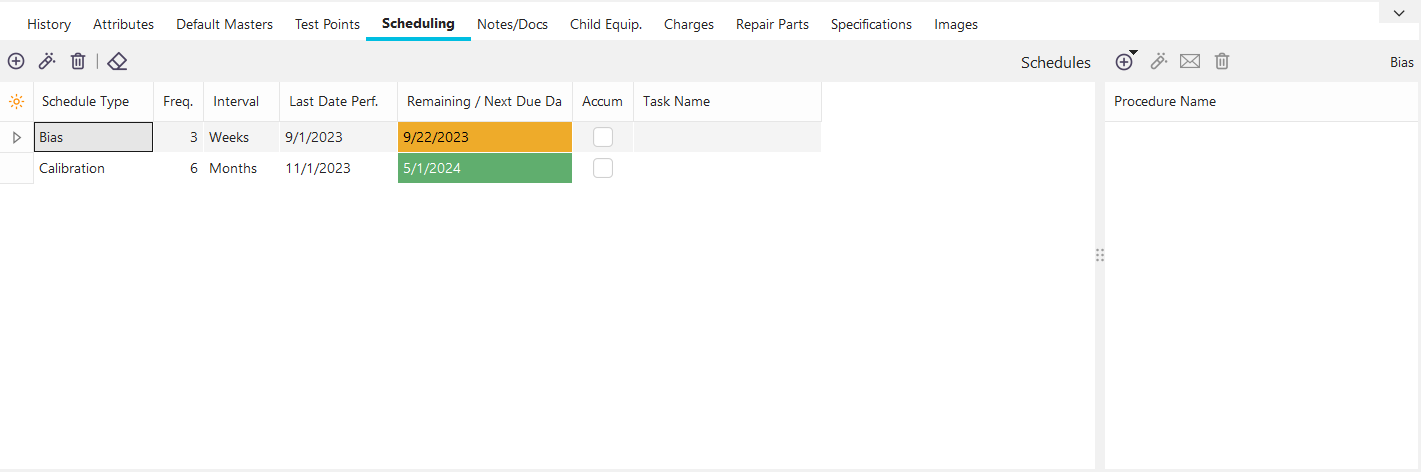
The Scheduling tab is used to store an unlimited amount of schedules for your equipment. These schedules are used throughout the software in reporting to determine when certain events should be performed on equipment. IndySoft ships with five standard schedule types: Calibration, Service, R+R, Bias, and Linearity, but many others may be added through Add/Edit...System-Wide...Charge Types.
Scheduling Grid Fields
Schedule Type
This is the type of schedule that is to be performed. Certain events will automatically move forward certain schedule types when they are completed. For example, if Calibration is the Schedule Type, and a calibration is performed, then the Due Date for the equipment will automatically be increased by one interval.
Freq./Interval
These fields specify the length of 1 scheduled interval. Both fields are generally necessary to display this information (except SBU and SAU - described below). Frequency describes the number of intervals for the schedule. Interval is the base unit of measure used when setting up the schedule.
SBU
Stands for 'Schedule Before Use' - After an event that is used to issue a piece of equipment is completed, the schedule will be marked as being due with the event date. For example, by default, IndySoft makes the Check-Out event have this behavior with Accumulate style schedules.
SAU
Stands for 'Schedule After Use' - After an event used to check-in a piece of equipment is completed, the schedule will be marked as due with the event date. For example, by default, IndySoft makes the Check-In event have this behavior with Accumulate style schedules.
Last Date Perf.
This field specifies the last date that the scheduled event occurred for the current equipment. This field is only updated by IndySoft after the completion of the related schedule event. This date can also be manually modified if you have the proper access rights in Profile Manager.
Next Due Date/Remaining
Suppose the schedule is not based on the accumulation of time. In that case, this date is typically calculated by IndySoft whenever the Frequency, Interval, or Last Date Performed changes, or an event, associated with the schedule type is performed. If the schedule is based on time accumulation, this field displays how much of the selected interval is left until the equipment is marked as due for the schedule type.
Accum.
This is checked if the update is based on an accumulation of time in use rather than a fixed period based on the passage of time.
Adding/Editing/Deleting Schedules
Use the buttons in the header bar above the Schedules grid to quickly add/edit/delete schedule types for the selected asset.
![]() Add a Schedule
Add a Schedule
Use this button to add a new schedule type for the selected asset. You will see the dialog below:
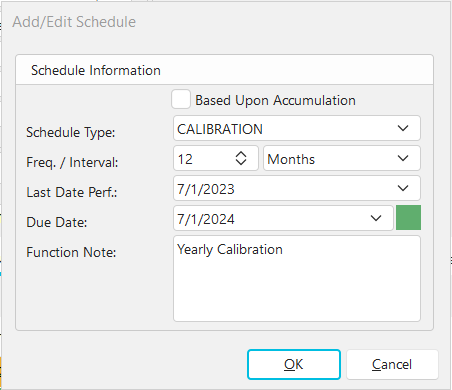
Schedule Information
Use the options in the dialog to select a new schedule type. Selecting the Freq., Interval, and 'Last Date Perf.' will automatically recalculate the Due Date. If security allows, you can directly modify the 'Due Date.' The 'Interval' options will vary depending upon the state of 'Based Upon Accum. of Time.' Press OK to save the schedule. Note: if you select a schedule type that already exists for this asset, then upon close of this dialog, you will be prompted if you want to overwrite the existing settings:
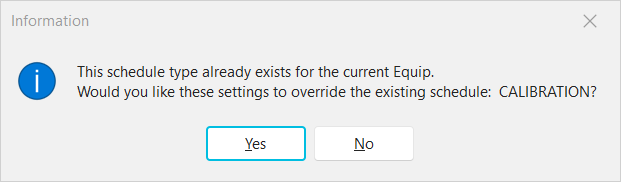
Note: if you do not have security rights to edit schedules, you will see a slightly different prompt - and schedule editing will be disallowed.
![]() View Selected Schedule
View Selected Schedule
Use this button to view/edit the selected schedule type in the grid. The same dialog shown above will be displayed, allowing edits to the previous schedule settings.
![]() Delete Selected Schedule
Delete Selected Schedule
Use this button to delete the selected schedule in the grid - appropriate security rights must be in place. All schedule procedures previously linked to this schedule type will also be deleted.
![]() Clear Accumulate Settings For Current Equipment
Clear Accumulate Settings For Current Equipment
When the selected schedule type is 'Based Upon Accum. of Time', this button can be used to clear all the fields 'behind the scenes' for this schedule type related to the amount of time accumulated in usage. For instance, say the schedule type is 'CALIBRATION' and based upon the accumulation of time, due every 100 hours of usage. A couple of check-out and check-in roundtrips are run, and you see 15 hours of accumulated usage (85 hours remaining). Then you realize that your technician did not type correctly, and they have been logging events for the wrong assets. After investigating, you confirm that this asset has not been touched. So, this button can be used to clear the accumulated usage and start over.
The following menu options are only applicable when Preventative Maintenance is used.
![]() Add a TaskSchedule
Add a TaskSchedule
Use this button to add a new task schedule for the selected asset. You will see the dialog below:
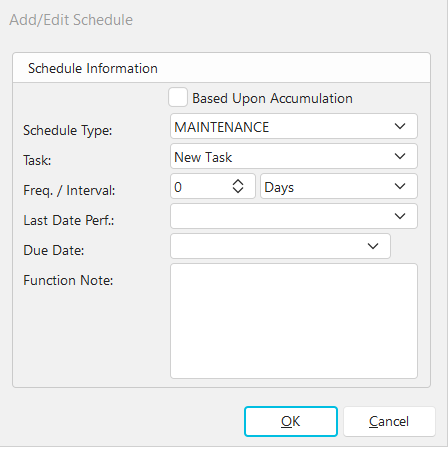
Add/Edit Task Schedule Dialog
![]() Edit Related Task
Edit Related Task
When highlighted on a task schedule, use this button to launch into Task Editor to edit the related task.
Add/Edit Task Schedule Dialog
Schedule Procedures
Each schedule type added to the grid can also have one or more associated procedures. These procedures will be made available to the user when events are performed if:
1. The event is set up with a 'Documents' event step (see Workflow Configuration - Event Tabs).
2. The event is set up to show 'Procedures' in 'Document Types Visible' in Event Configuration (see Workflow Configuration - Event Tabs).
3. The event is set up to update this schedule type upon completion, proving that the event type is related to this schedule type (see Workflow Configuration - Schedule Updates).
The procedures associated here come from the Add/Edit..Documentation...Procedures wizard. To add/edit schedule procedures for the selected schedule type, use the buttons above the schedule procedures grid:
![]() Add [Schedule] Procedure
Add [Schedule] Procedure
Two options are available for adding procedures:
Add Procedure
Use this option to select a procedure from the Advanced Procedure/Document Search dialog.
Add New Procedure From File
Use this option to select a procedure from a file quickly. This operation will accomplish two things at once. 1) the file will create a new IndySoft procedure in the Add/Edit...Documentation...Procedures wizard. The current company will be used as the owner of the procedure. The file name will be used for the procedure name (minus the file extension and possibly truncated to make an acceptable procedure name). 2) This new procedure will be associated with the schedule type, like the 'Add Procedure' option above.
![]() View [Schedule] Procedure
View [Schedule] Procedure
Use this option to view the selected procedure. This will retrieve the document from the database, and Windows will be prompted to display it through the default file association for its extension.
![]() EMail [Schedule] Procedure
EMail [Schedule] Procedure
Use this option to quickly send an email with the selected schedule procedure as an attachment. The Choose Employees/Groups/Vendors/Companies to EMail dialog will be displayed to populate the email distribution.
![]() Delete [Schedule] Procedure
Delete [Schedule] Procedure
Use this button to delete the selected schedule procedure. Note that this deletion removed the association of this procedure with the schedule type - it does not permanently remove the procedure from the Add/Edit..Documentation...Procedures listing.
Equipment Tabs - Scheduling